1. ຕັ້ງຄ່າ Nameserver ໃຫ້ກັບໂດເມນ
* ຫາກຍັງບໍ່ຮູ້ nameserver ສາມາດເລື່ອນລົງໄປເບິ່ງທີ່ຫົວຂໍ້ທີ 2 ກ່ອນກໍໄດ້
1.1 Login ເຂົ້າສູ່ລະບົບ Huk-com ໄດ້ ທີ່ນີ້

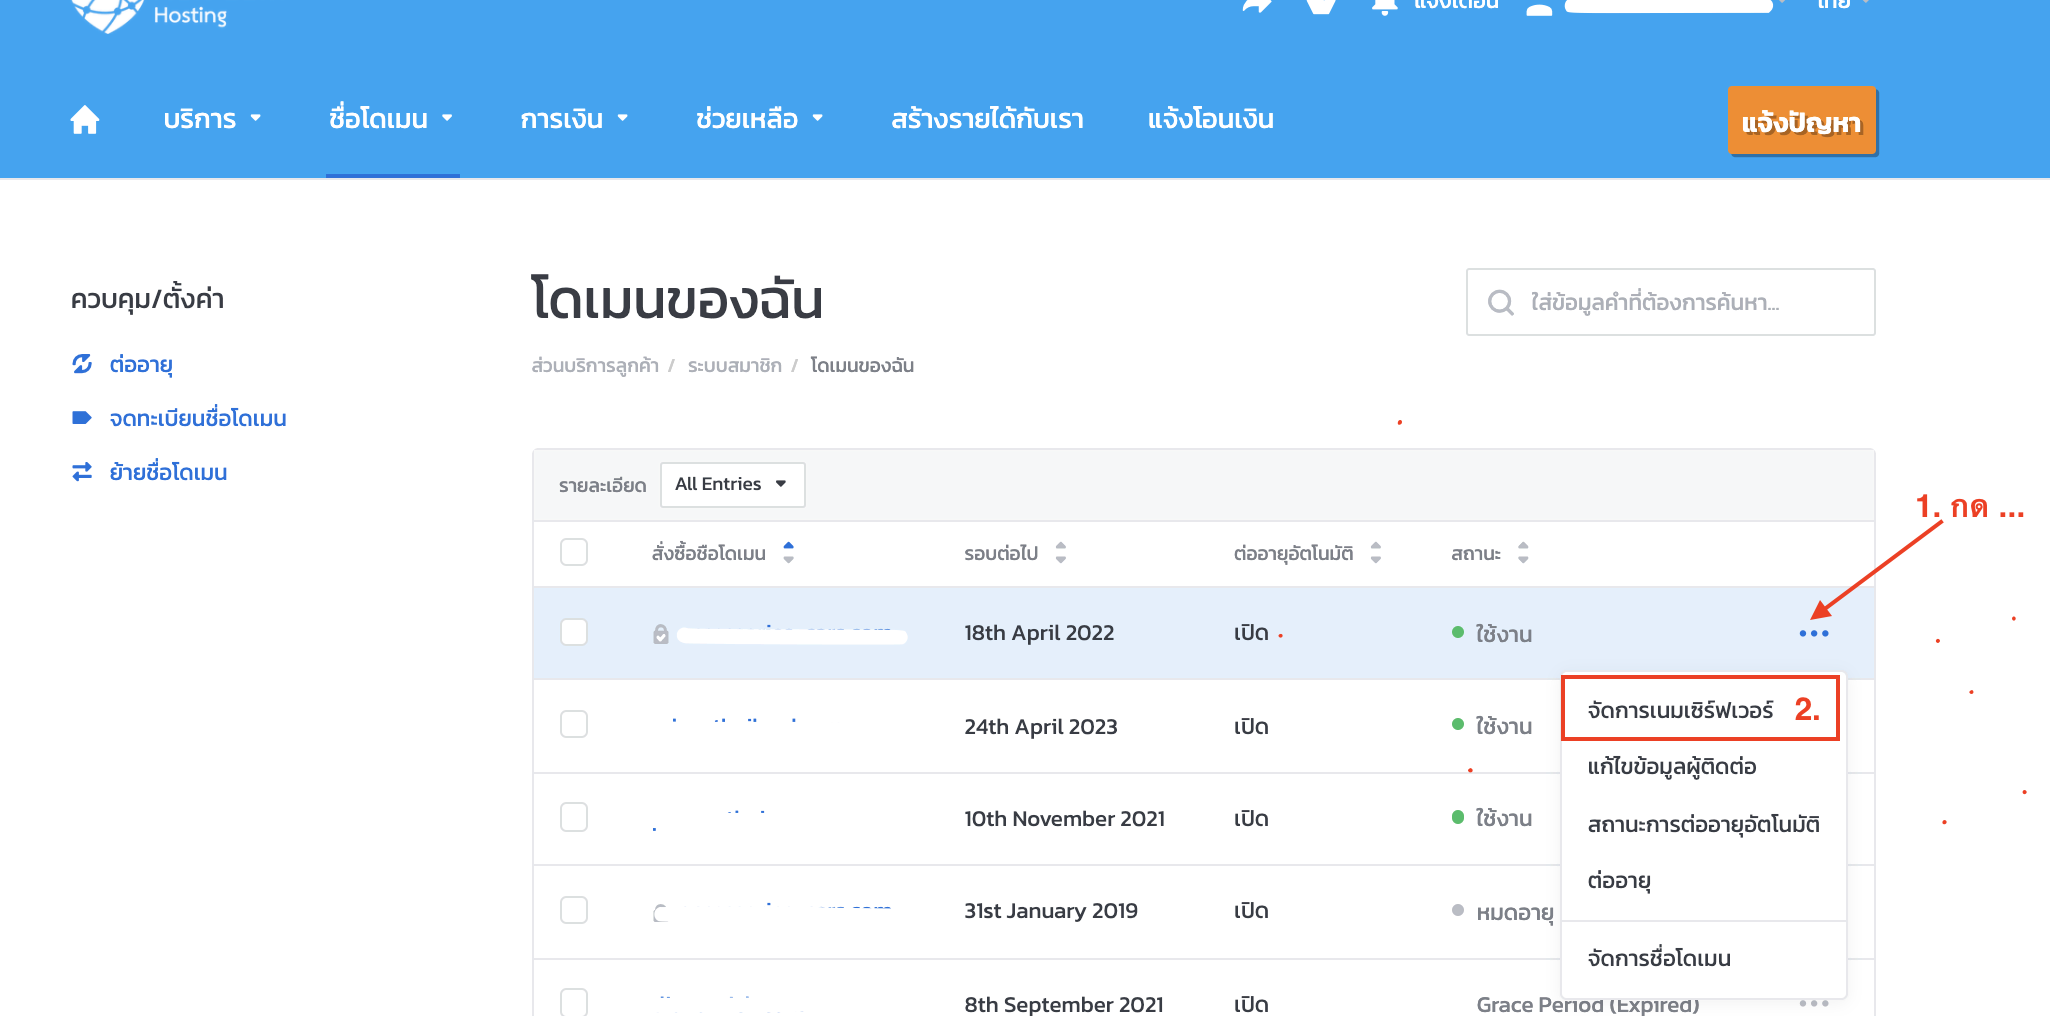
1.2. ເລືອກເມນູ ໂດເມນເນມ -> ໂດເມນເນມຂອງຂ້ອຍ

1.3. ເລືອກ Domain ທີ່ທ່ານຕ້ອງການປ່ຽນ Nameserver ແລະ ກົດ … ດ້ານຫຼັງ

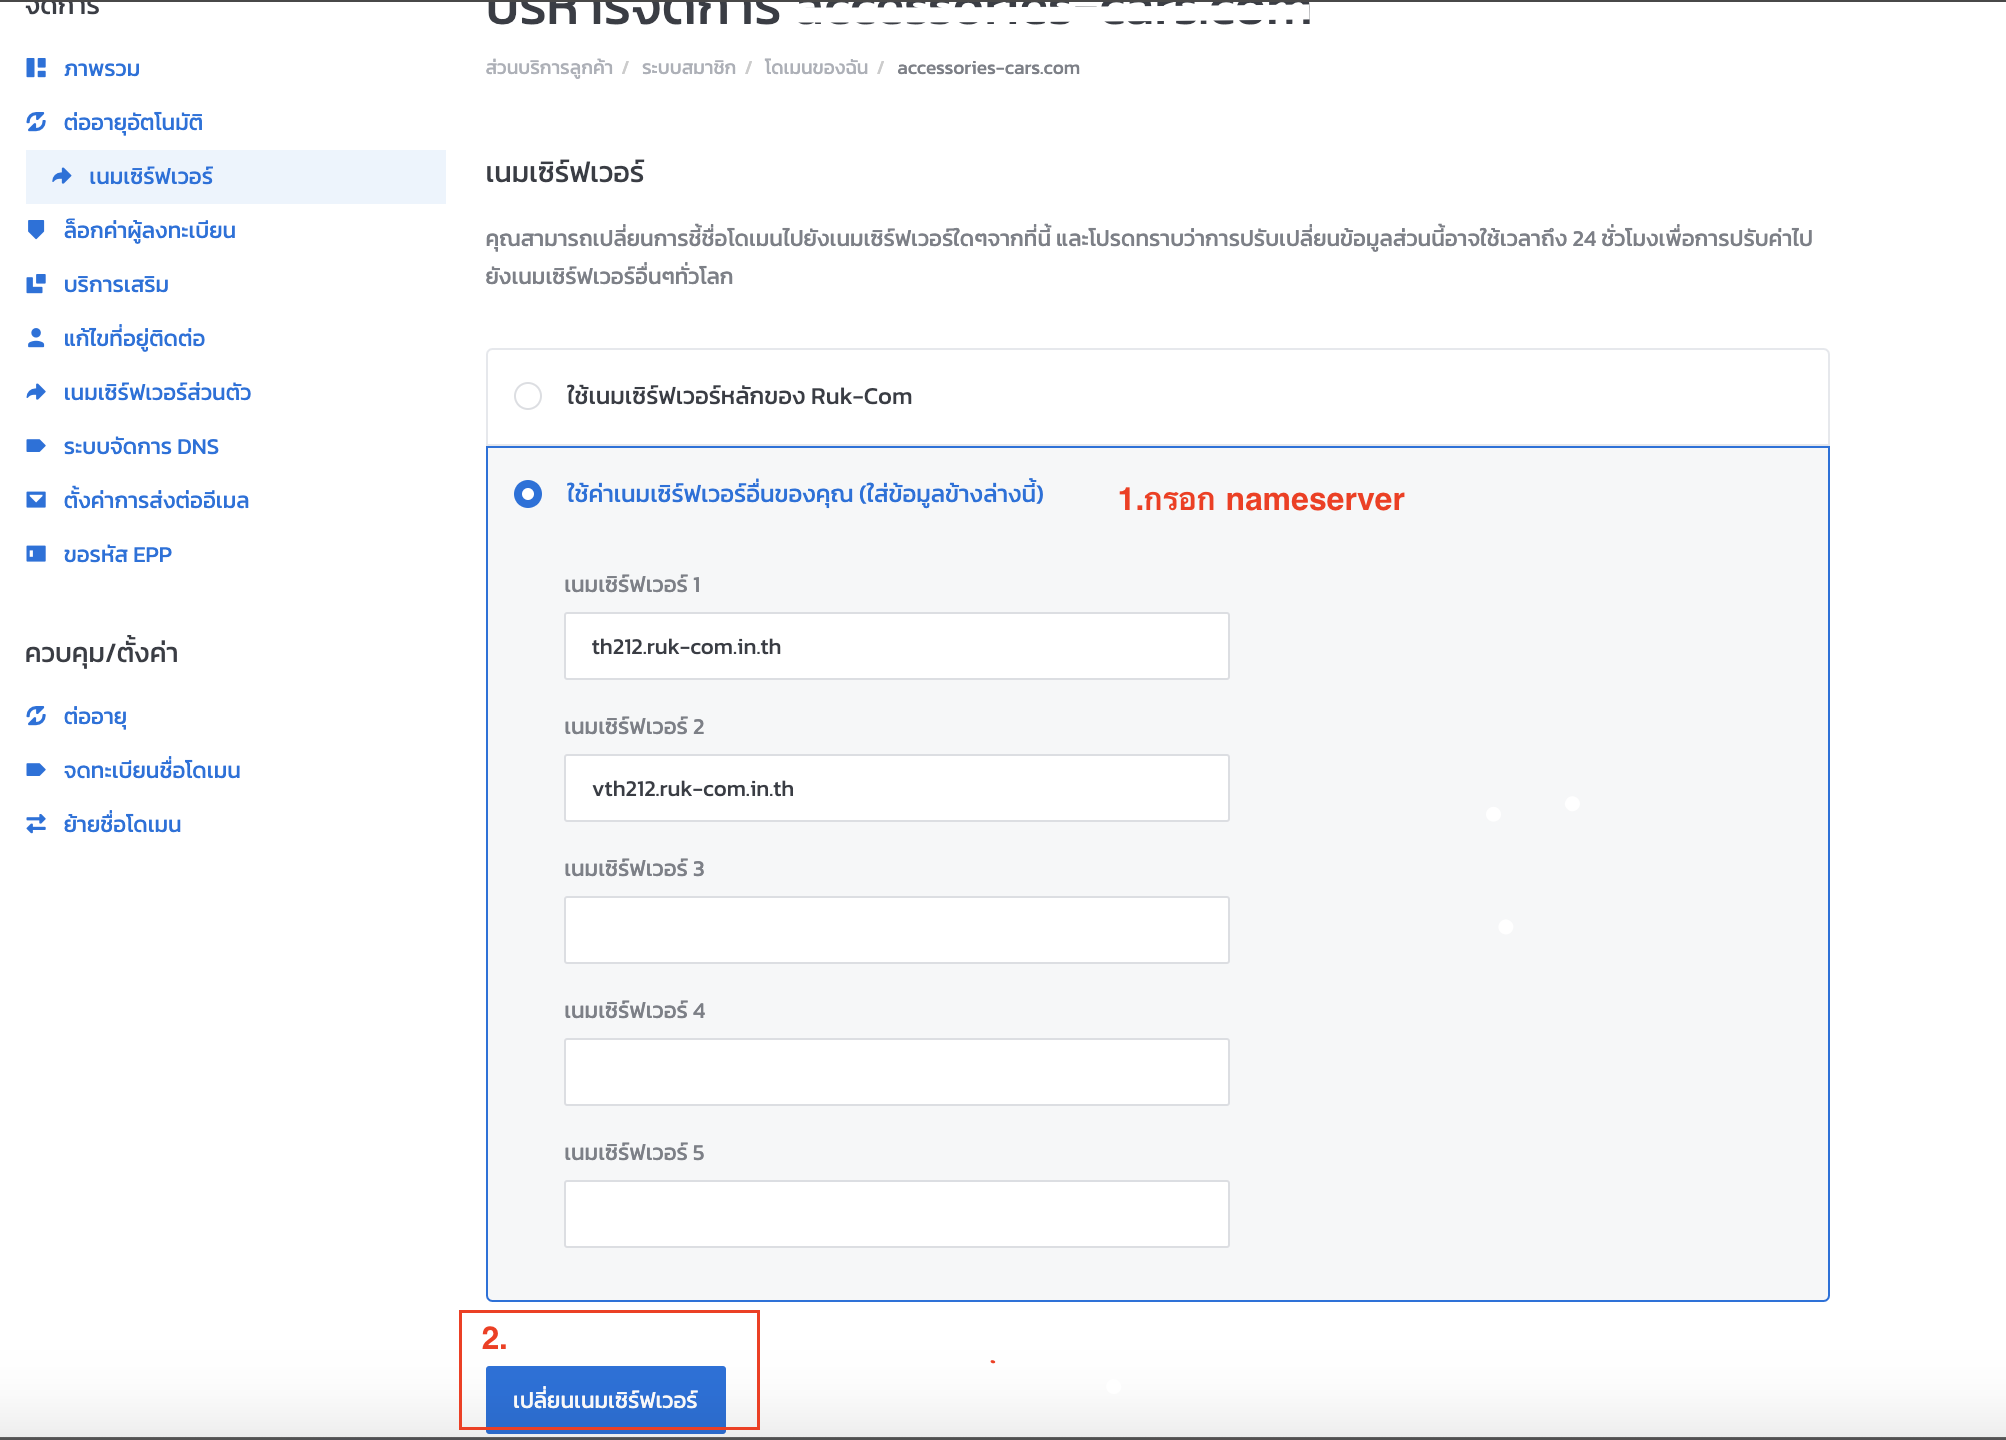
1.4. ເມື່ອເຂົ້າມາໃນໜ້ານີ້ຈະສະແດງລາຍລະອຽດກ່ຽວກັບ Domain ທີ່ເລືອກມາ
1.4.1 ເລືອກ “Use custom nameservers (enter below)” / ໃຊ້ຄ່າເນມເຊີບເວີອື່ນຂອງທ່ານ (ໃສ່ຂໍ້ມູນຂ້າງລຸ່ມນີ້) ເພື່ອຕັ້ງຄ່າ Nameservers ເອງ
1.4.2 ໃສ່ Nameservers ທີ່ຕ້ອງການຊີ້ໄປ
1.4.3 ກົດປຸ່ມປ່ຽນເນມເຊີບເວີ

—————————————————————————————————————————————————————————————————————————————————————-
2.ຄົ້ນຫາ Nameserver
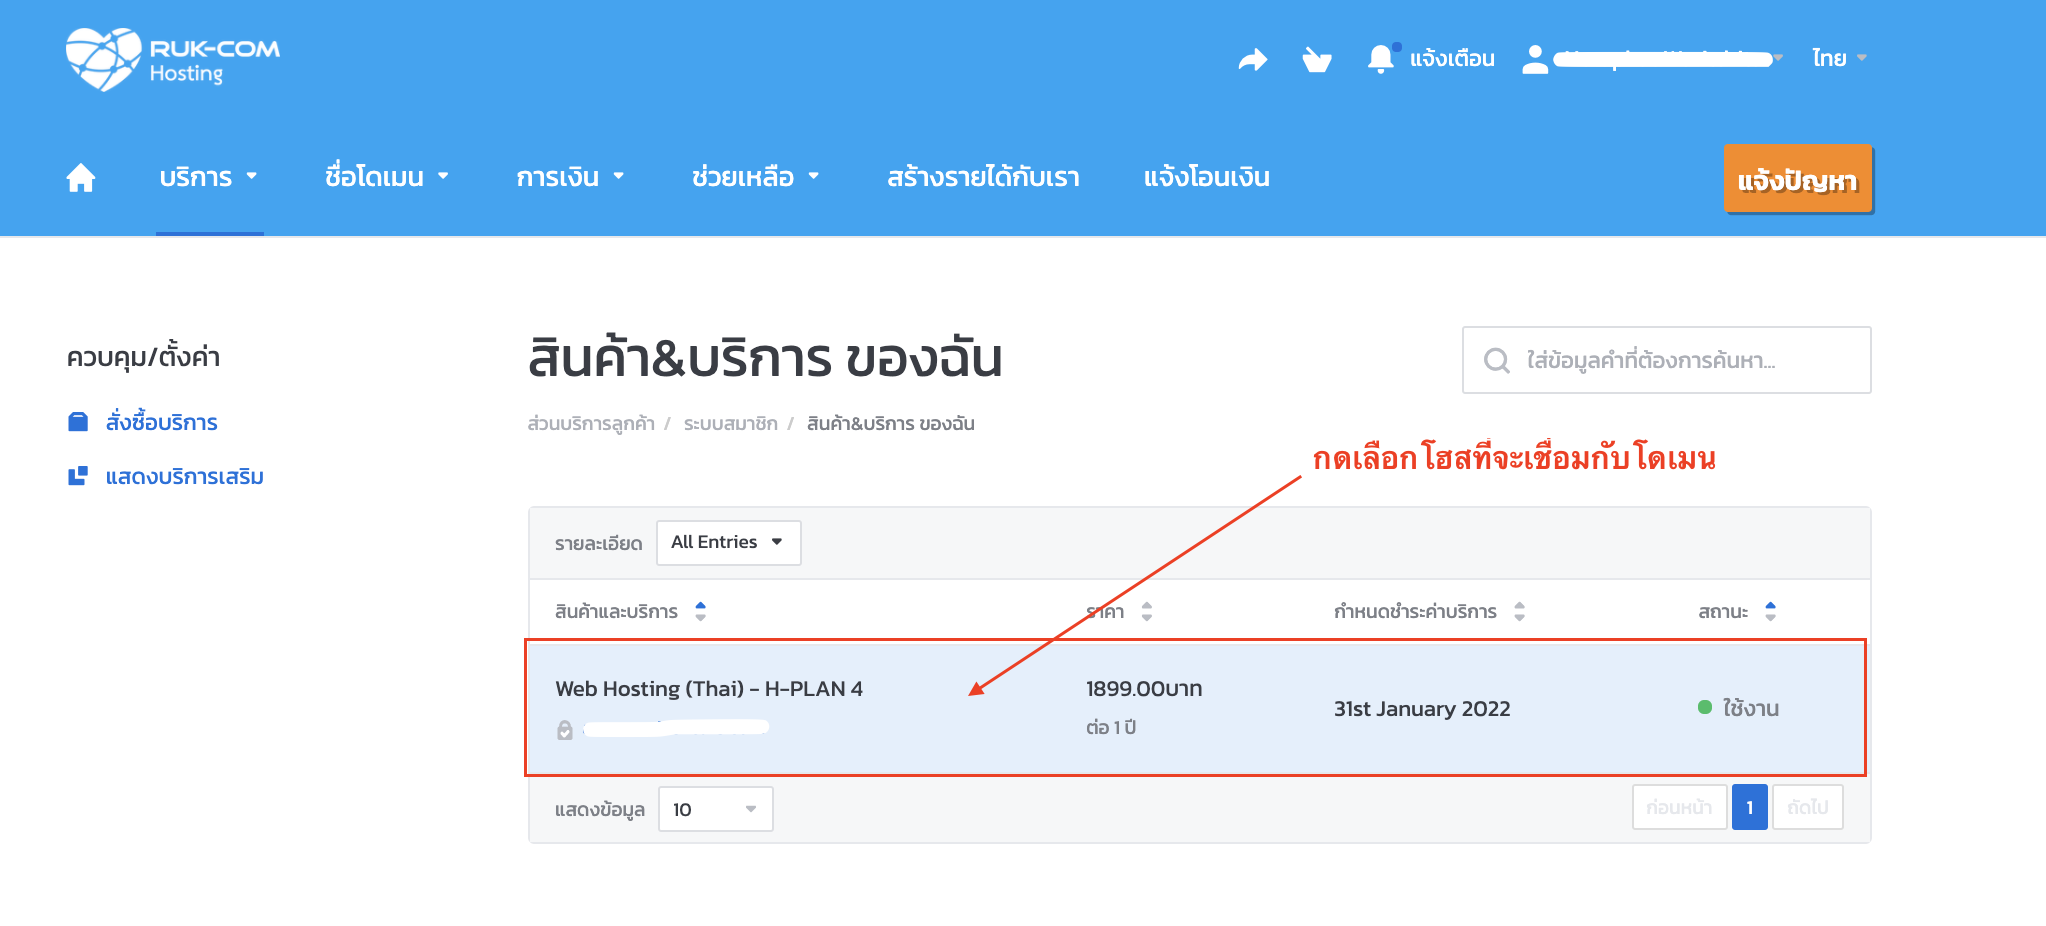
ຖ້າຫາກຍັງບໍ່ຮູ້ວ່າຄ່າ nameserver ທີ່ໃຊ້ຢູ່ແມ່ນຫຍັງ ສາມາດເຂົ້າໄປກວດເບິ່ງໄດ້ຈາກ hosting ທີ່ນໍາໃຊ້ຢູ່ໂດຍໄປທີ່ menu ບໍລິການ -> ບໍລິການນຂອງຂ້ອຍ

2.1 ເລືອກ hosting ທີ່ໄດ້ນໍາໃຊ້ຢູ່

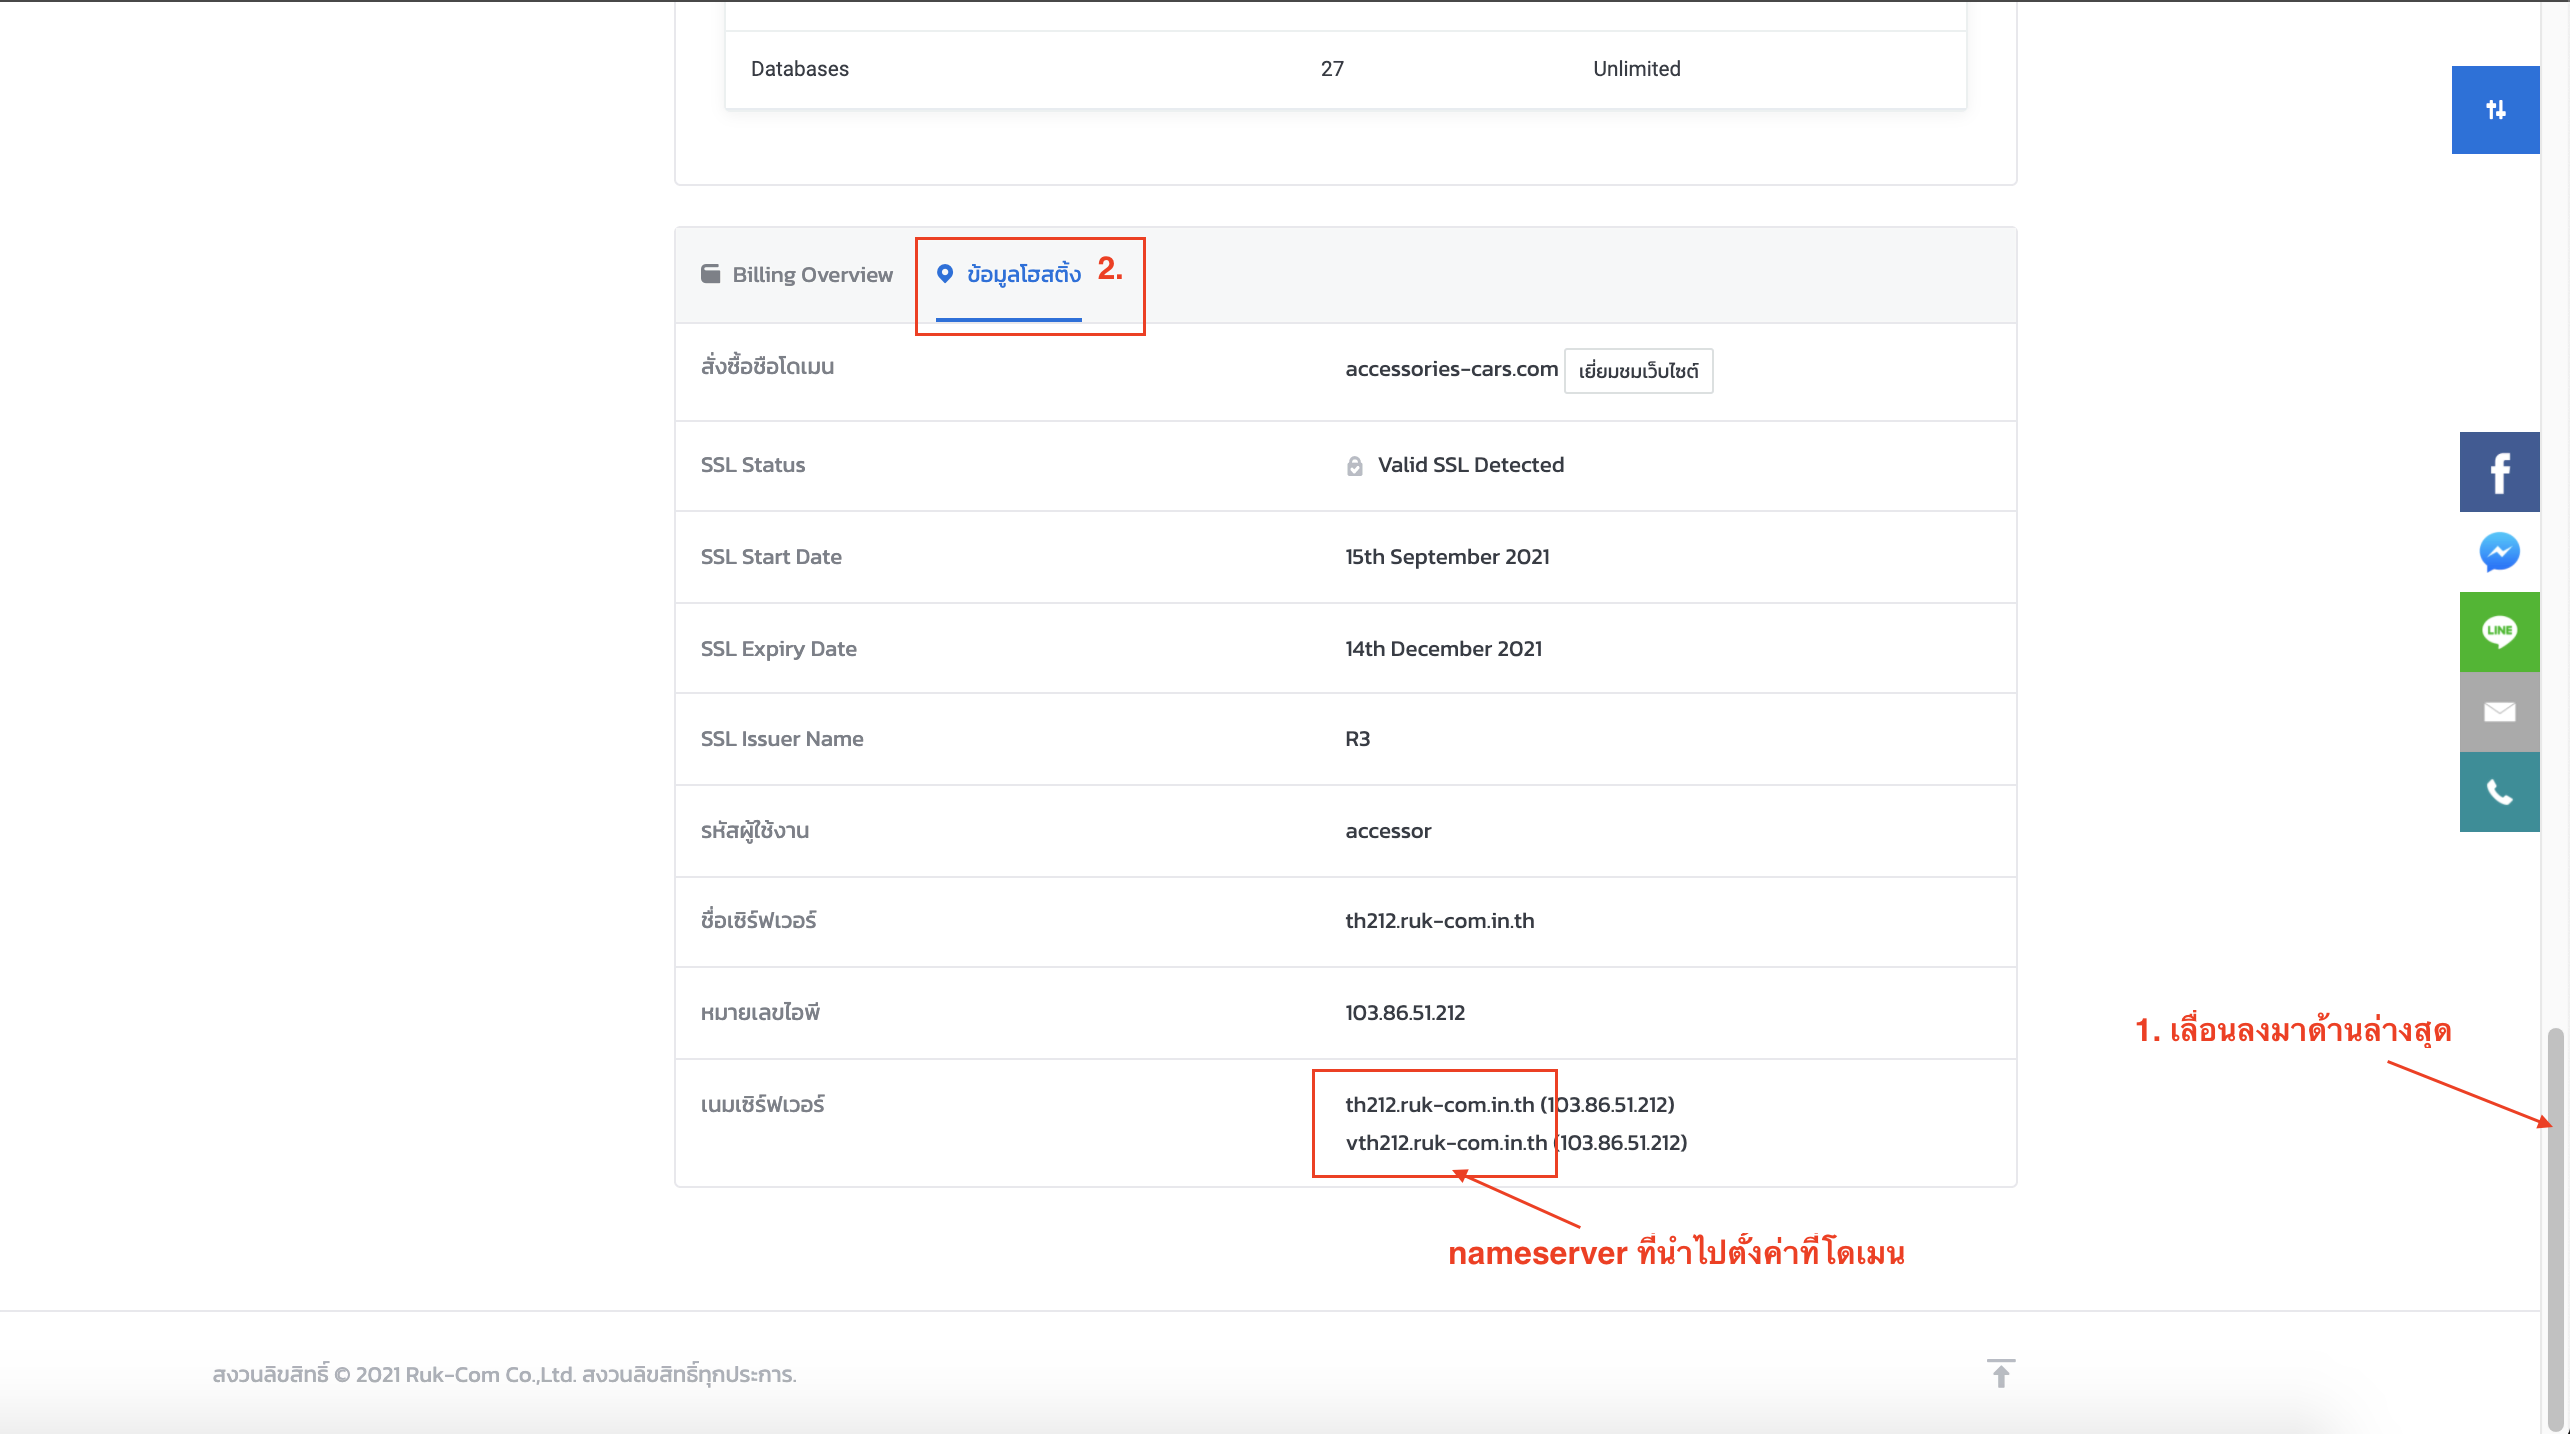
2.3 ເລື່ອນ Scroll bar ລົງມາລຸ່ມສຸດ >> ຂໍ້ມູນໂຮສຕິງ ເມື່ອຄລິກເຂົ້າມາແລ້ວຈະມີຊື່ nameserver ຂອງ hosting ທີ່ນໍາໃຊ້ຢູ່ ສາມາດເອົາໄປຕັ້ງຄ່າໄດ້ເລີຍ (ເອົາໄປແຕ່ຊື່ໃນກອບສີແດງ)


