ตั้งค่าให้ Apps อื่นๆสามารถเข้าถึง G Suite
1. ให้ทำการ Login เข้าสู่ Admin Console ที่ https://admin.google.com
2. เปิดให้ User สามารถกำหนด Allow less secure app ได้เอง โดยไปที่เมนู
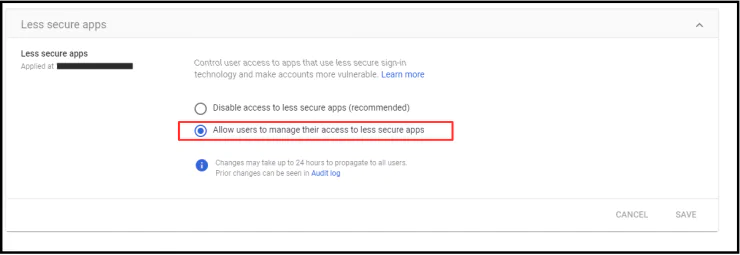
Security > Basic Settings > less secure app > Go to settings for less secure apps
3. ทำการเลือก “Allow users to manage their access to less secure apps” เพื่อให้ Users สามารถจัดการเปิดการใช้งาน less secure apps เองได้
4. ทำการ Login เข้าสู่ G Suite โดยใช้บัญชีผู้ใช้ที่ต้องการตั้งค่ารับเมล์ ที่ https://accounts.google.com
5.ไปที่เมนู security หรือ https://myaccount.google.com/security

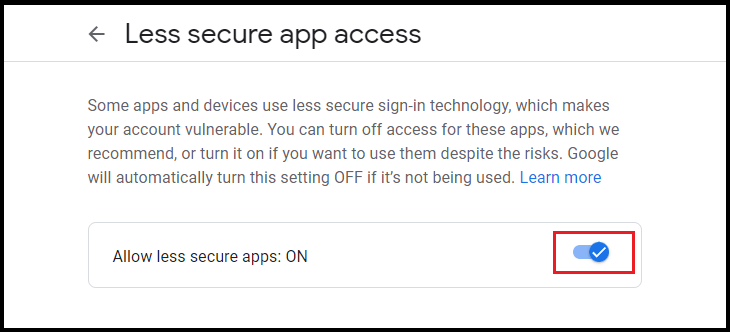
6. ไปที่ Less secure app access และคลิกที่ Turn on access (not recommended)
7. เปลี่ยนจาก Off เป็น On เพื่อให้ Gsuite อนุญาตให้ App อื่นๆ เข้าถึงได้
เปิดการใช้งาน IMAP
1. ทำการ Login เข้าสู่ G Suite โดยใช้บัญชีผู้ใช้ที่ต้องการตั้งค่ารับเมล์ ที่ https://accounts.google.com
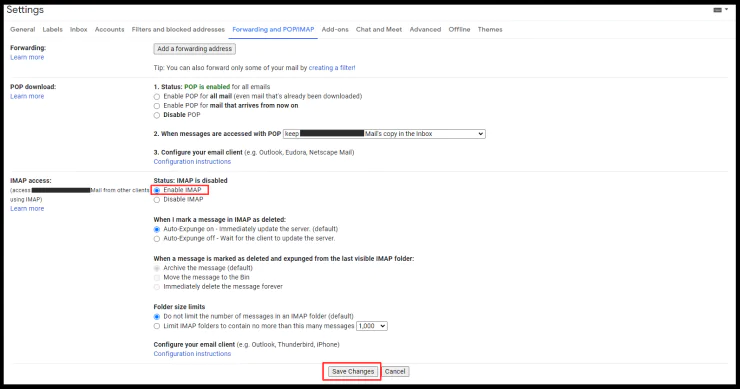
2. ไปที่เมนู See All Setting -> Forwarding and POP/IMAP
3. ทำการติ๊กในส่วน Enable IMAP แล้วทำการบันทึก
วิธีการเพิ่มบัญชีผู้ใช้ G Suite บน Outlook 2019
1. ทำการเพิ่มบัญชีผู้ใช้ใหม่

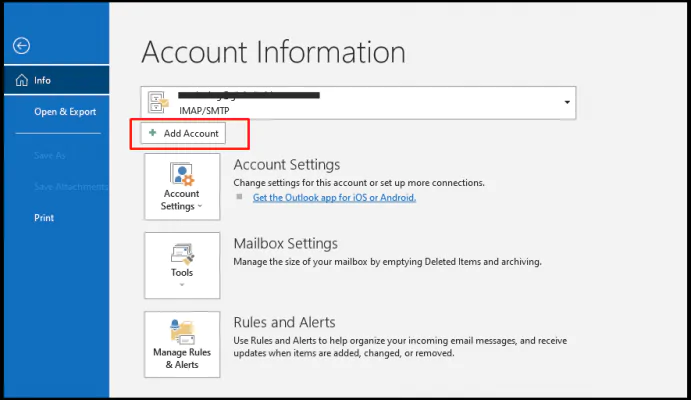
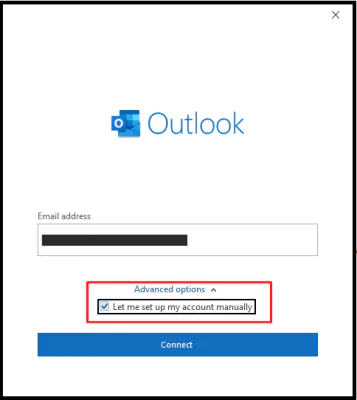
2. กรอก Email ที่ต้องการใช้งาน และคลิกไปที่ Advanced options -> ติ้ก Let me set up my account manually และกด Connect
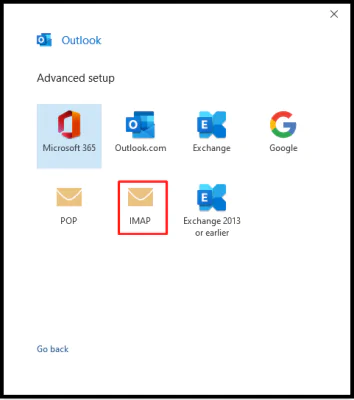
3. เลือก Imap
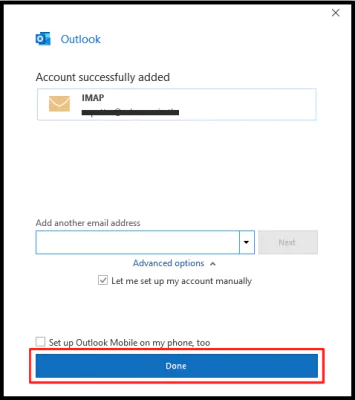
4. หลังจากเรียบร้อยแล้วให้กด Done เพื่อเริ่มใช้งาน Email บน Outlook ได้เลย
***หมายเหตุ***
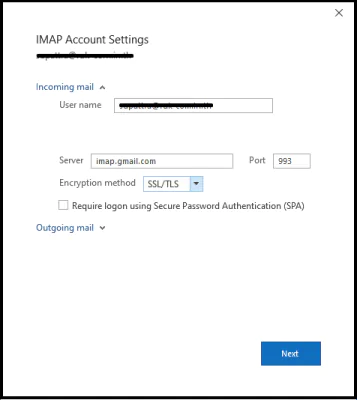
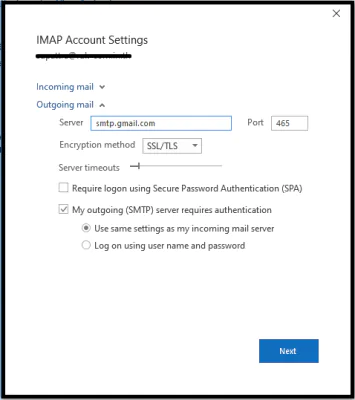
ในส่วนของ Incoming และ Outgoing แต่ละ Version ของ Outlook หน้า Interface อาจจะแตกต่างกันแต่สามารถตั้งค่าตามข้อมูลด้านล่างได้เลยค่ะ
- Incoming server (IMAP): 993
- Encryption method: SSL/TLS
- Outgoing server (SMTP): 465 หรือ 587
- Encryption method: SSL/TLS
