การติดตั้ง SSL ใน Directadmin revolution
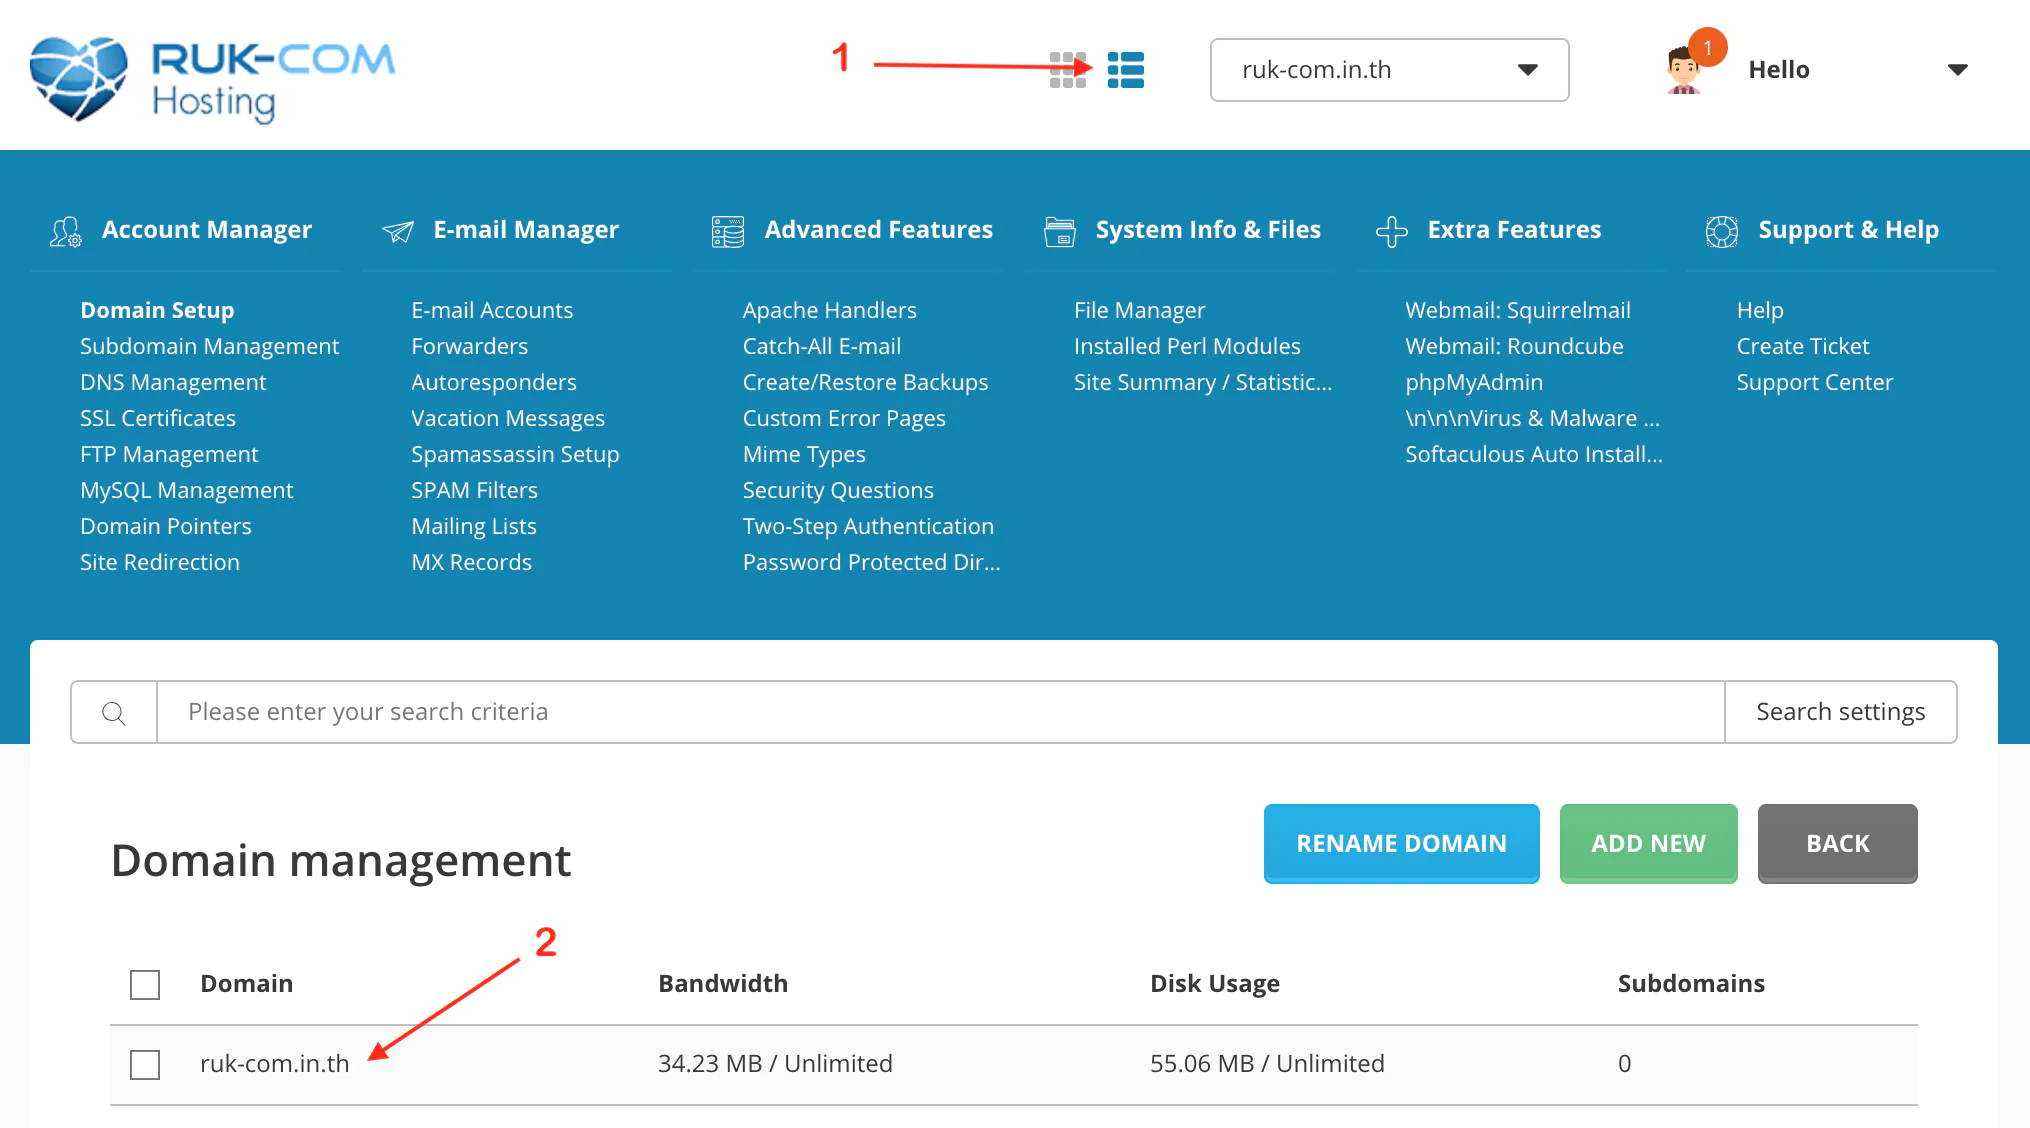
1. ทำการเปลี่ยน Menu เป็นแบบ List เพื่อแสดง Submenu ทั้งหมด
2. เลือก Domain ที่ต้องการติดตั้ง SSL

ขั้นตอนการเปิดให้ Domain รองรับ SSL
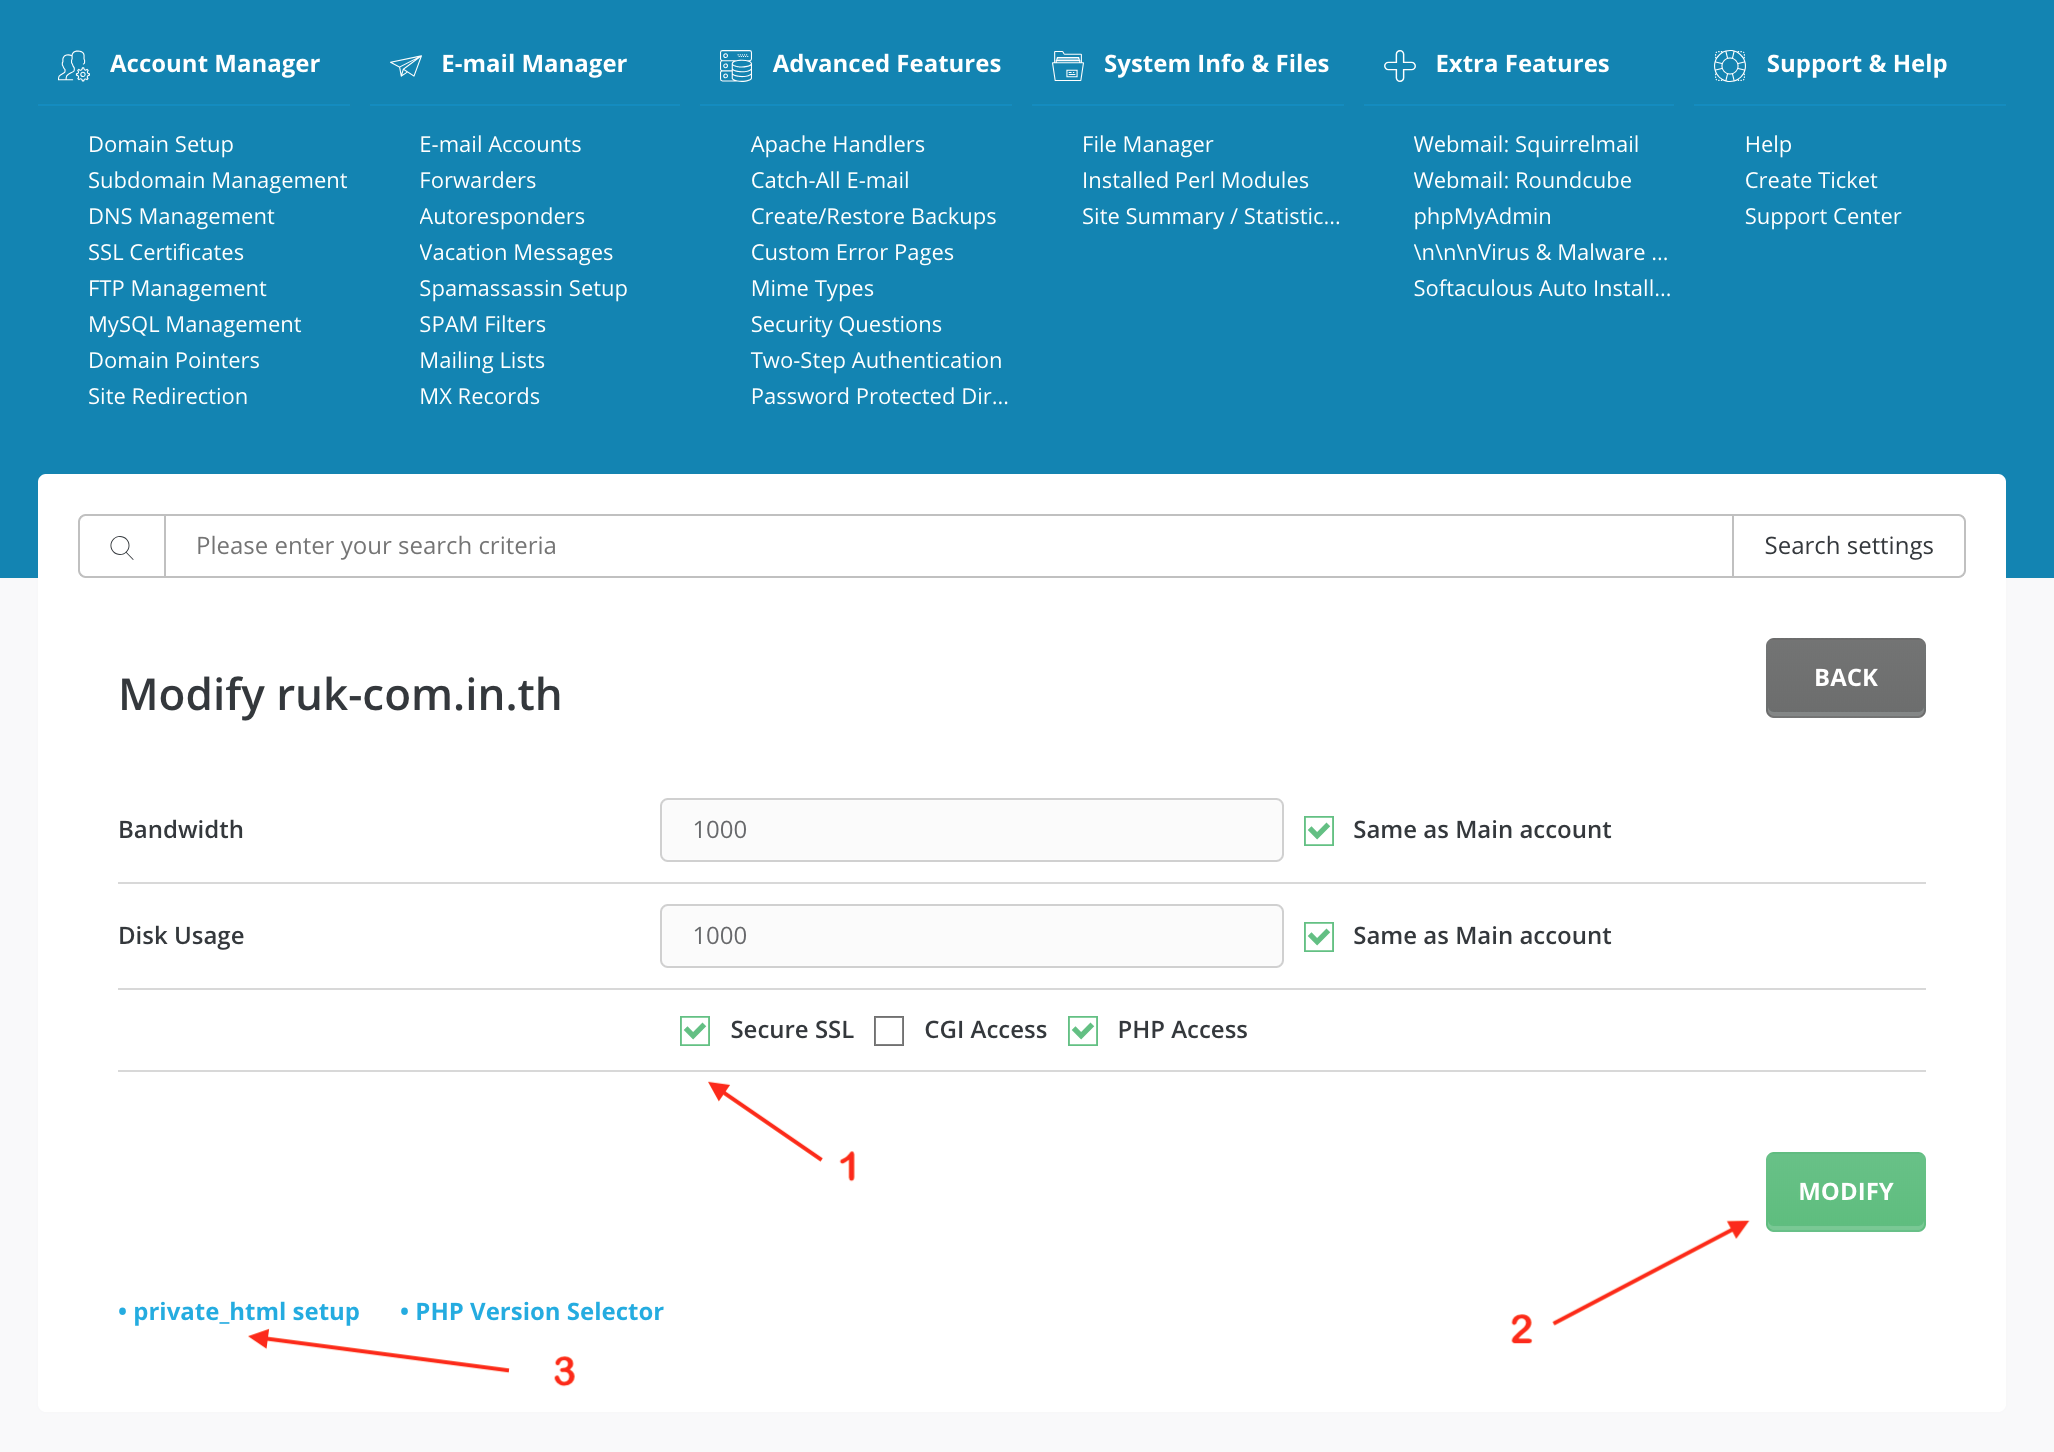
1. เลือก Secure SSL
2. กดปุ่ม Modify เพื่อบันทึกข้อมูล
3. กดปุ่ม private_html setup เพื่อตั้งค่า Folder private_html

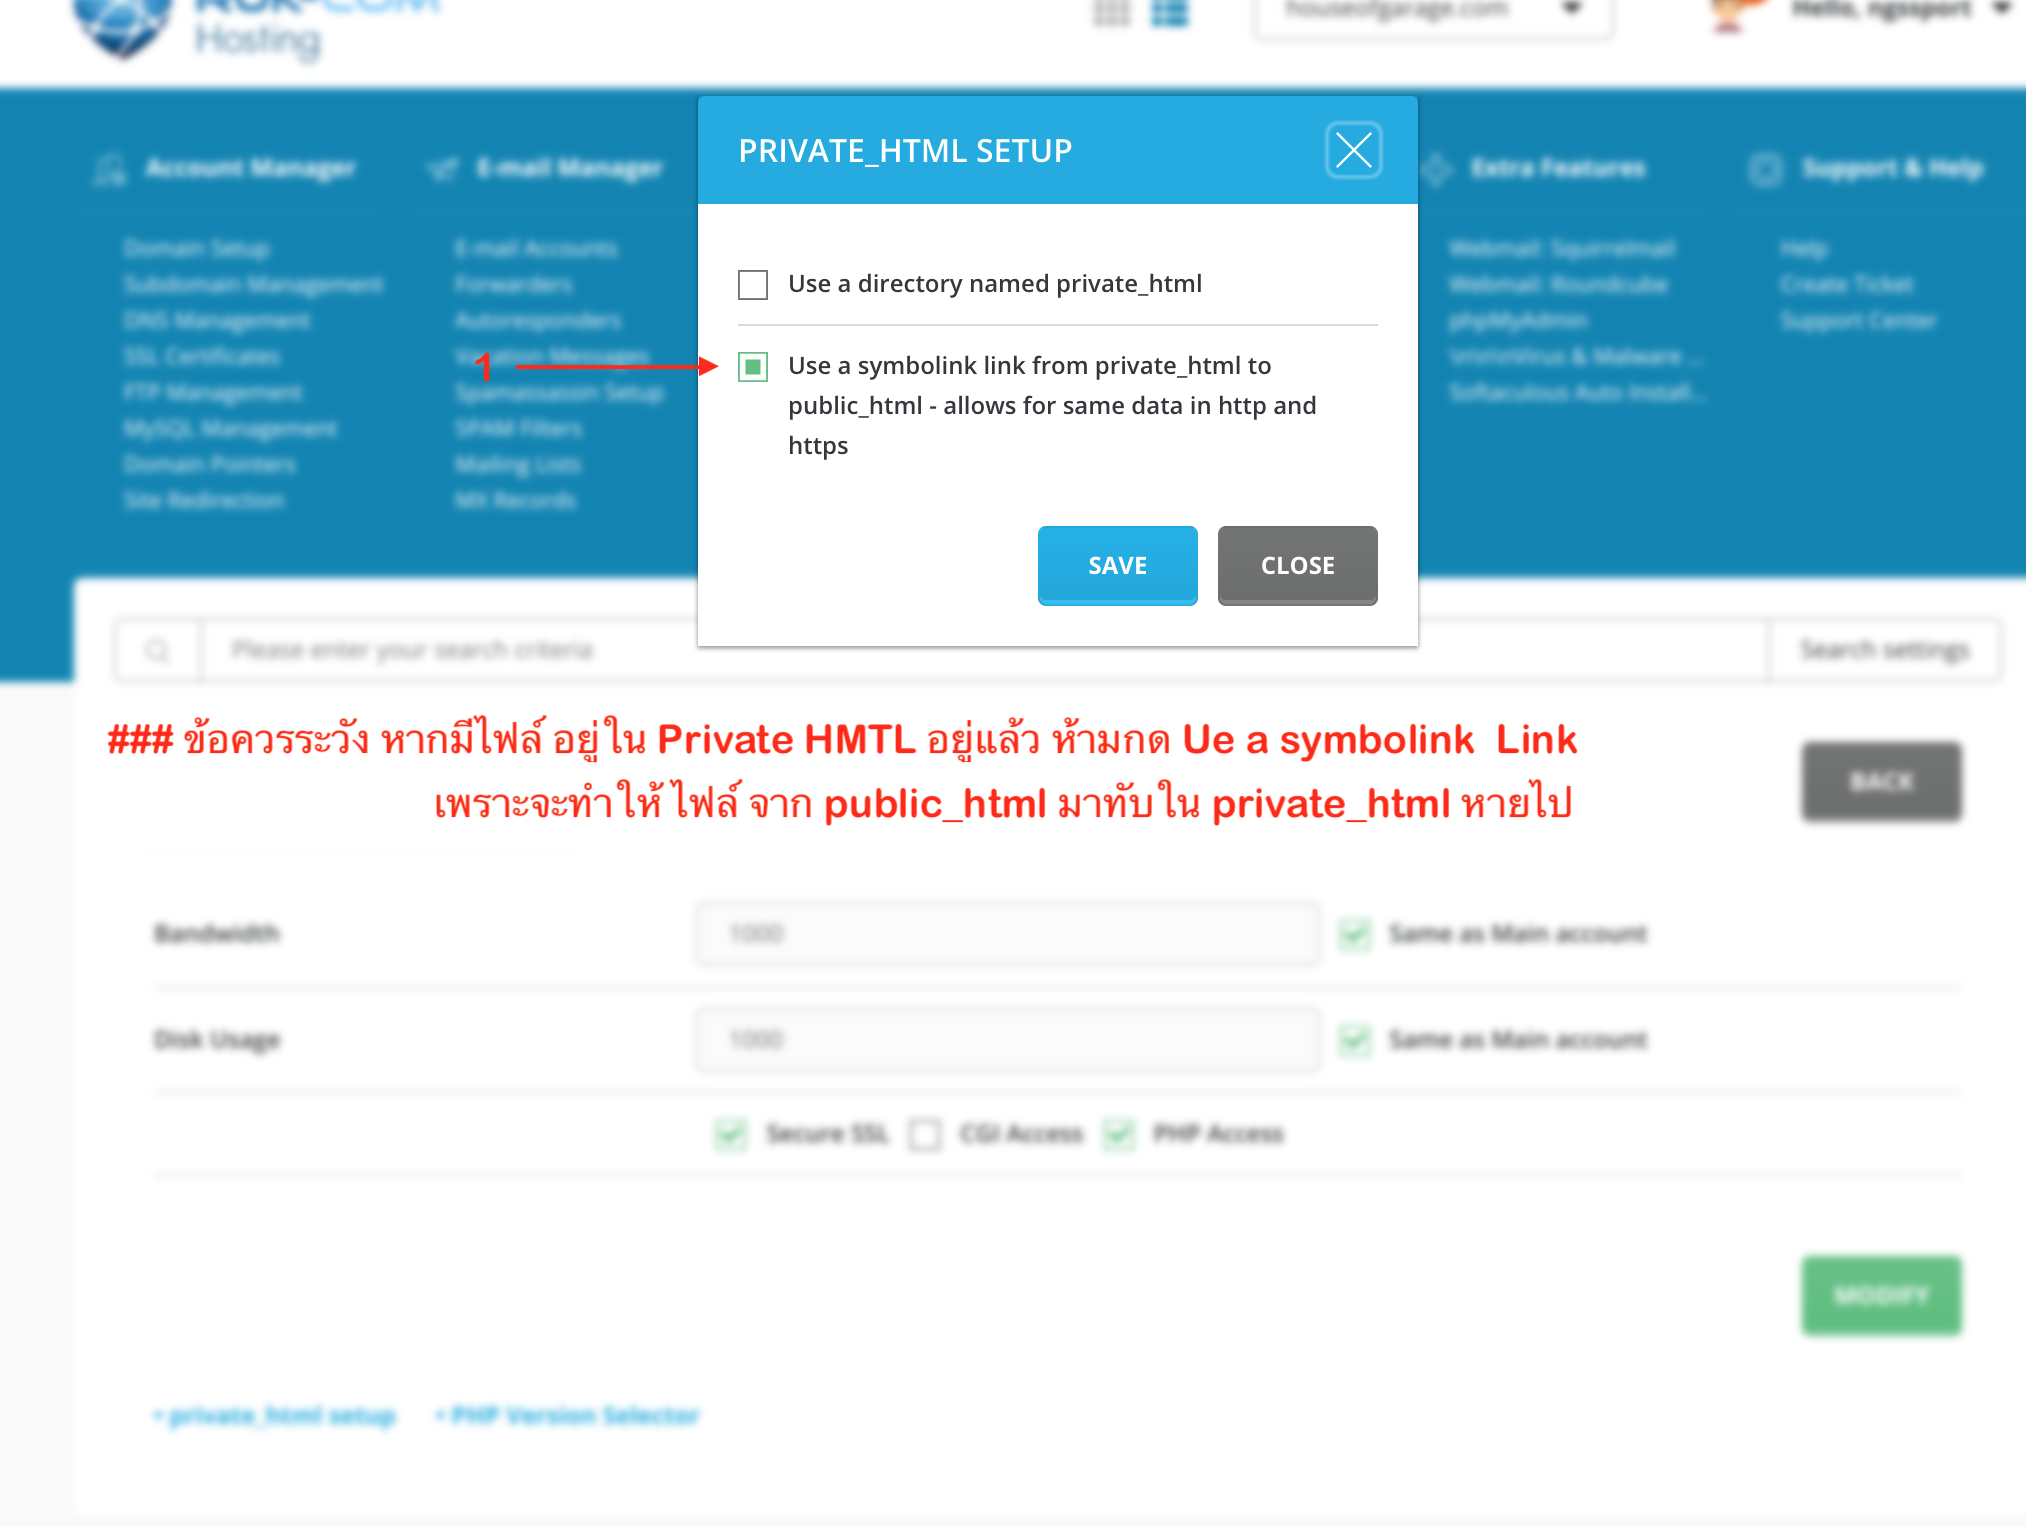
ขั้นตอนการทำ Symbolink
1. เลือก Us a symbolink Link เพื่อนำไฟล์ในpublic_html มาทับใน private_html
### ข้อควรระวัง หากมีไฟล์ อยู่ใน Private HMTL อยู่แล้ว ห้ามกด Us a symbolink Link เพราะจะทำให้ ไฟล์ จาก public_html มาทับใน private_html หายไป

ขั้นตอนการขอ Certificate from Let’s Encrypt
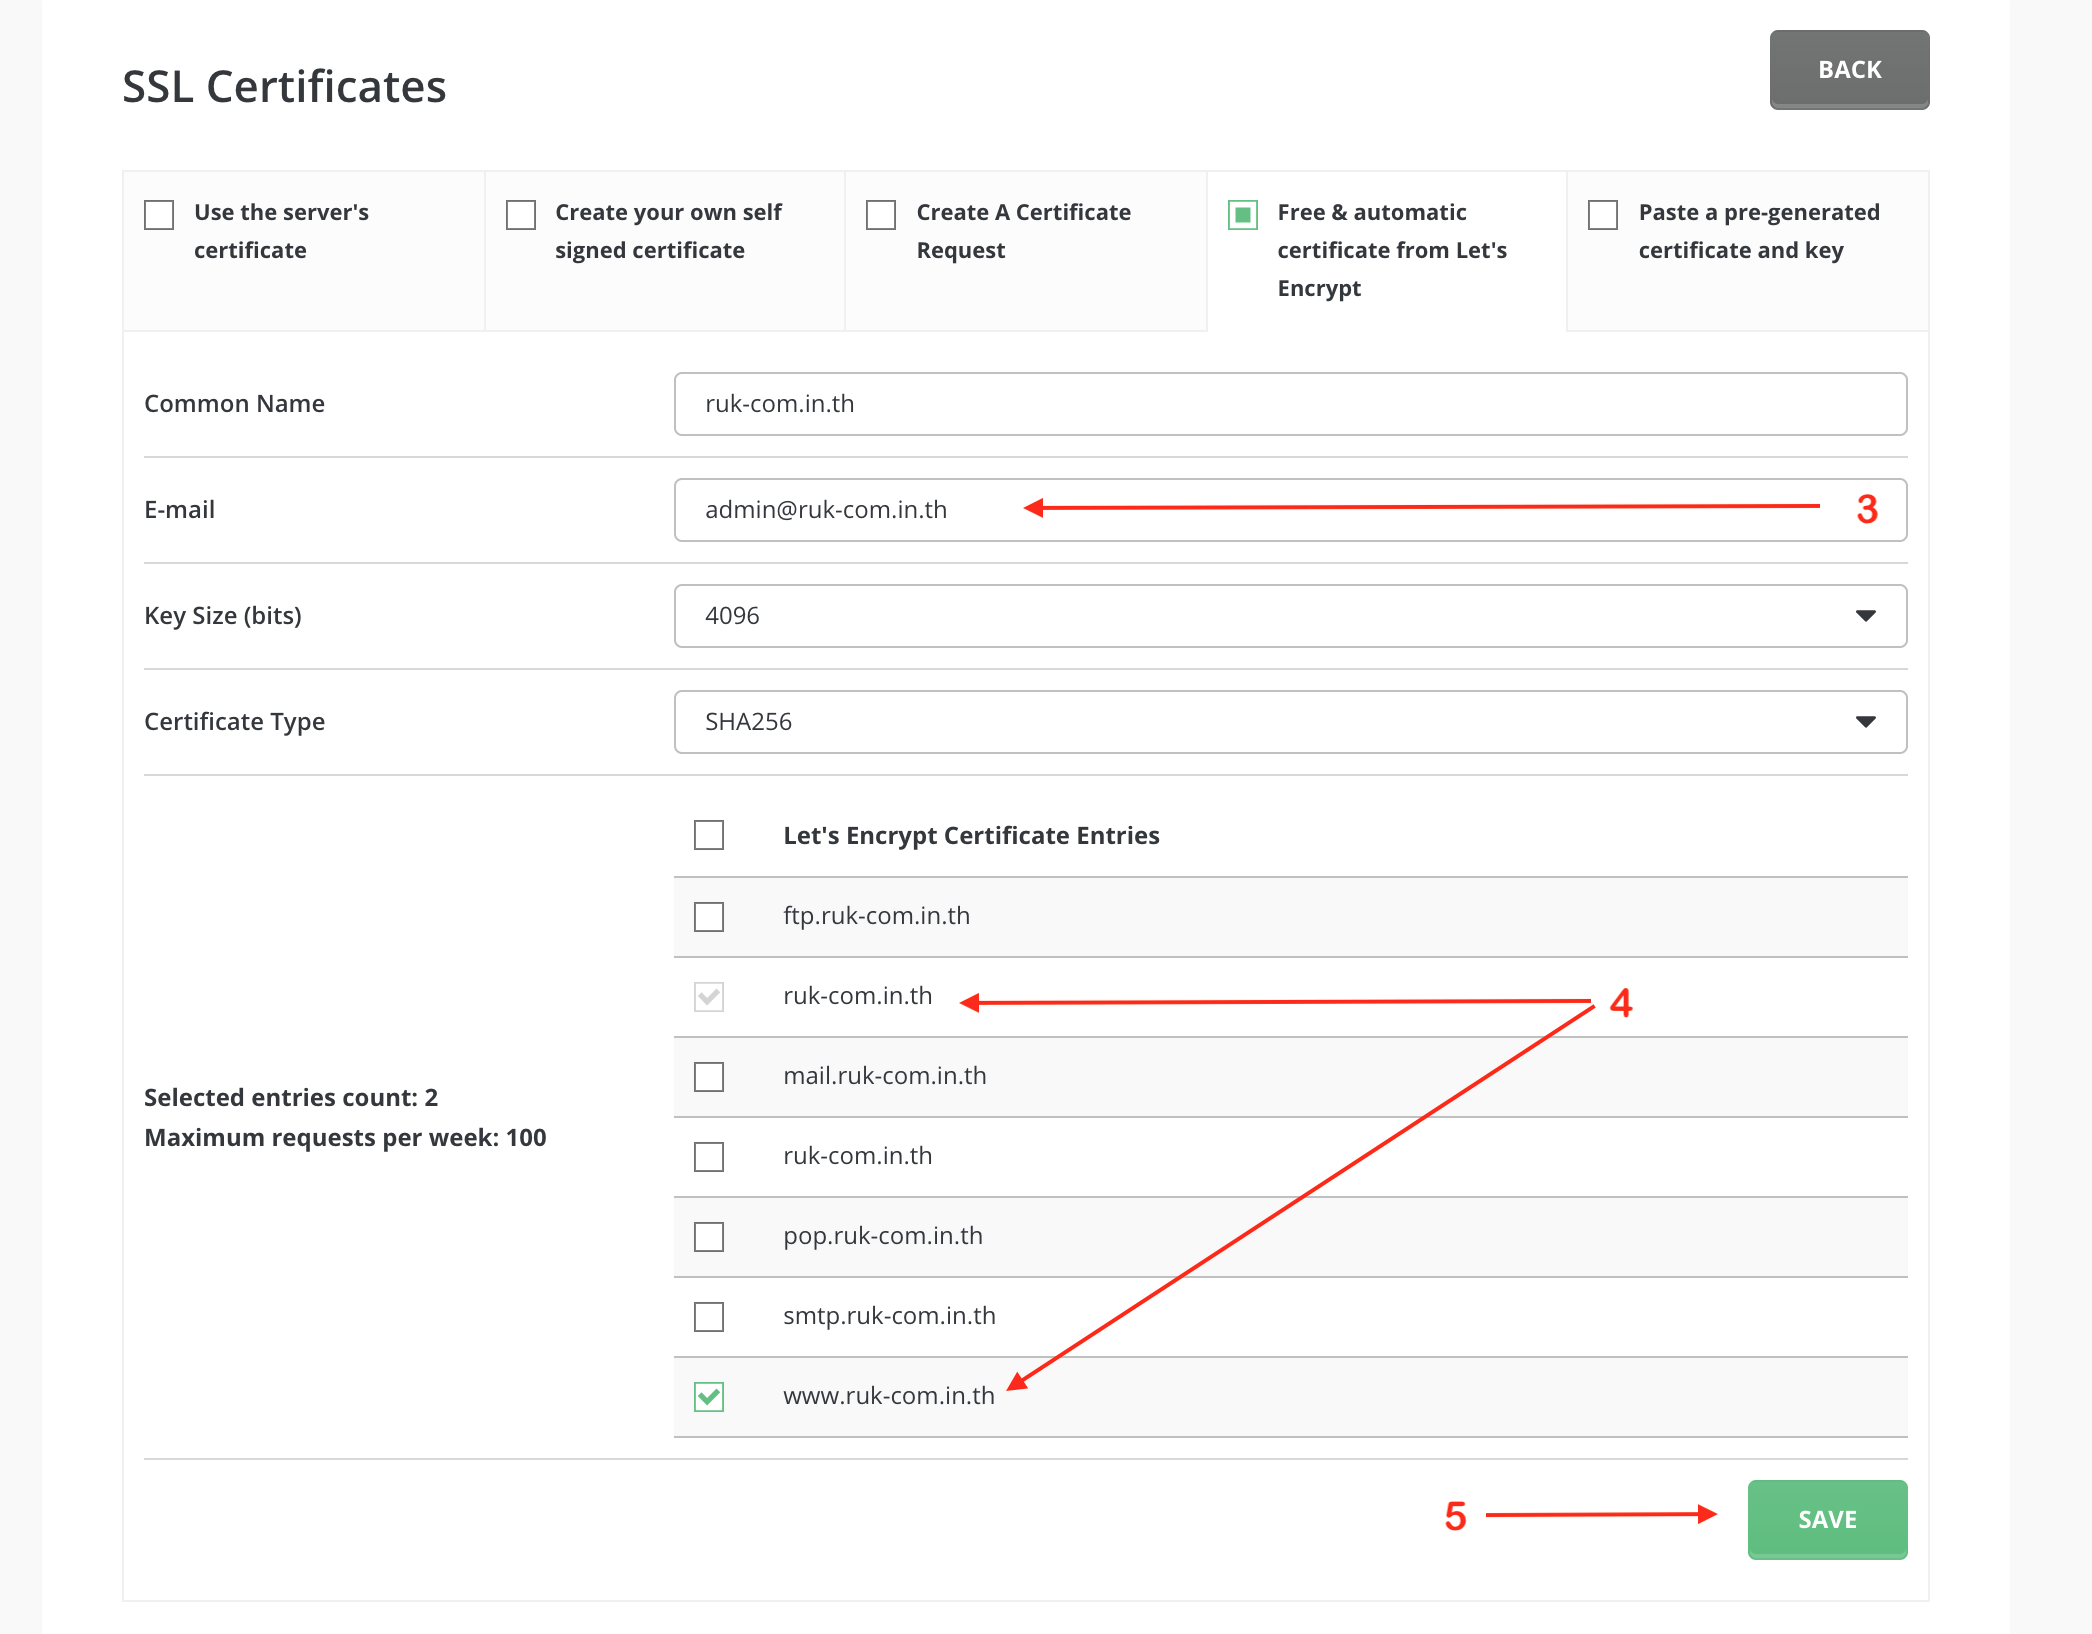
1. เลือก Menu SSL Certificates
2. หลังจากเข้า หน้า SSL Certificates เลือกเปิดใชังาน
Free & automatic certificate from Let’s Encrypt

ขั้นตอนการขอ Certificate from Let’s Encrypt
1. เลือก Menu SSL Certificates
2. หลังจากเข้า หน้า SSL Certificates เลือกเปิดใชังาน
Free & automatic certificate from Let’s Encrypt

หลังจาดำเนินการเสร็จทั้งหมดแล้ว จะรอประมาณ 10-15 นาที . เพื่อให้ข้อมูล Update และหาก Website เป็น WordPress สามารถ ดำเนินการตั้งค่าต่อได้ที่บทความ ทำไมทำ https:// แล้ว URL ไม่เปลี่ยนเป็นสีเขียว


