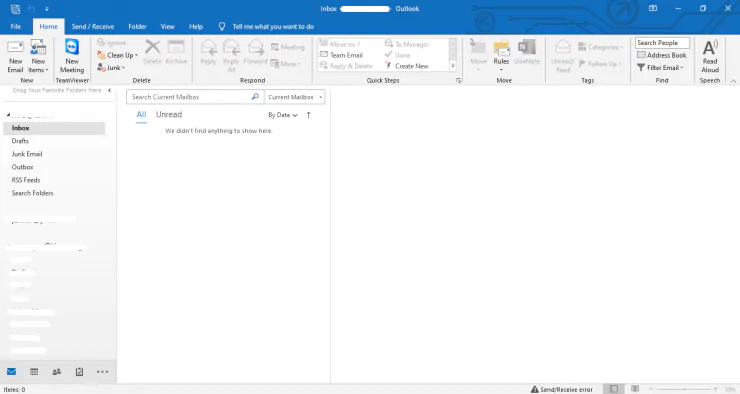
1. คลิ๊กเปิดโปรแกรม > Microsoft outlook 2016
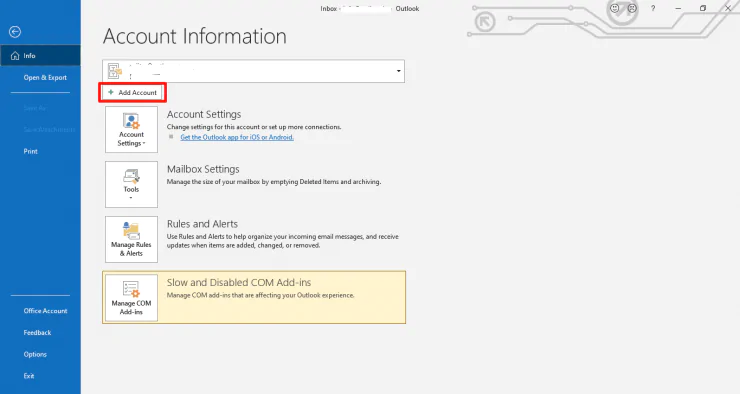
2. ไปที่ File เลือก > Add account
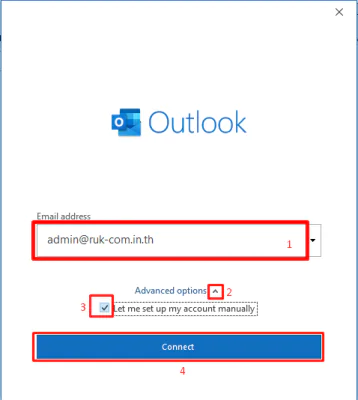
3.กรอกอีเมลที่ลูกค้าต้องการใช้งาน >> กดที่ไอคอนลูกศรลง หลังคำว่า Advanced options
>> ติ๊กเครื่องหมายถูกในช่อง Let me set up my account manually
>> คลิ๊ก Connect
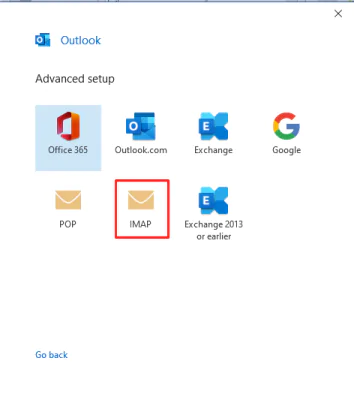
4. จะขึ้นหน้าต่างให้เลือกประเภทของบัญชี เลือกเป็น IMAP
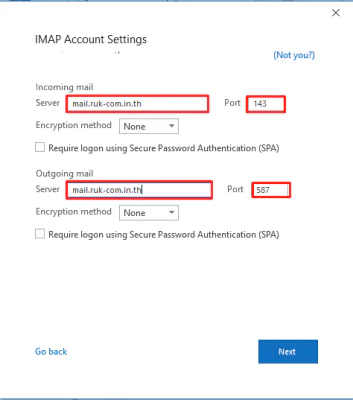
5. ตั้งค่าในส่วนอีเมลขาเข้า (incoming port) และอีเมลขาออก (outgoing port)
Incoming Mail Server: mail.yourdomain.com
Outgoing Mail Server: mail.yourdomain.com
ตามตัวอย่างเมล์ของรักคอม ใช้เป็น mail.ruk-com.in.th
**ช่อง Encryption method ตั้งค่าให้เป็น None
>> คลิ๊ก Connect
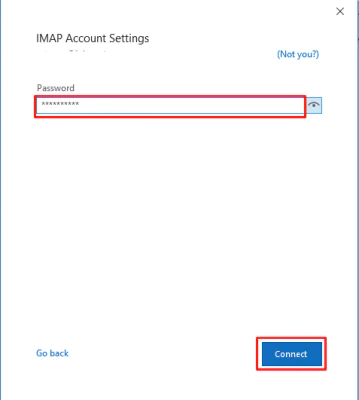
6. กรอกรหัสผ่าน >> คลิ๊ก Connect
7. ถ้าการตั้งค่าถูกต้องจะสามารถเข้าใช้งานเมล์ได้เลยค่ะ
