ย้ายข้อมูล email google workspace จากโดเมนเก่าไปไว้ที่โดเมนใหม่
- login เข้า gmail https://mail.google.com/ เพื่อเปิด imap
(ทำทั้ง2 อีเมล์ต้นทาง เเละปลายทาง)
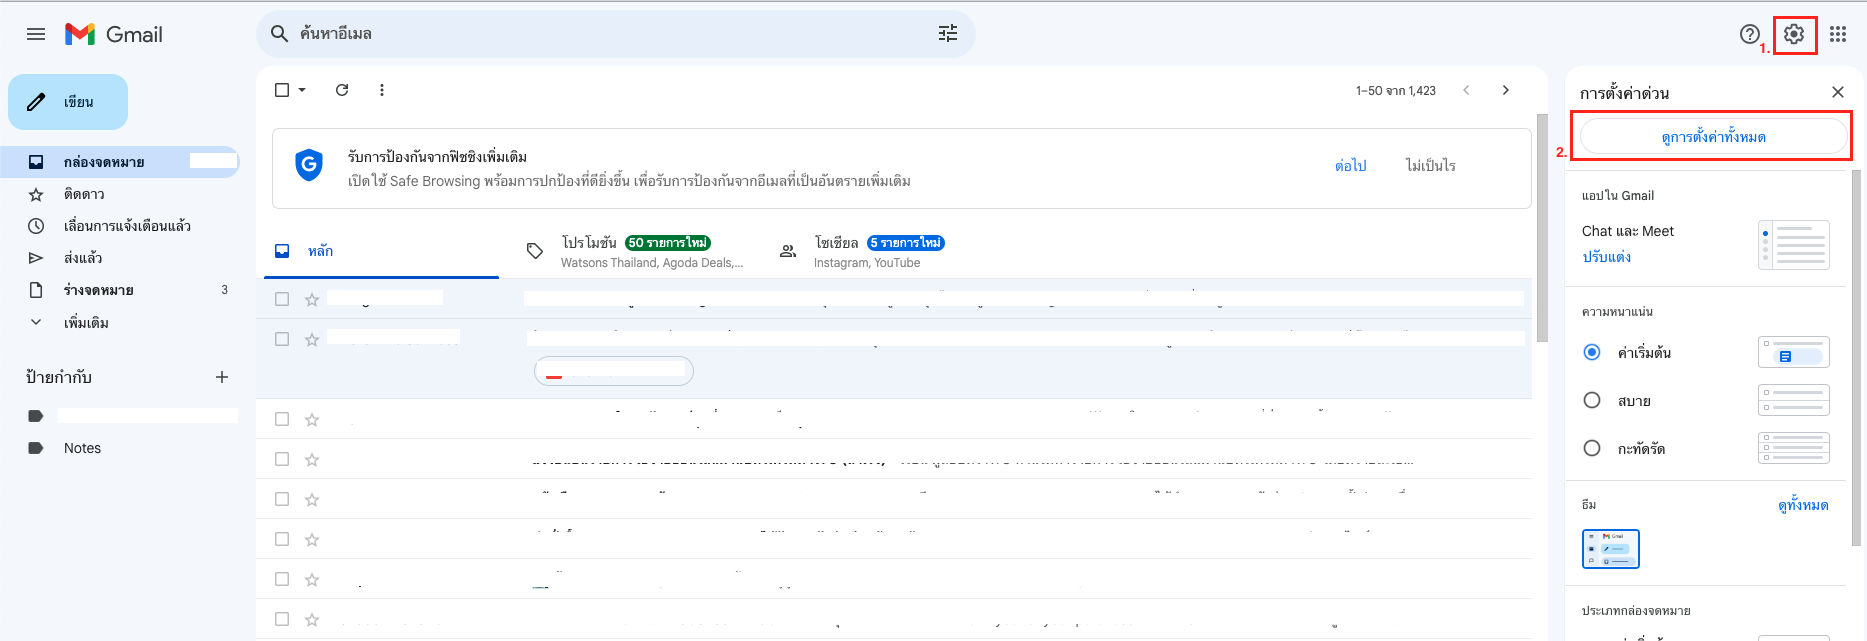
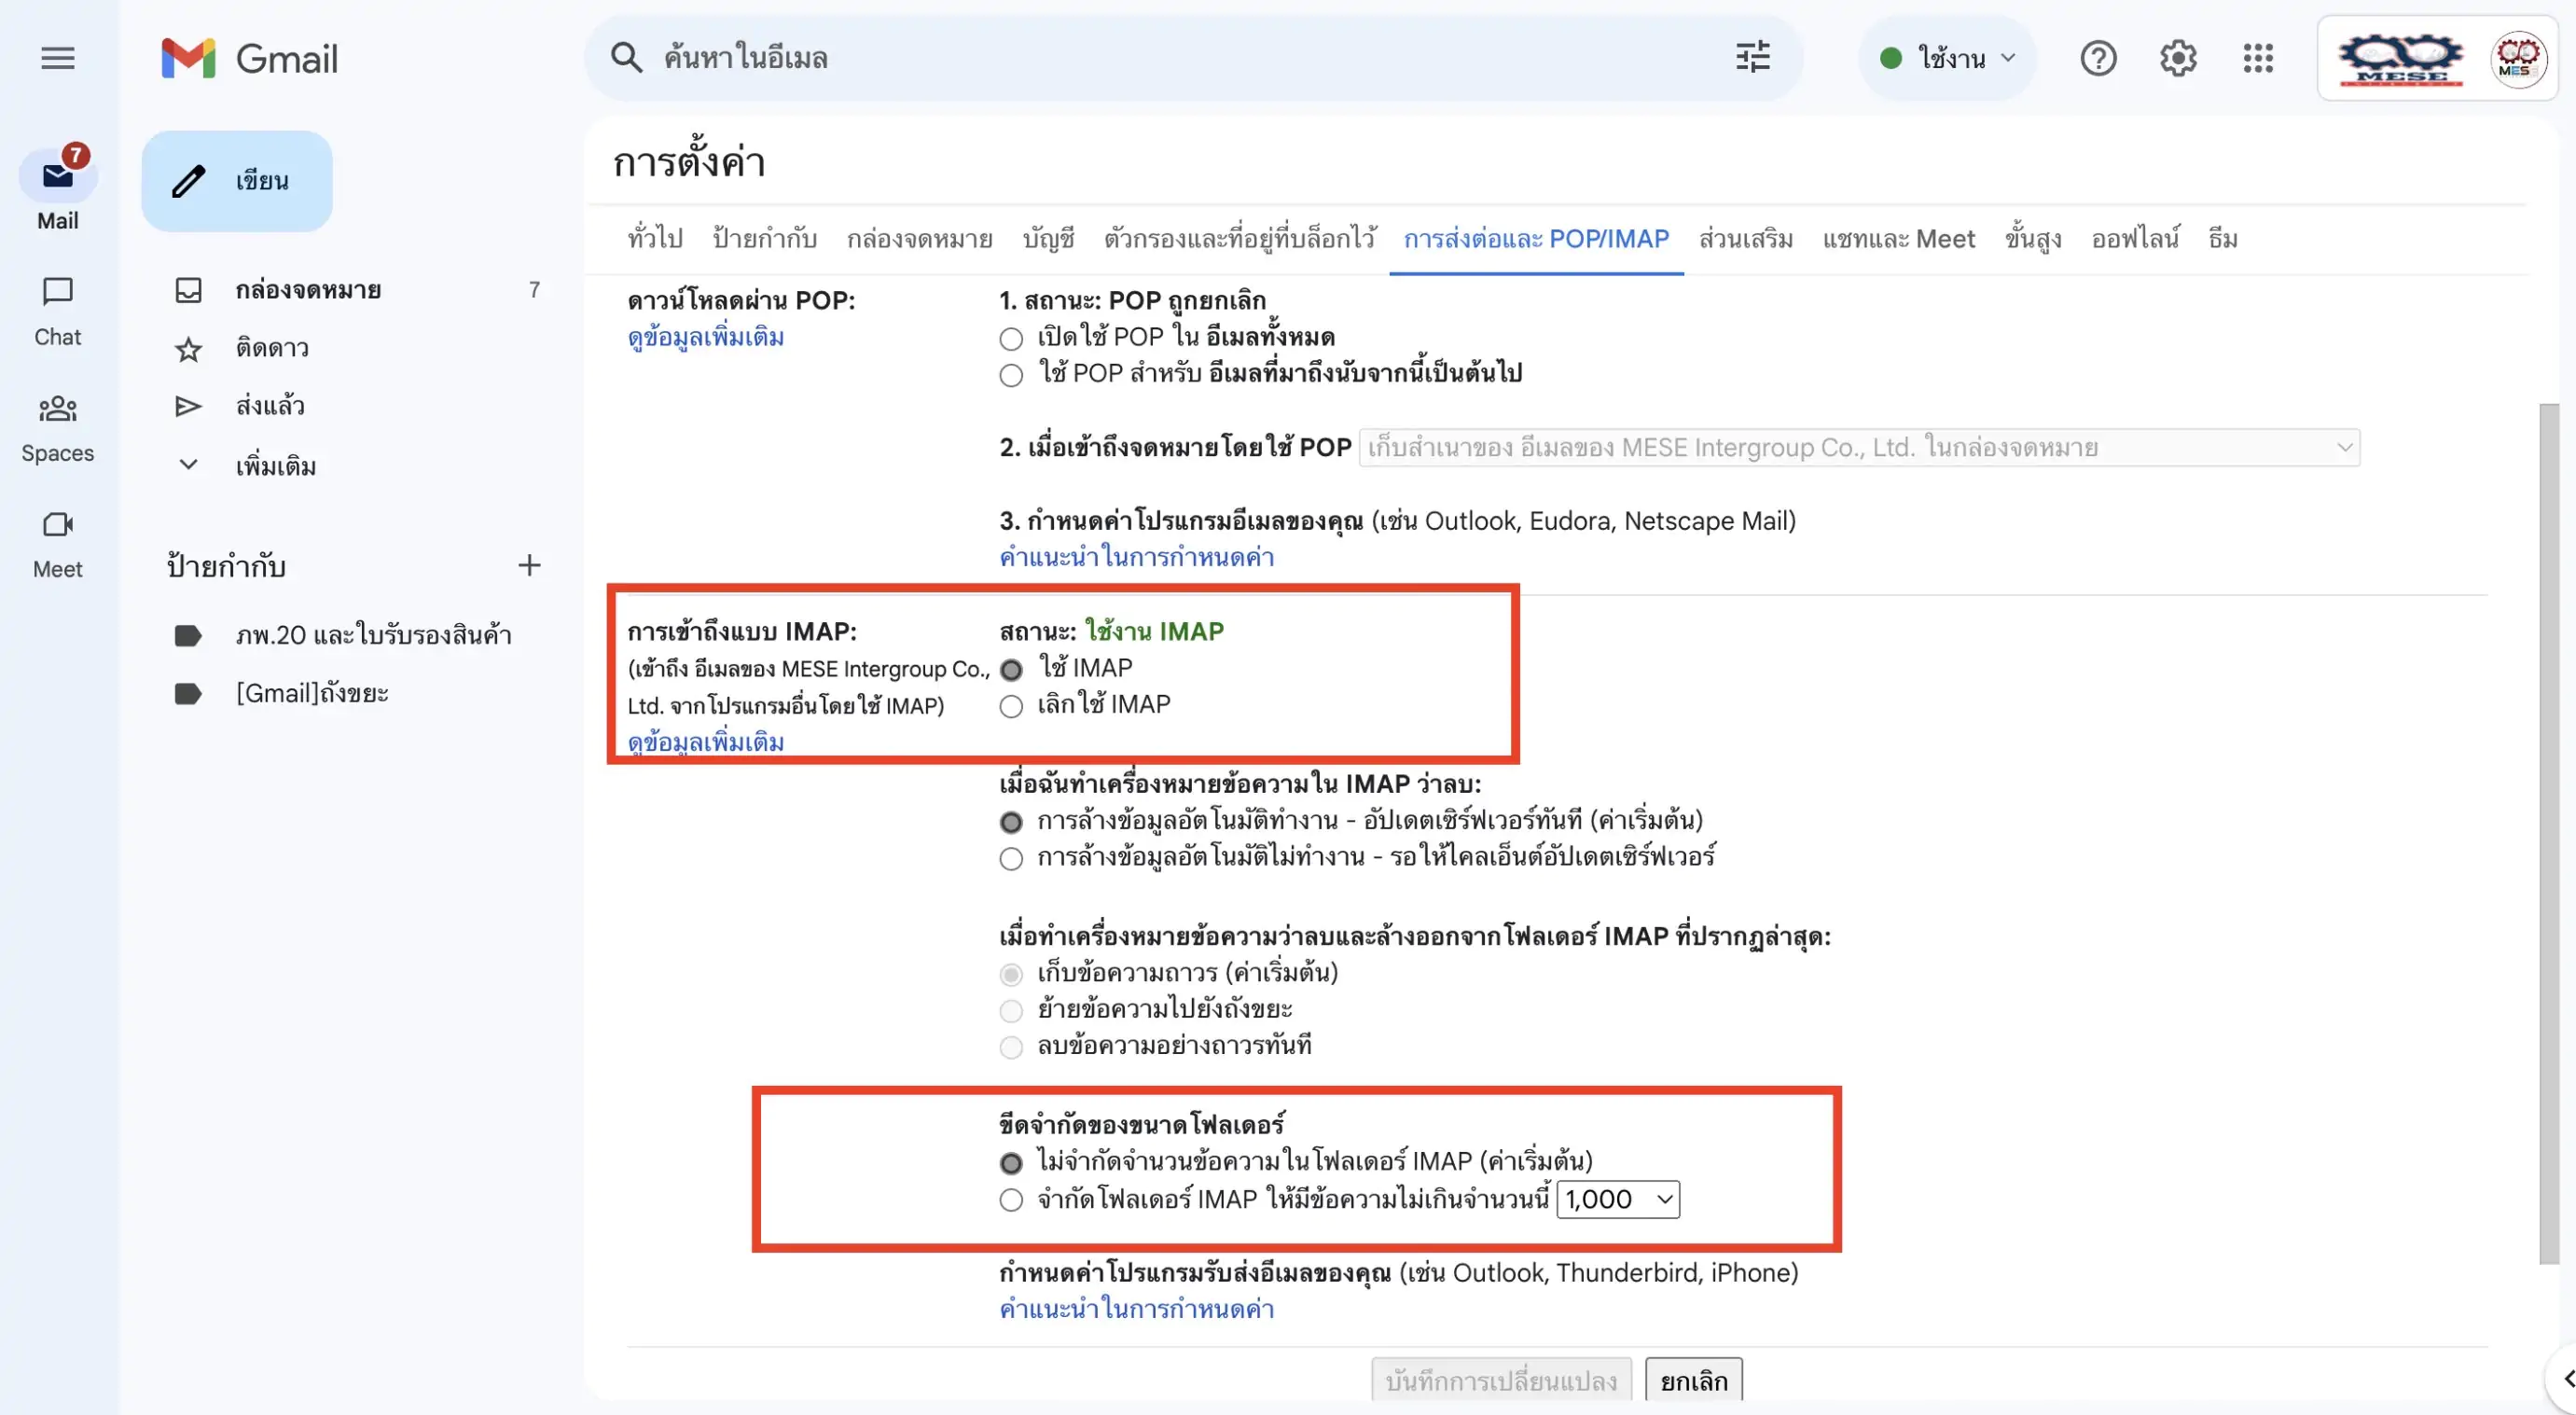
2.เลือก การส่งต่อและ POP/IMAP
>> ติ๊ก ใช้ IMAP
>> เลือก ไม่จำกัดจำนวนข้อความในโฟลเดอร์ IMAP (ค่าเริ่มต้น)
>> กด บันทึกการเปลี่ยนแปลง
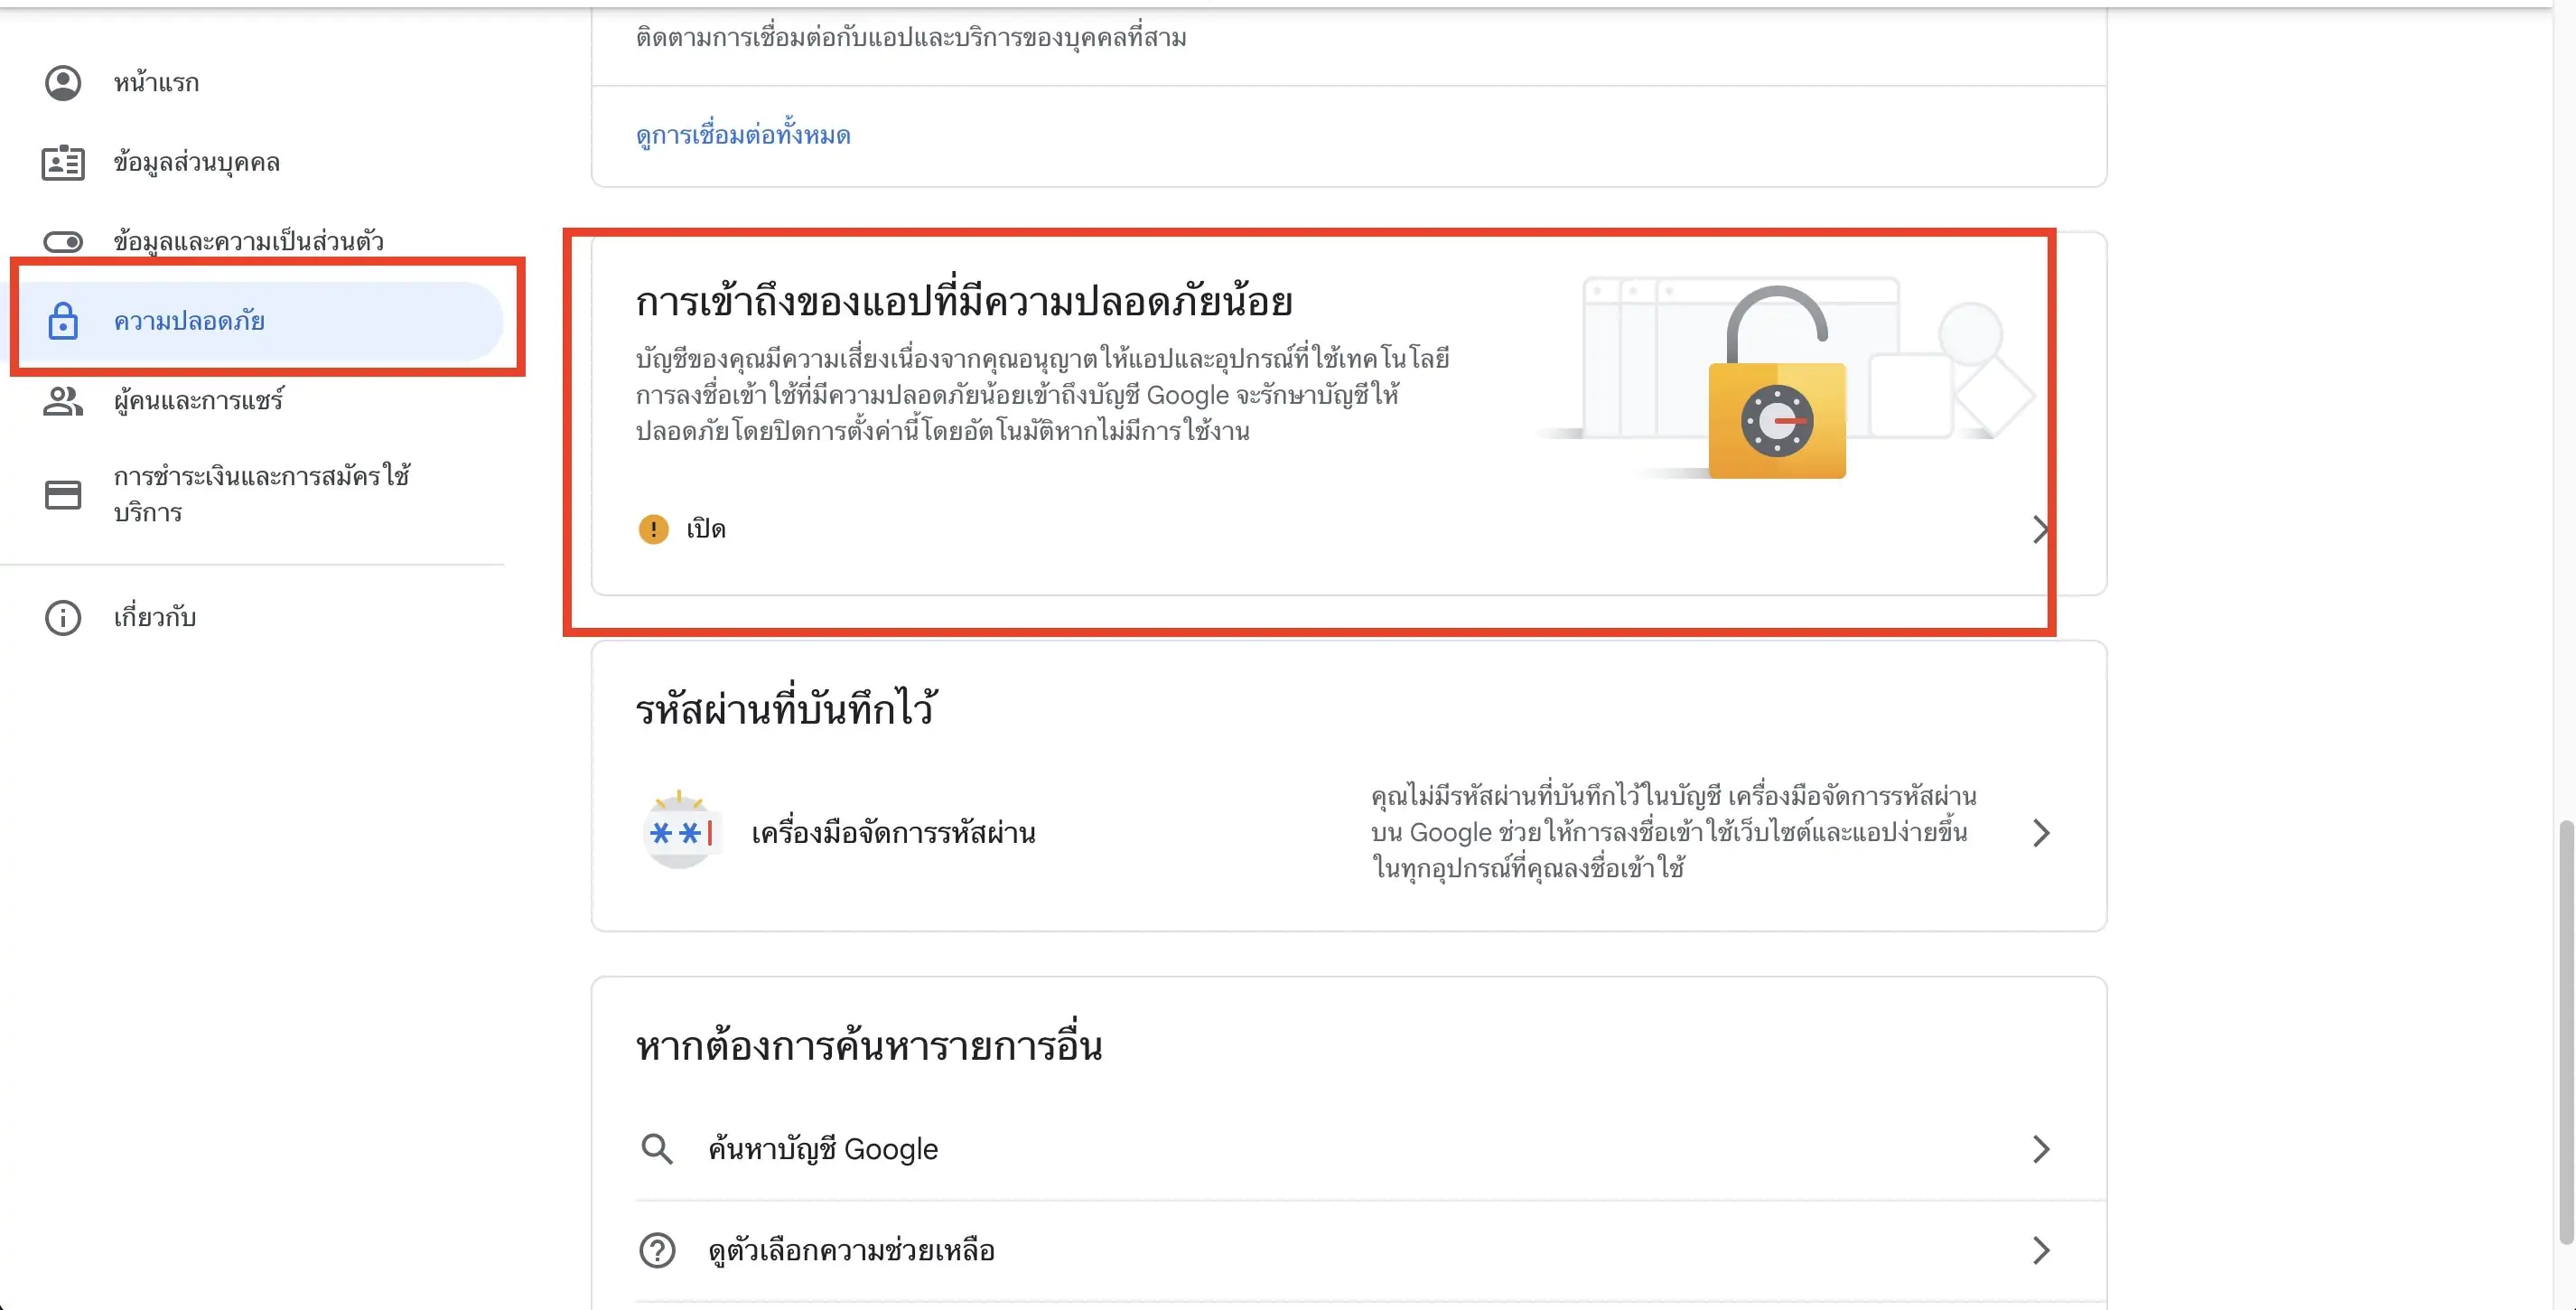
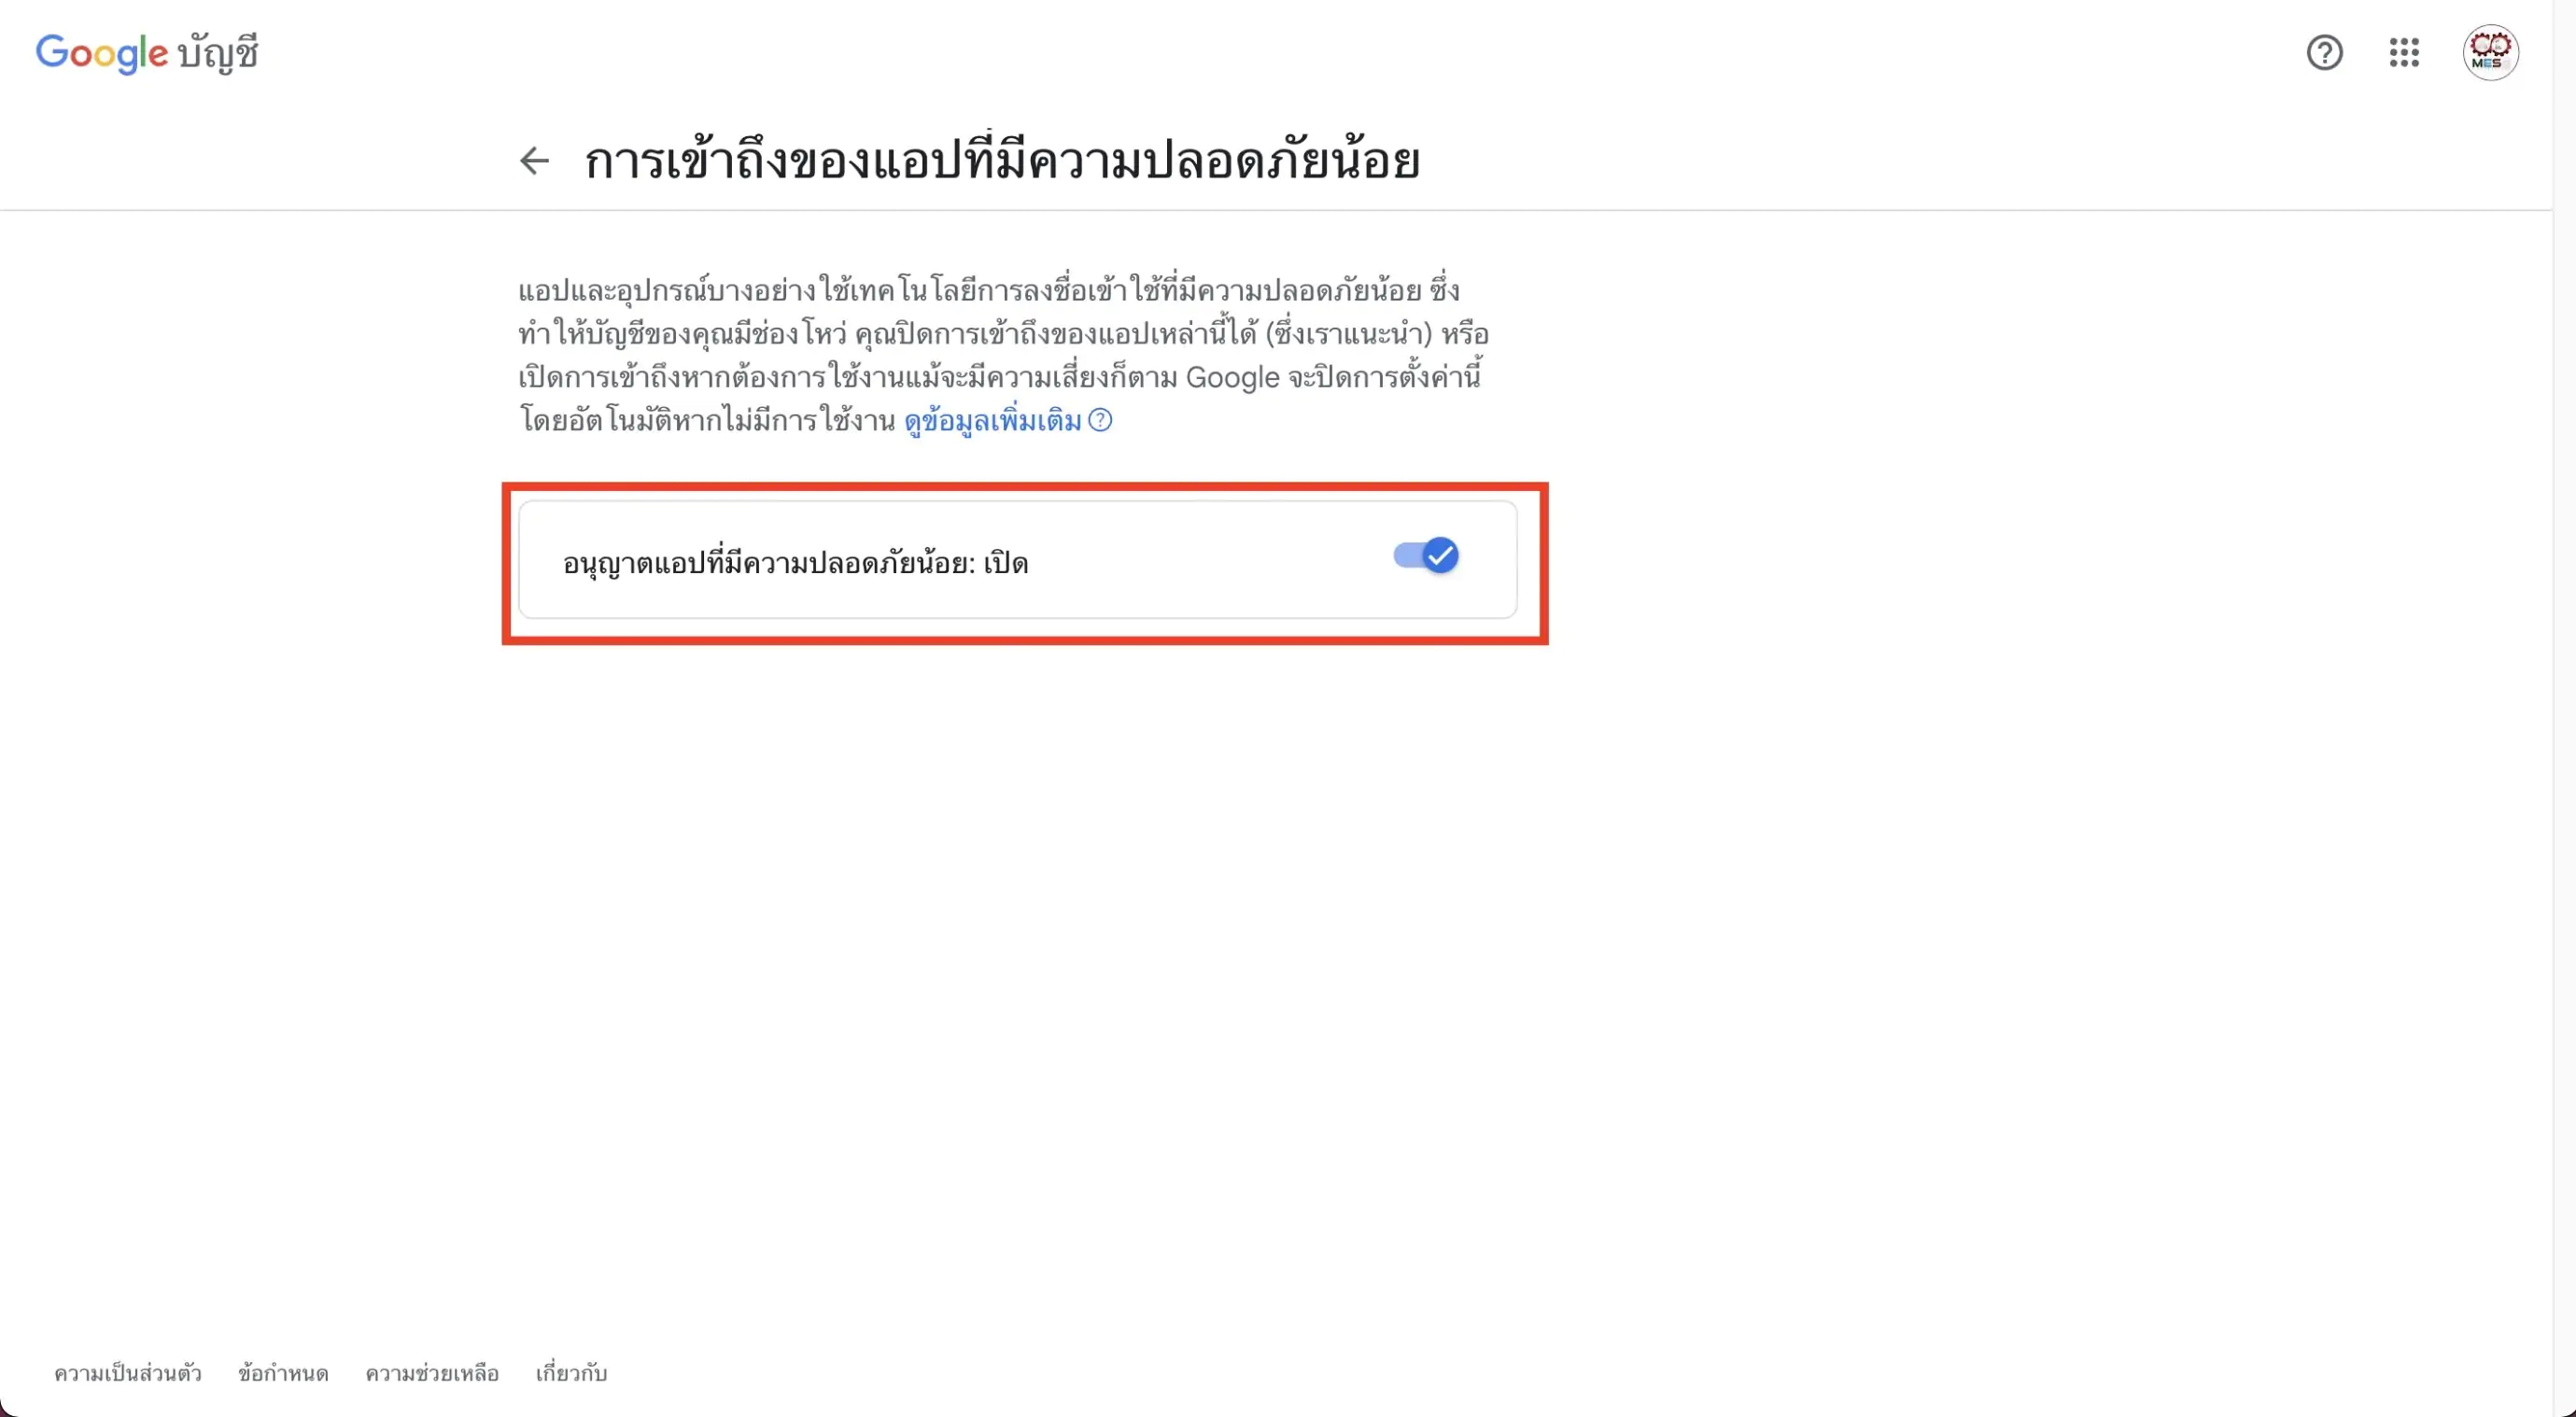
3. เข้า login ที่ https://accounts.google.com เเละเข้าไปเปิดความปลอดภัยน้อย
โดยไปที่เมนู ความปลอดภัย (security) หรือ https://myaccount.google.com/security
(ทำทั้ง 2 อีเมล์ต้นทาง และปลายทาง)
4. login เข้าสู่ Admin Console : https://admin.google.com
ไปที่ หน้าแรก >> ความปลอดภัย >> แอปที่มีความปลอดภัยน้อย
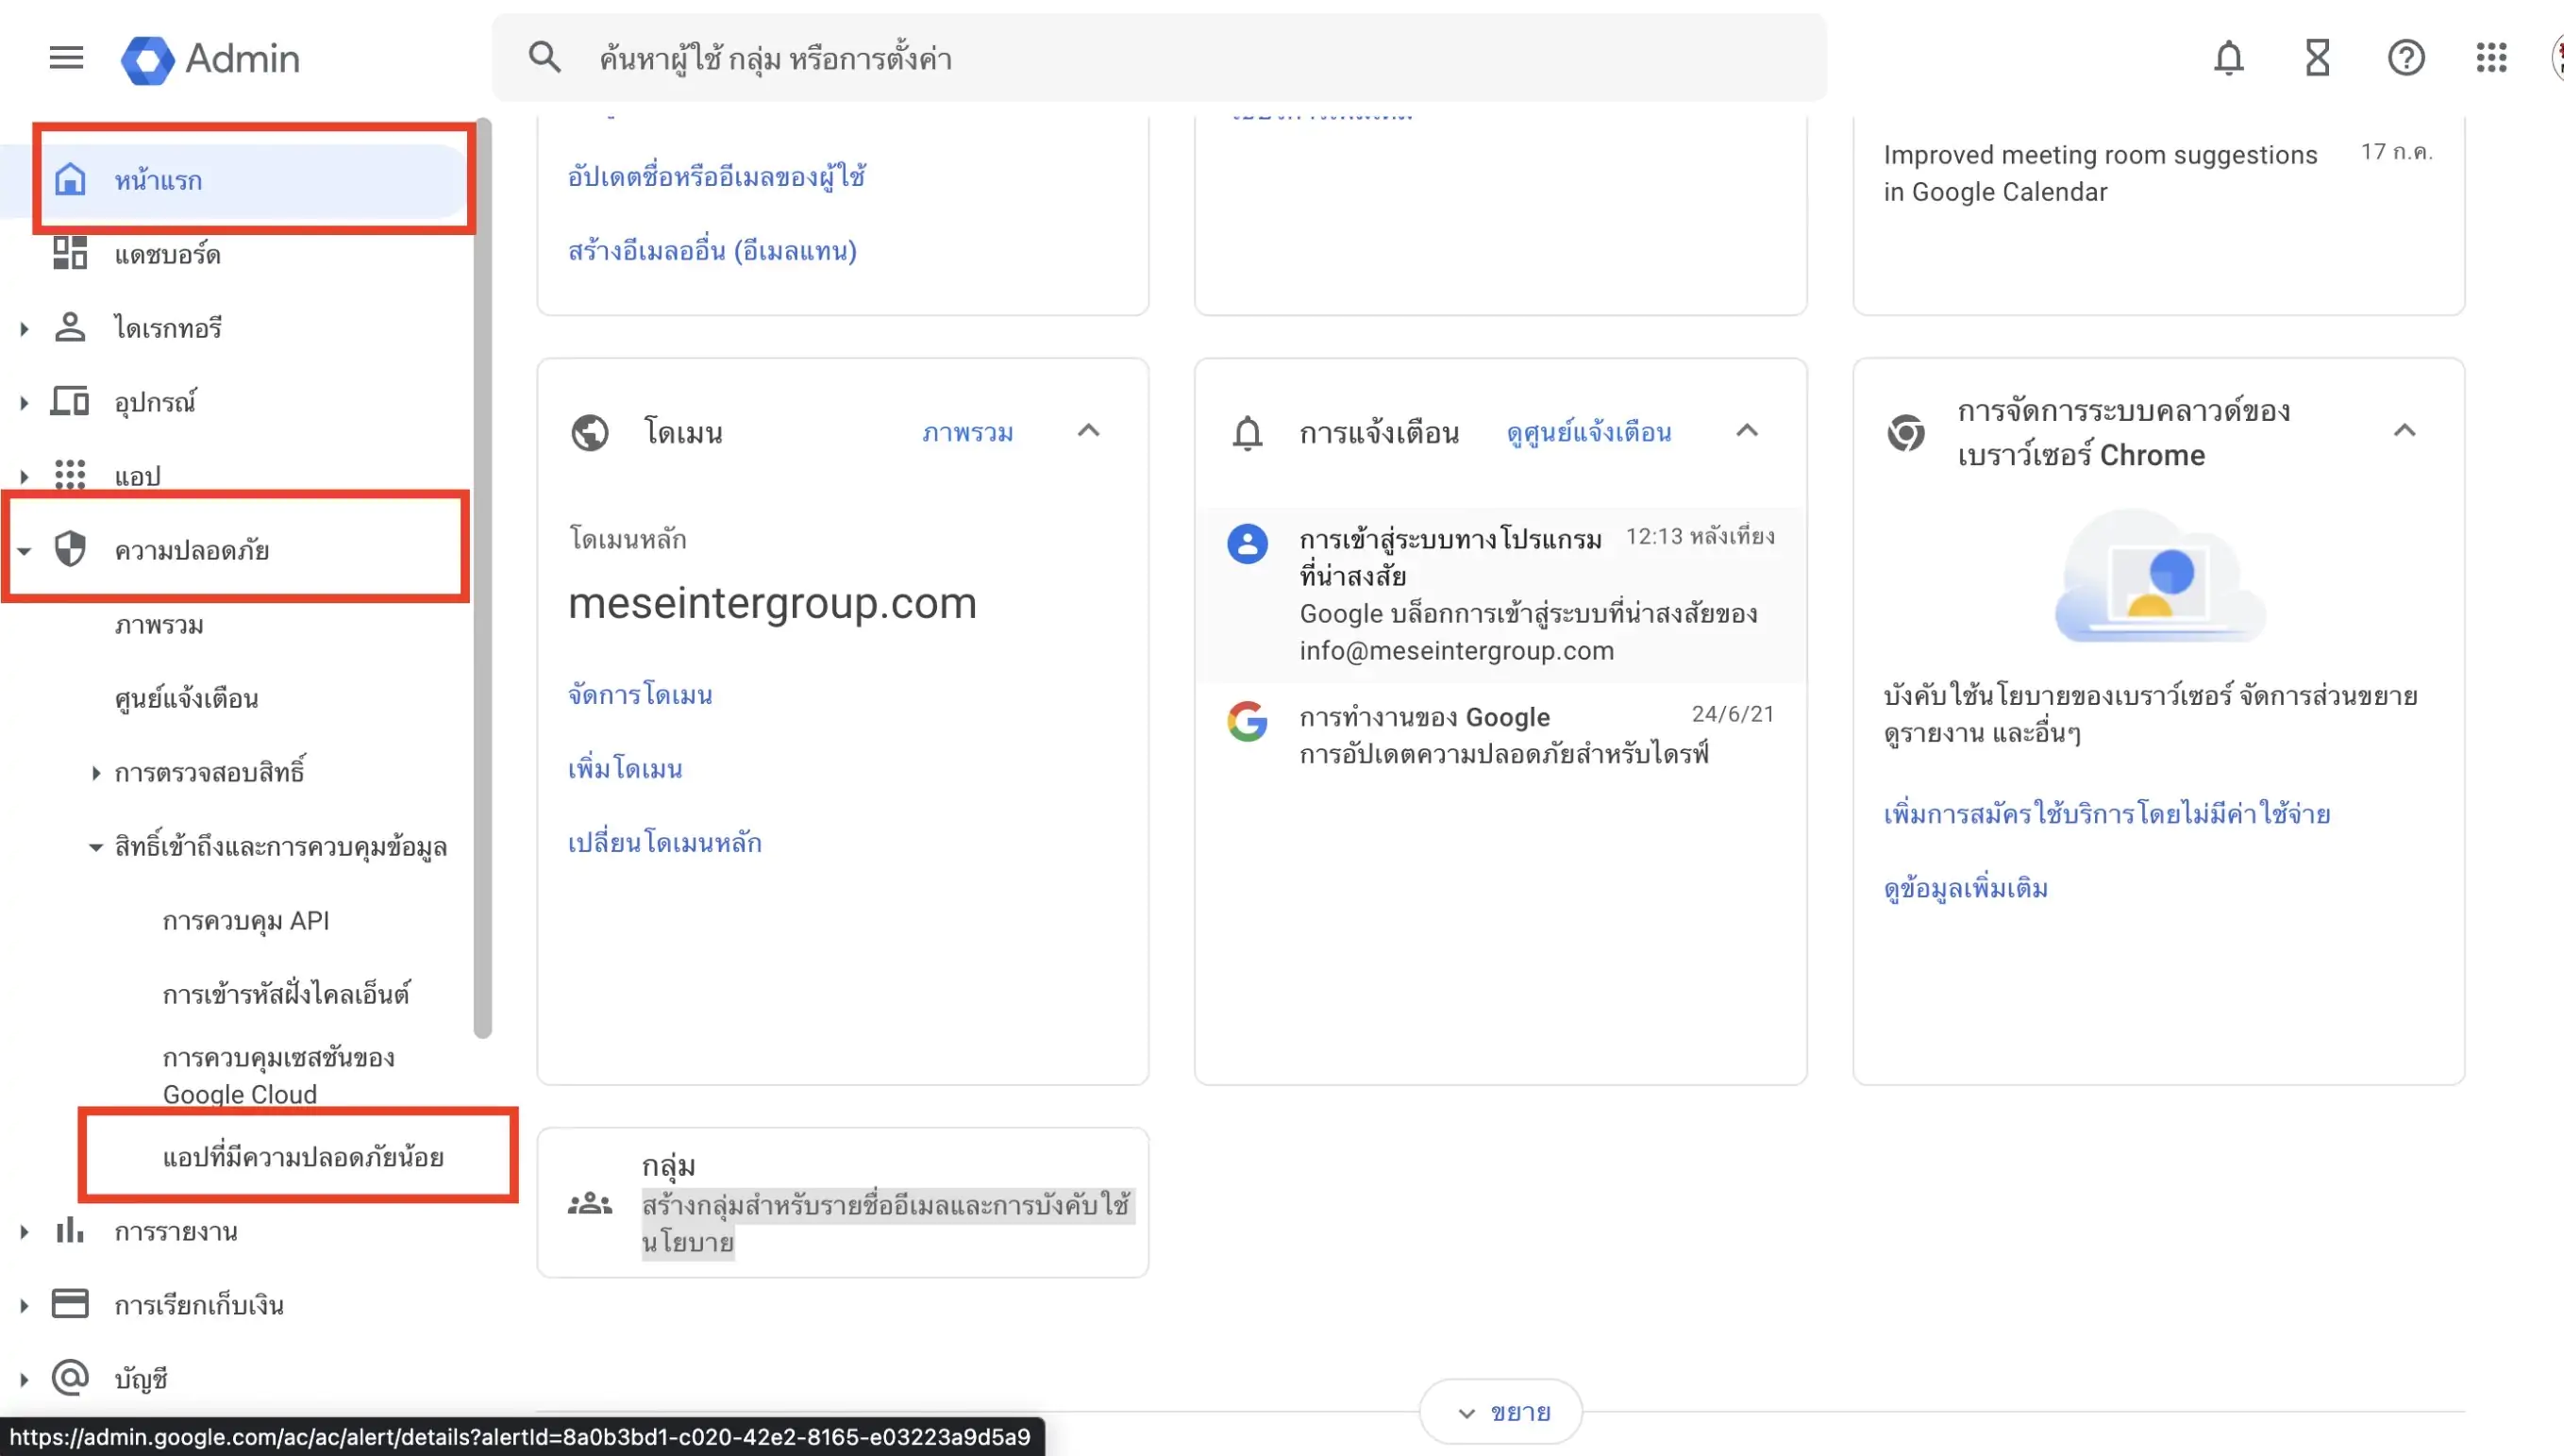
5.กดเลือก อนุญาติให้ผู้ใช้จัดการการเข้าถึงแอปที่มีความปลอดภัยน้อย
>> บันทึก
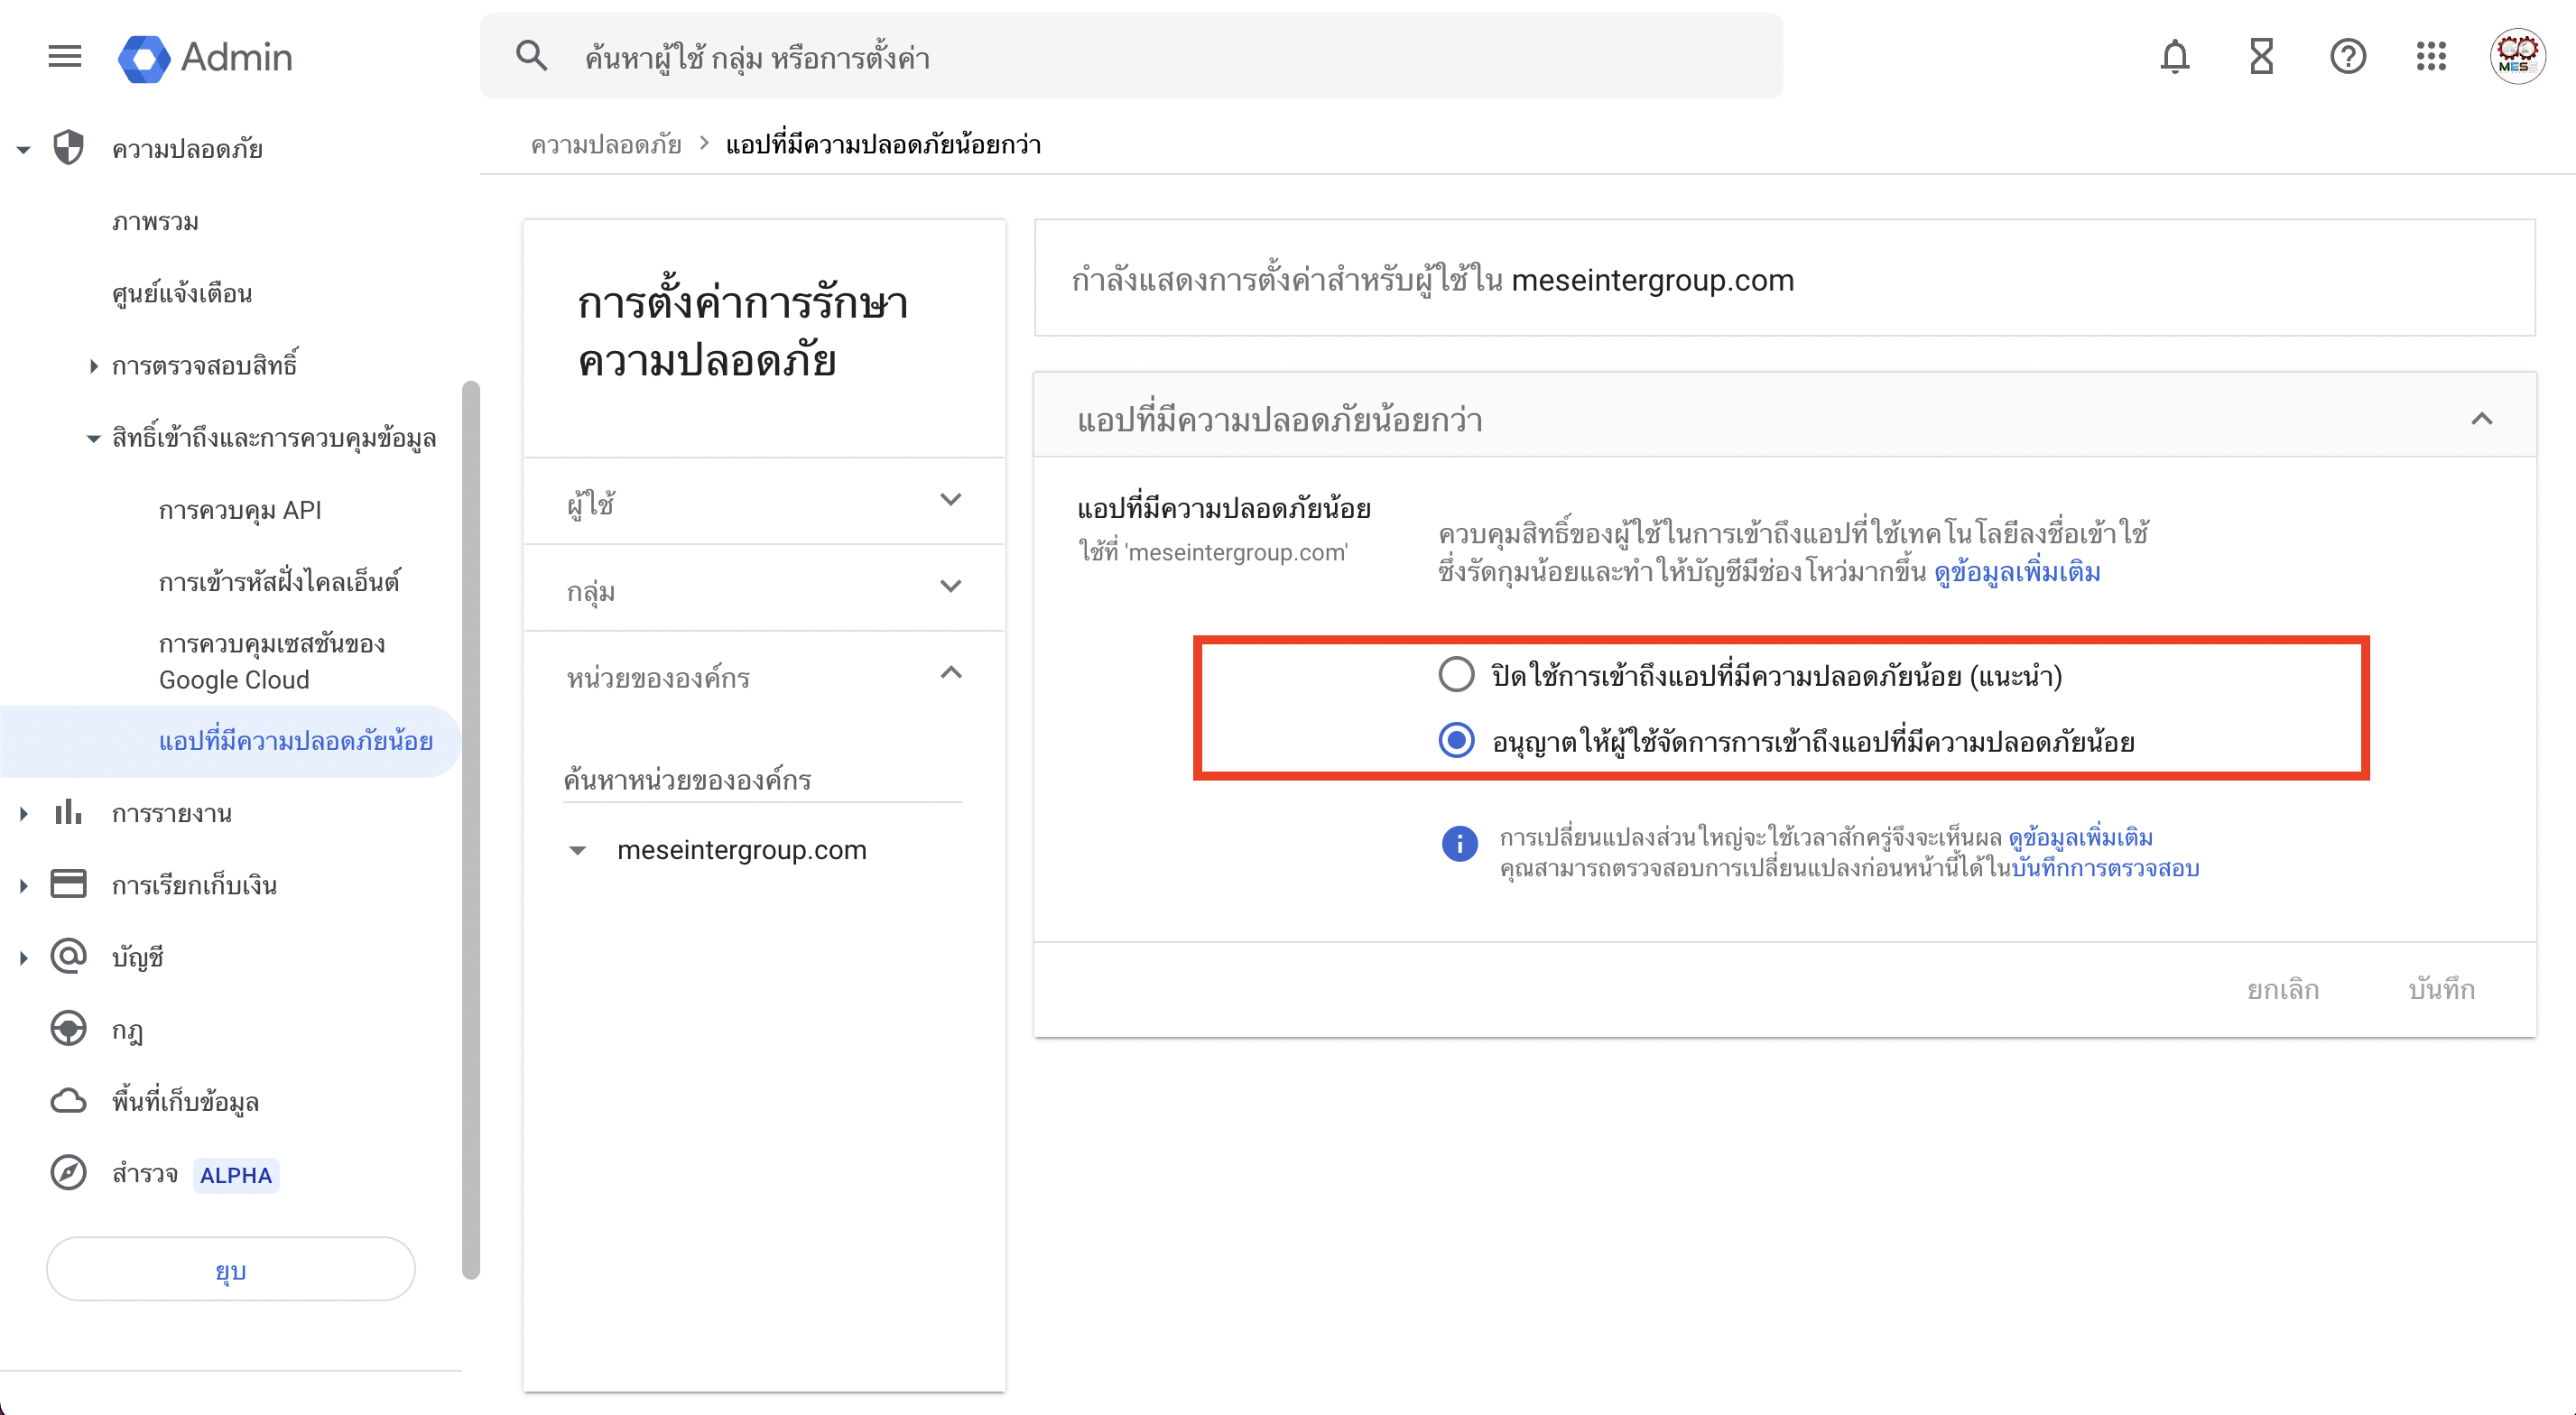
6.ขั้นตอนการย้ายข้อมูลอีเมล์ (ดำเนินการที่ Admin.google ของอีเมล์ปลายทาง)
>>กด ขีดสามขีด เพื่อเปิดเเถบเมนู
>> @บัญชี (@Account)
>> การย้ายข้อมูล (Data migration)
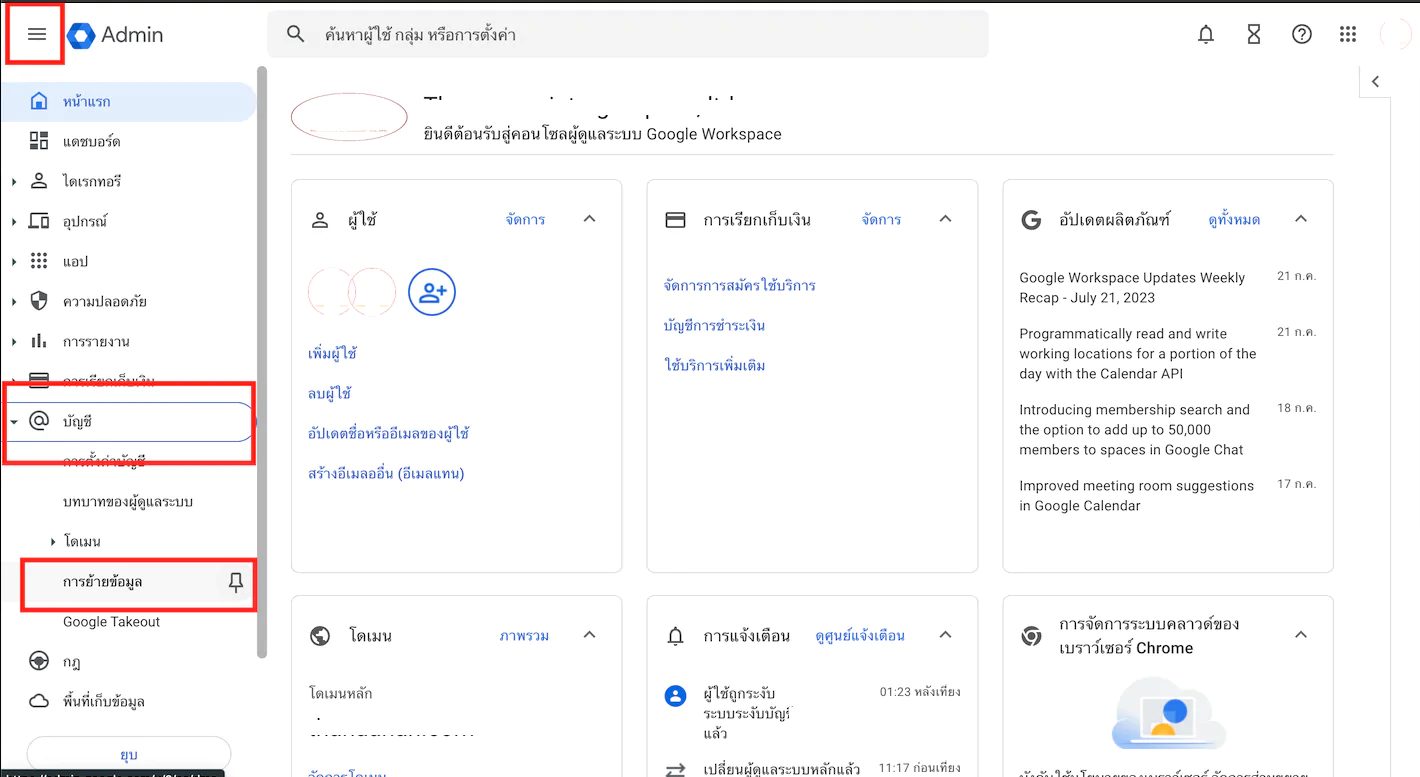
7.กด ตั้งค่าข้อมูลการย้าย (SET DATA MIGRATION UP)
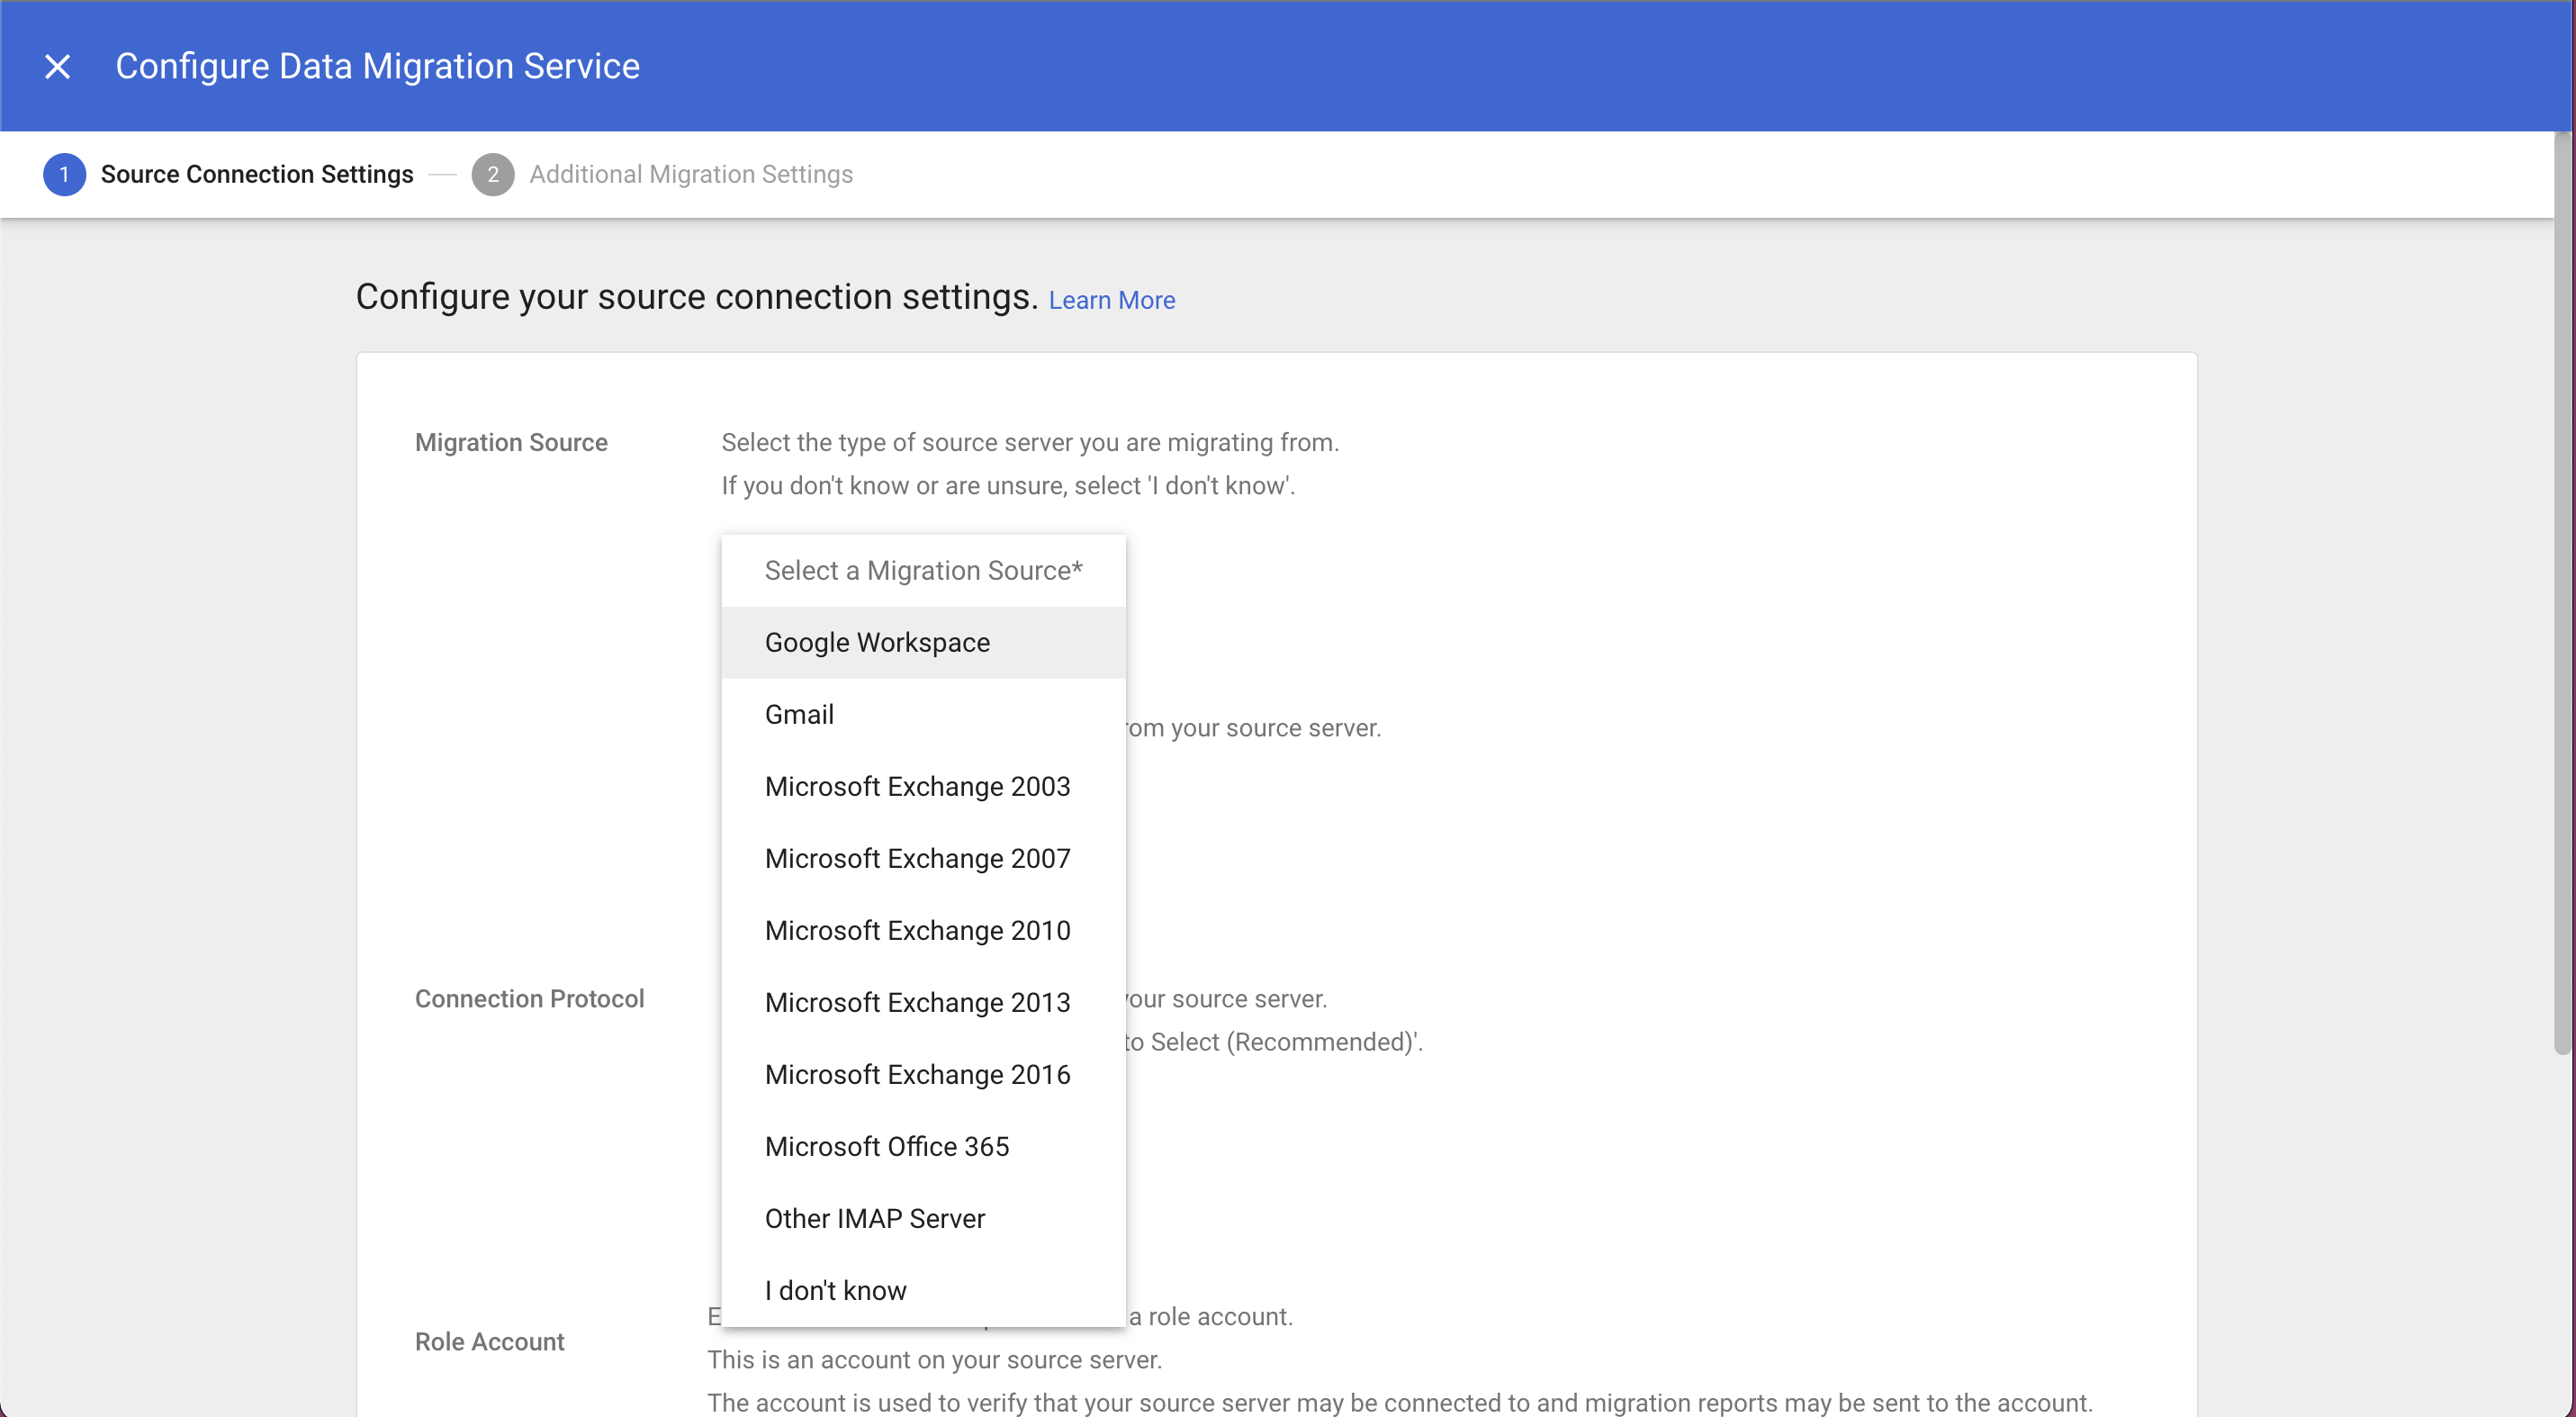
8. เลือก google workspace
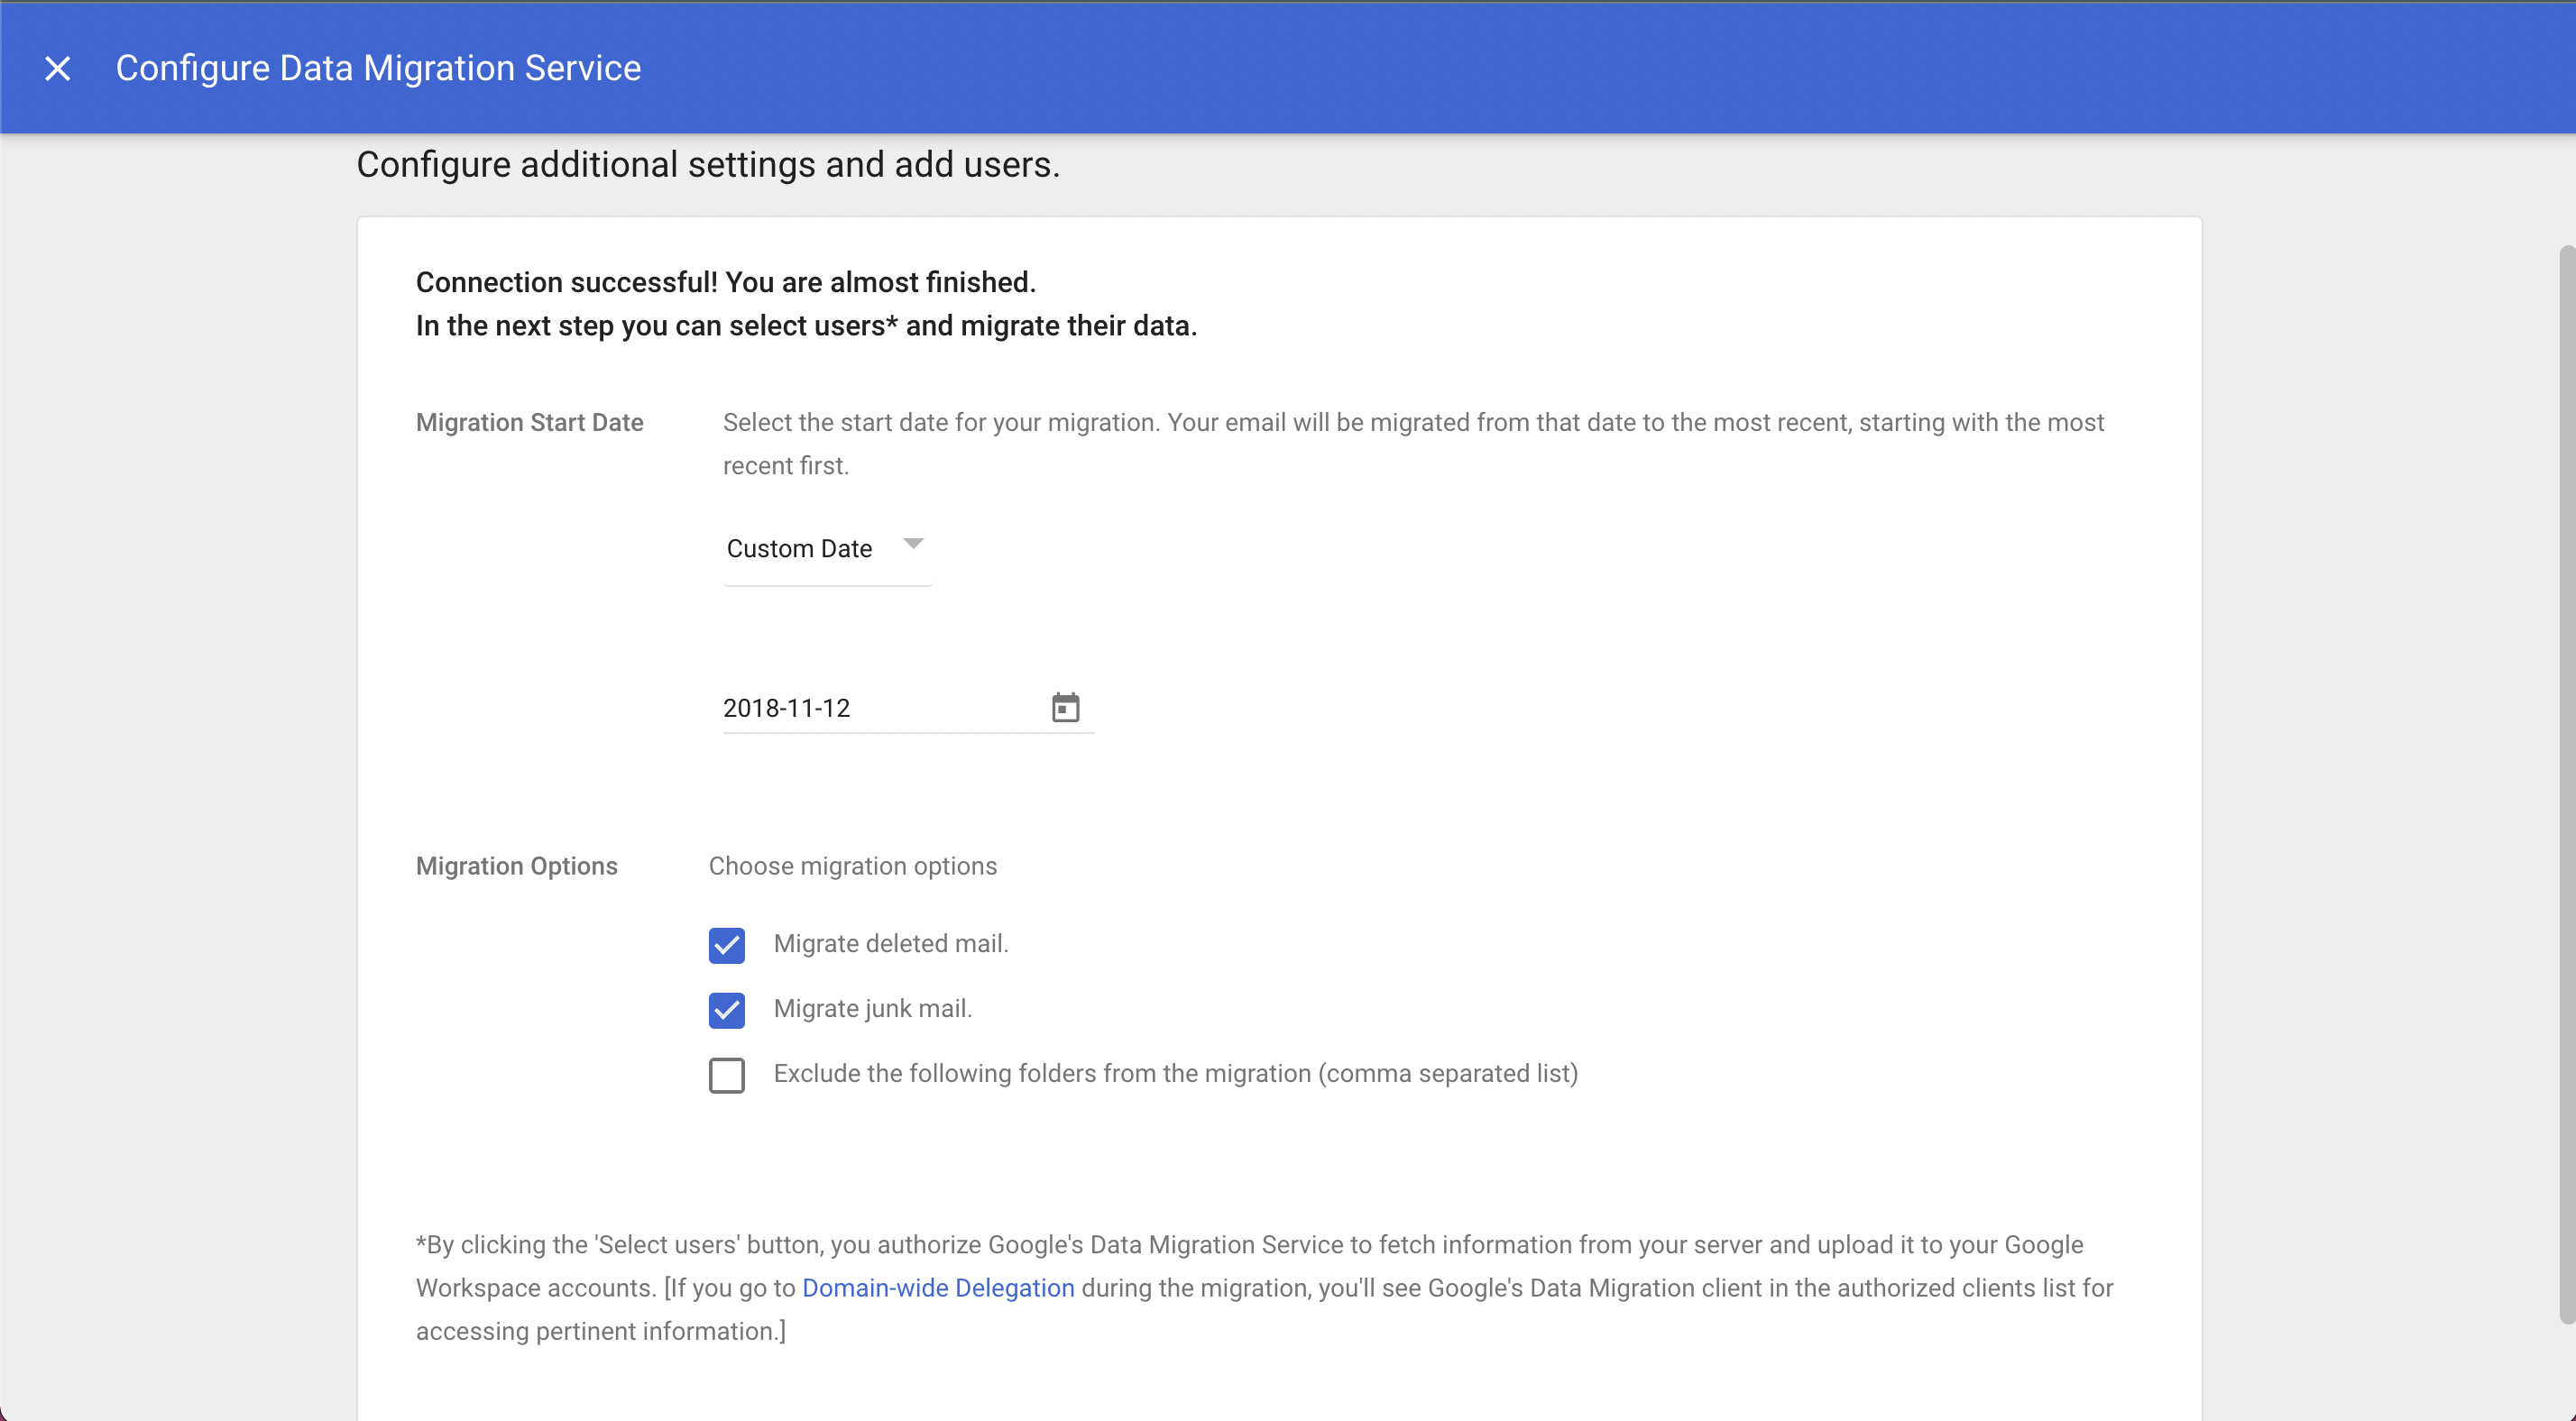
9. Migration Start Data : สามารถ coutom date ได้ว่าจะให้ย้ายข้อมูลเมล์ตั้งเเต่วันที่เท่าไหร่ หรือสามารถเลือกเป็นเจาะจงว่าเอาข้อมูลย้อนหลัง 1ปี 6เดือนได้เช่นกัน
Migration Options : สามารถเลือกว่าต้องการย้ายข้อมูลตามตัวเลือกด้านล่างมาด้วยหรือไม่
ตัวเลือกสุดท้าย exclude the following folders from the migration : พิมพ์ชื่อโฟร์เดอร์ที่ไม่ต้องการย้ายข้อมูลมาด้วย (หากมี)
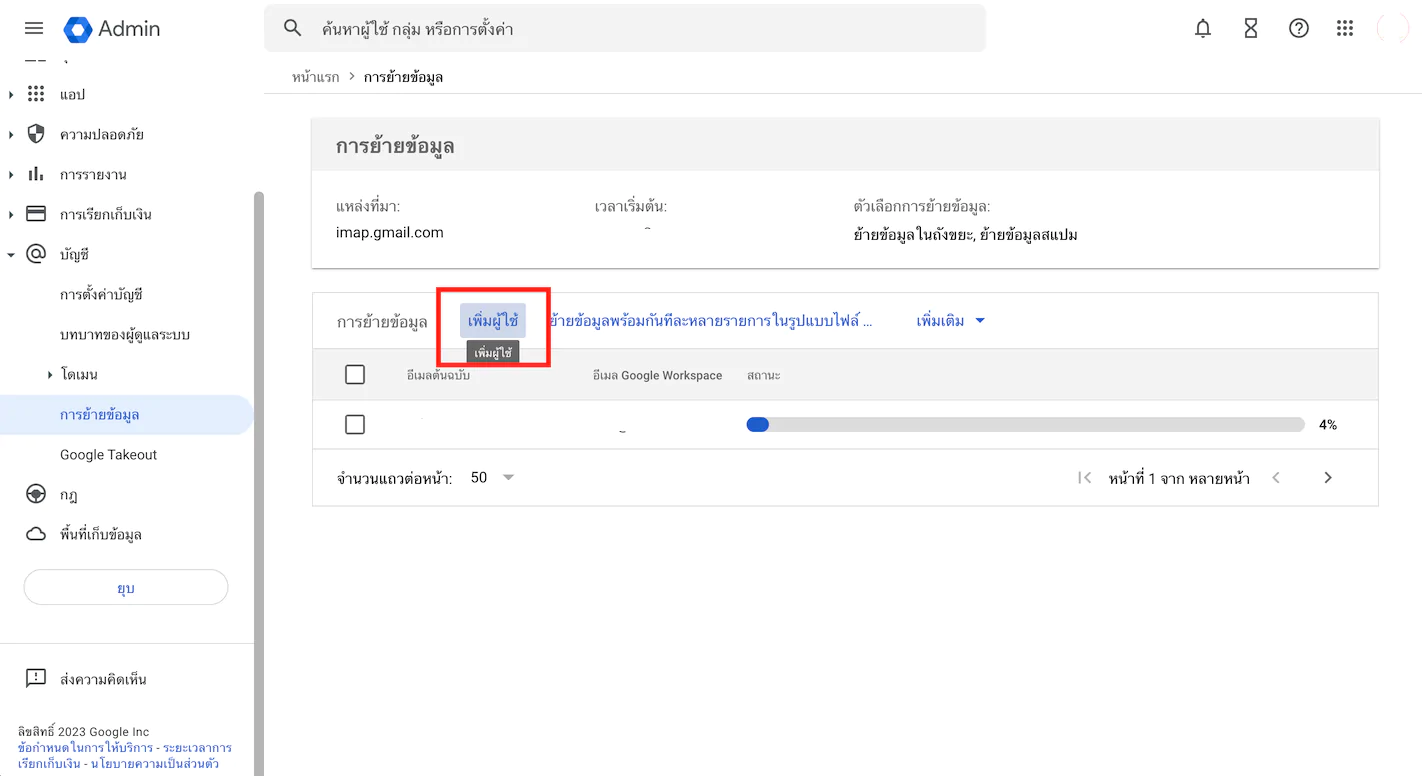
10. กด เพิ่มผู้ใช้ (Add User)
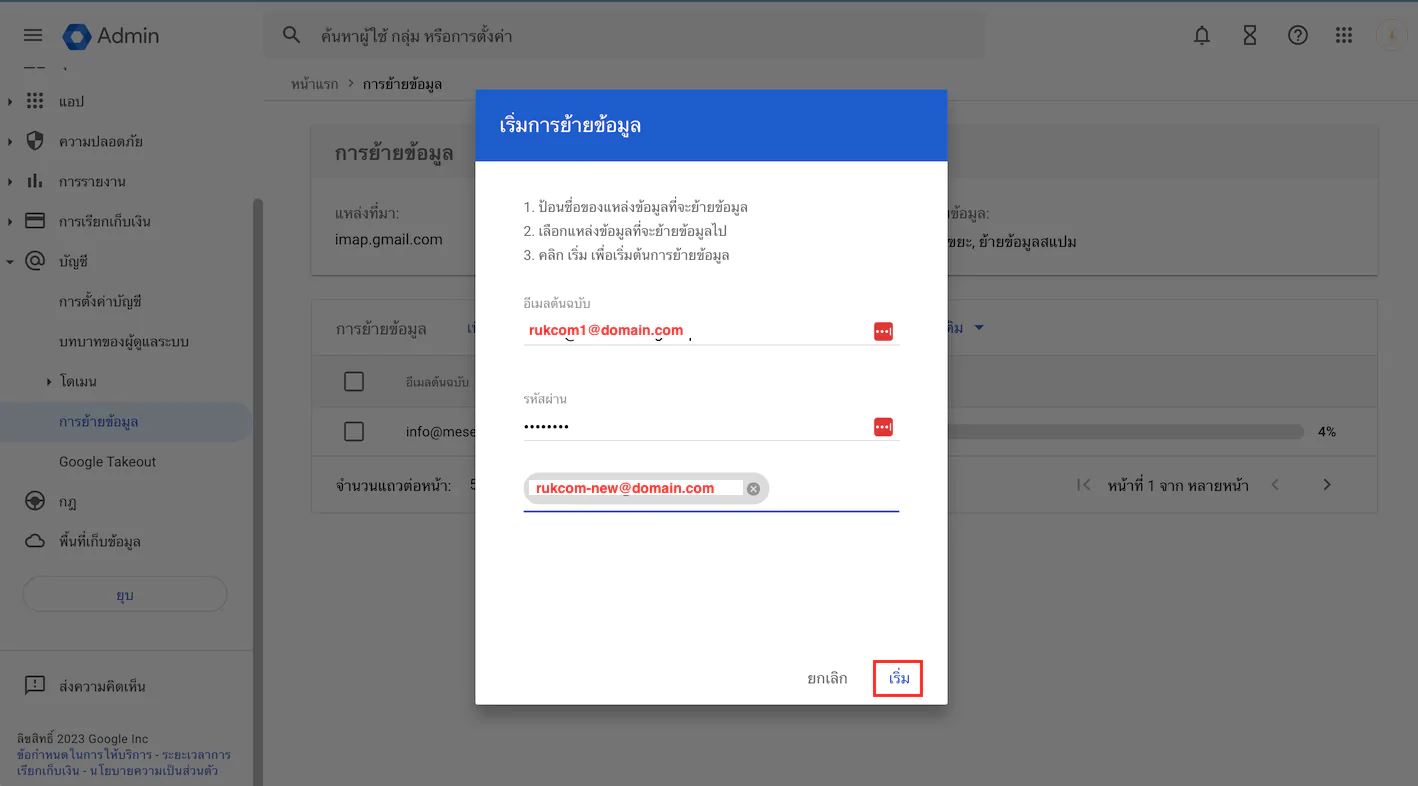
11. อีเมล์ต้นฉบับ : กรอก อีเมล์ต้นทาง
รหัส : ใส่ Password อีเมล์ของอีเมล์ต้นทาง
ช่องสุดท้าย : กรอกอีเมล์ปลายทางที่ต้องการวางข้อมูล
กด เริ่ม
12.หากกด เริ่ม เรียบร้อยเเล้วจะเเสดงเเถบโหลดข้อมูลเป็นเปอร์เซ็นให้เพิ่มเติม
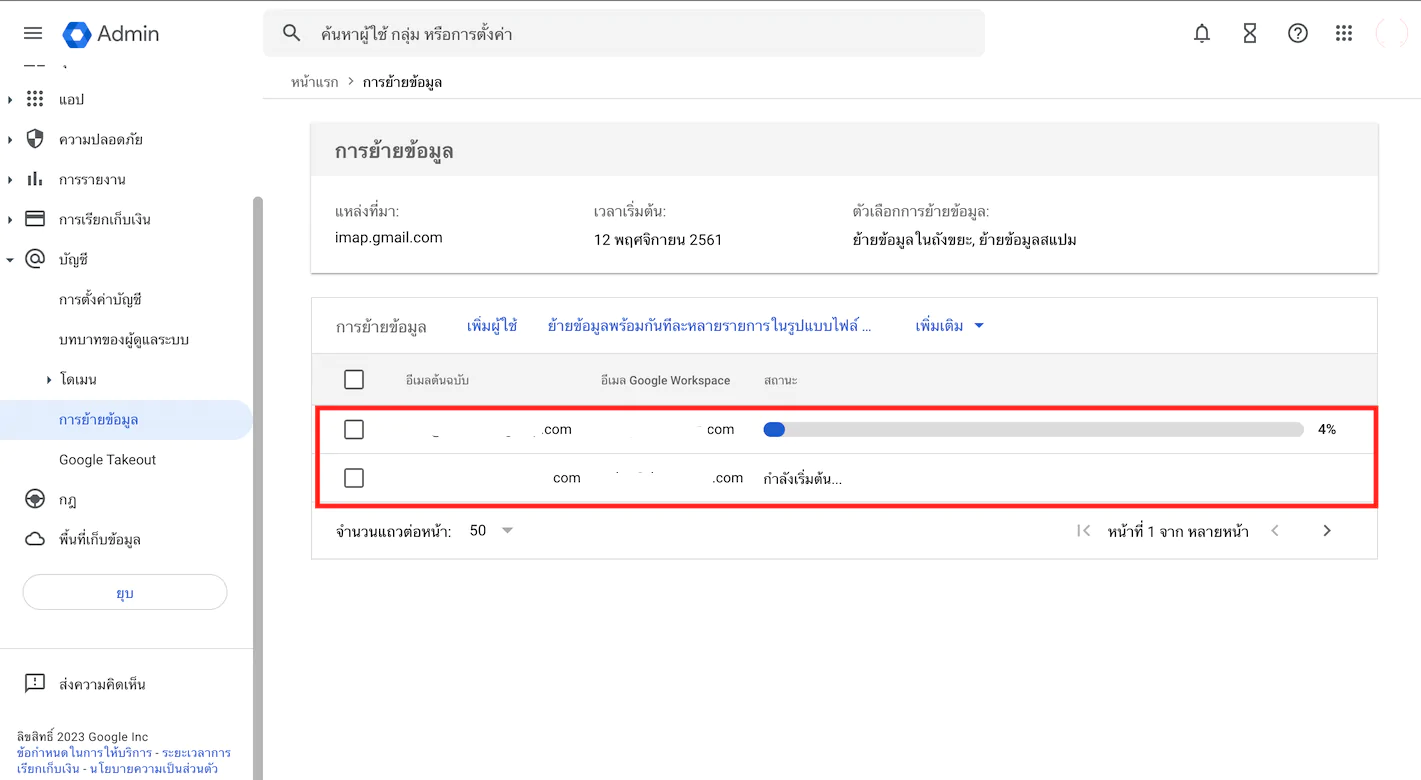
13. หากข้อมูลย้ายเรียบร้อยเเล้วจะเเสดงข้อความ เสร็จสมบูรณ์


