วิธีตั้งค่าสำหรับ MAC OS
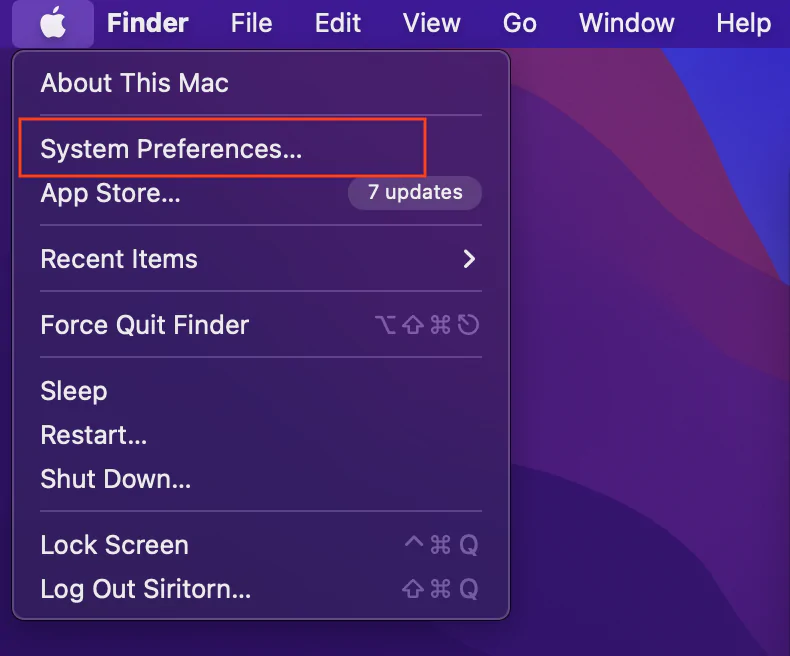
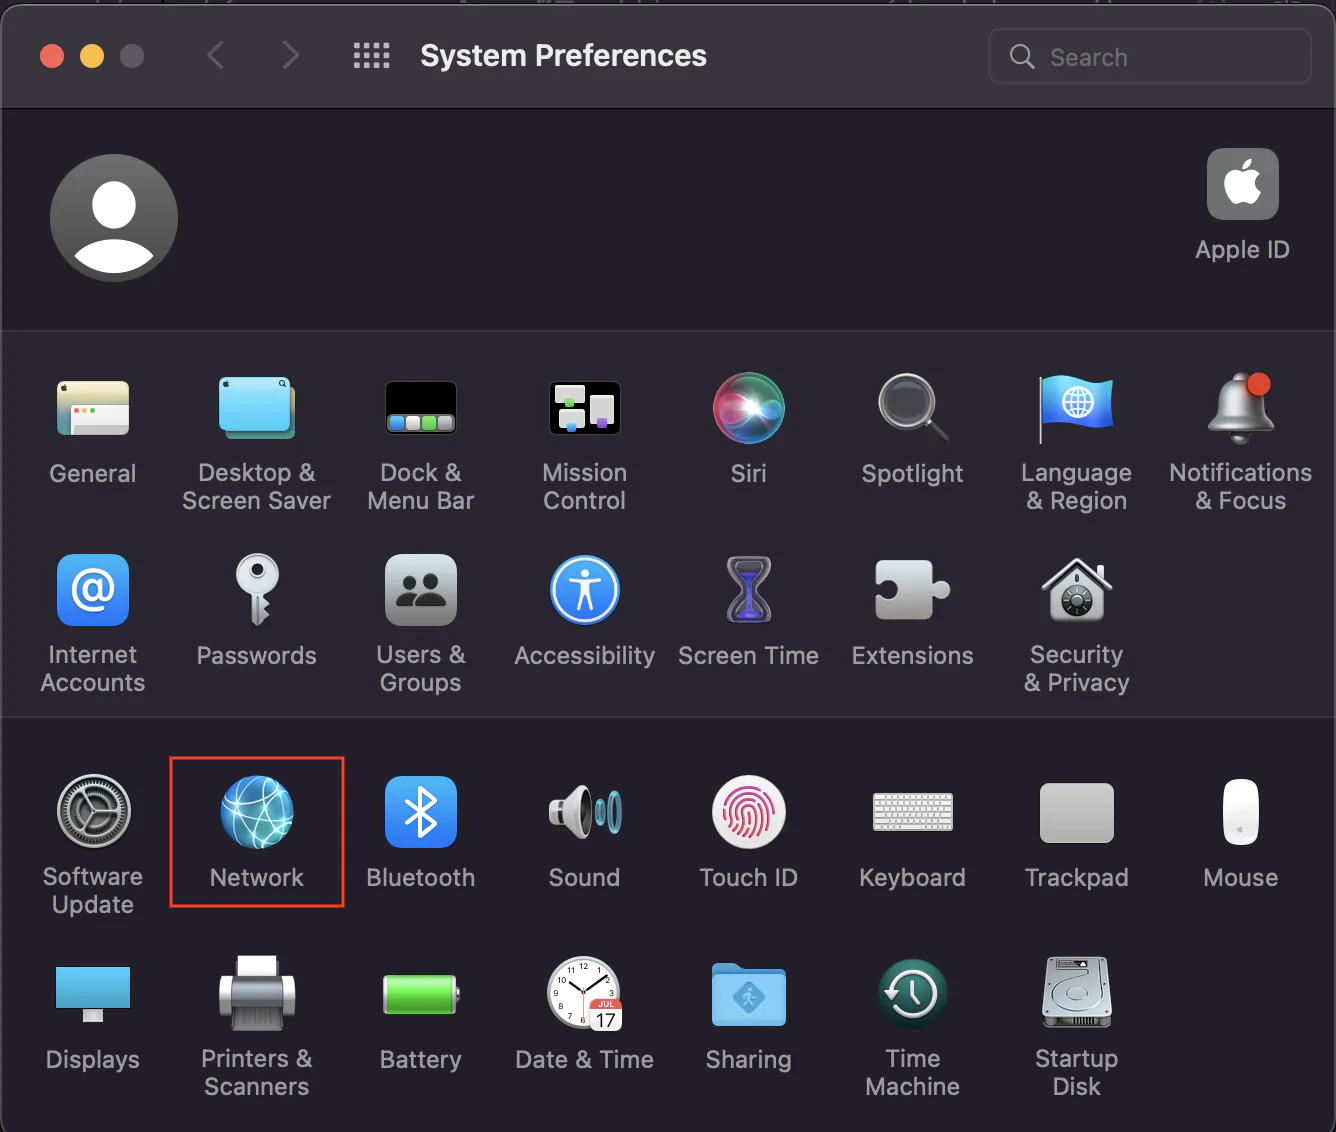
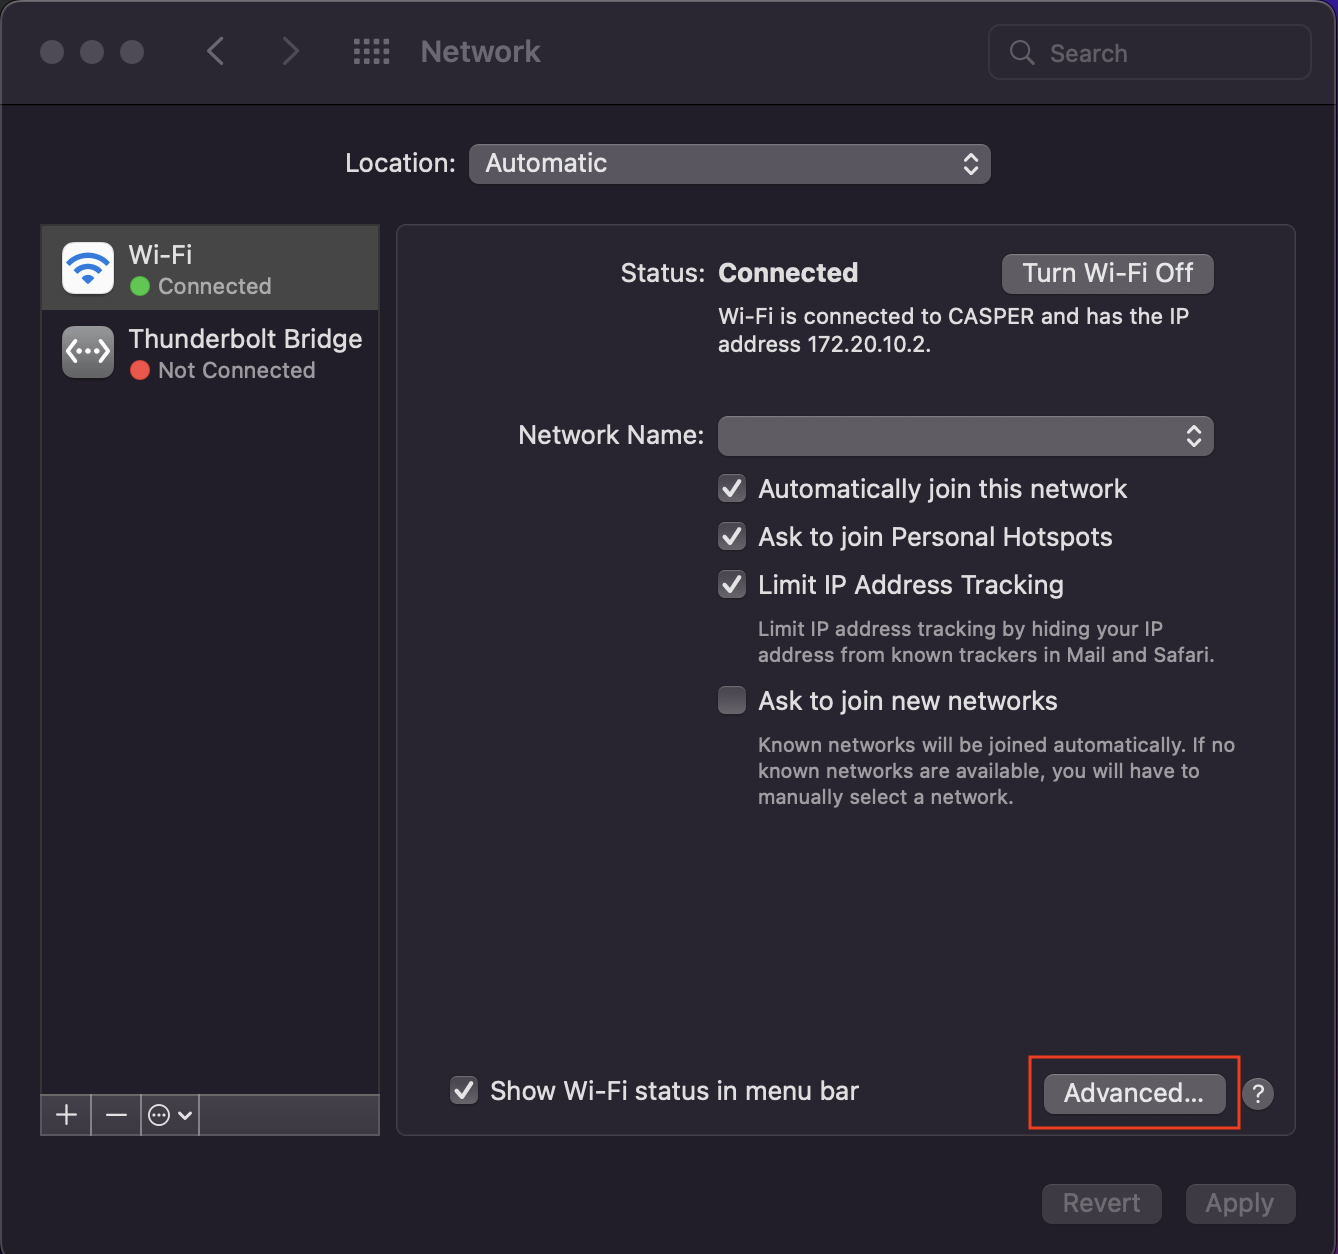
1. เข้าไปที่ System Preferences (ตั้งค่า) > เลือก Network (เครือข่าย)
2. เลือกเครือข่ายที่มีการเชื่อมต่ออยู่
ดังภาพตัวอย่าง : มีการเชื่อมต่อ Wi-fi อยู่จึงเลือก Wi-fi และเมนูกด Advanced (ขั้นสูง)
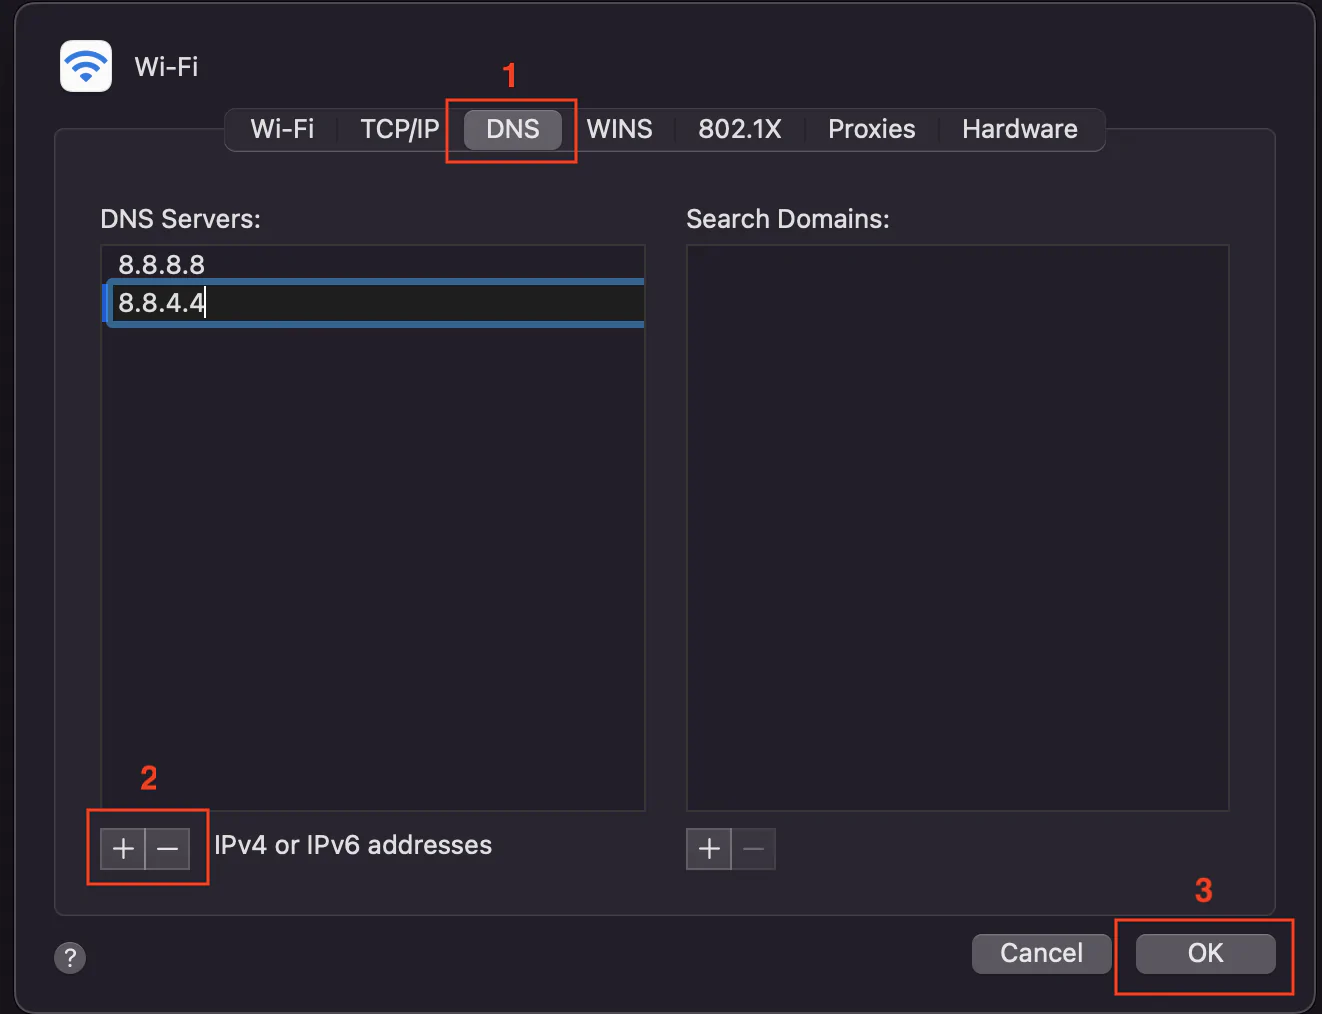
3. จากนั้นไปที่หัวข้อ DNS ตามหมายเลข 1 และ กดปุ่ม + ที่หมายเลข 2 แล้วพิมพ์ค่า DNS Swrvers : ดังนี้
- แถวแรก 8.8.8.8
- กดปุ่ม + อีกครั้งแล้วพิมพ์ 8.8.4.4
4. เสร็จแล้วกด OK ที่หมายเลข 3
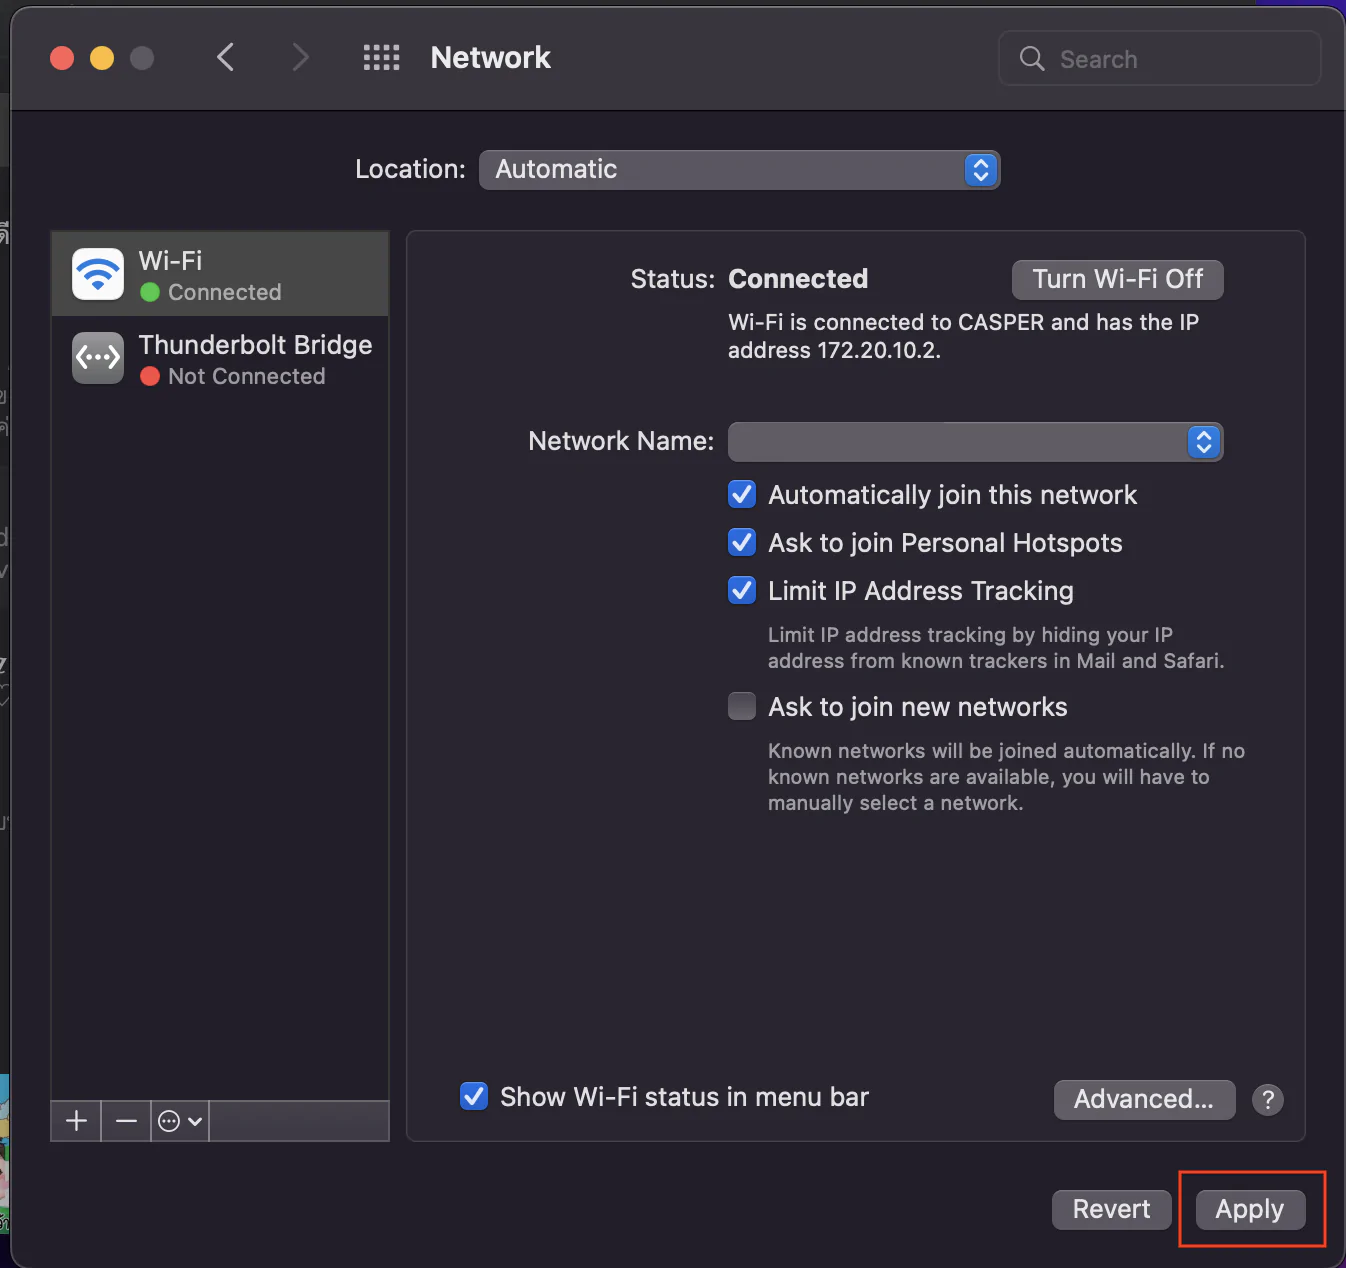
5. กด Apply เป็นอันเสร็จเรียบร้อย
วิธีตั้งค่าสำหรับ Windows 10
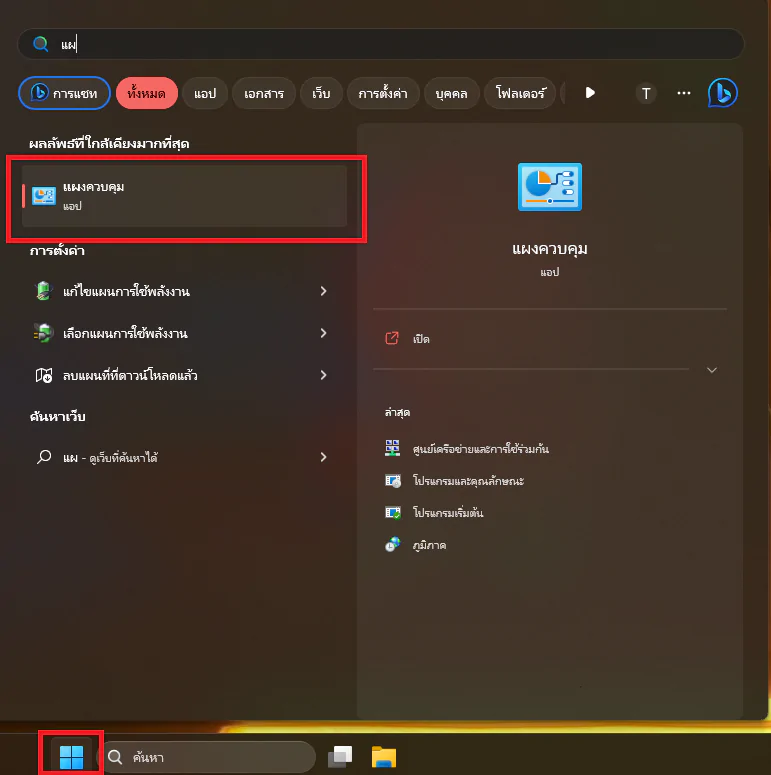
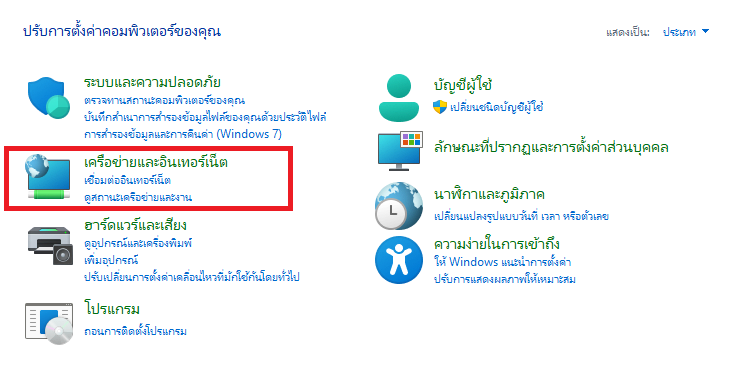
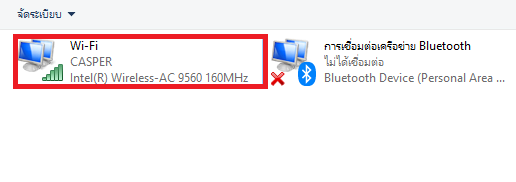
2. คลิกที่เมนู ดูสถานะเครือข่ายและงาน (View network status and tasks) -> เปลี่ยนแปลงเครือข่ายการตั้งค่าอะแดปเตอร์ (Change adapter settings)
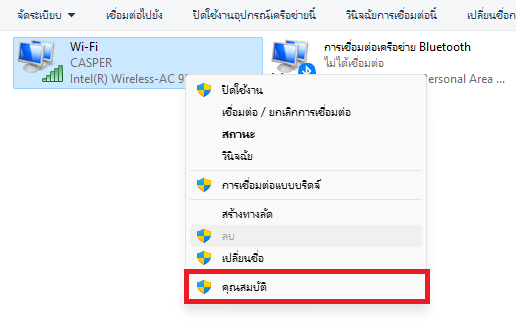
3. คลิกขวาที่ Internet ที่ใช้งานอยู่ เลือก คุณสมบัติ (Properties)


4. เลือก Properties. หากมีข้อความเด้งเพื่อขอ รหัสผ่านของ administrator ก็สามารถกรอกได้เลย
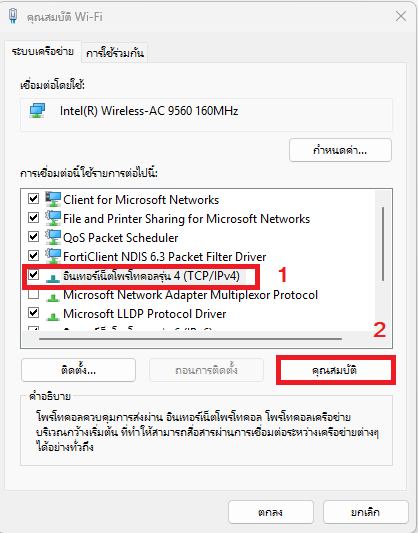
5. เลือกแถบ Internet Protocol Version 4 (TCP/IPv4) ในตัวเลือก จากนั้นเลือก Properties.
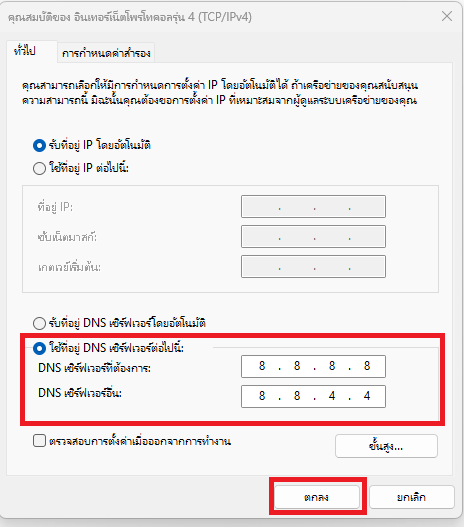
6. เลือกที่ Use the following DNS server addresses และพิมพ์ IP ลงไปดังนี้
- Preferred DNS server: 8.8.8.8
- Alternate DNS server: 8.8.4.4
7. เรียบร้อยแล้วเลือกปุ่ม OK จากนั้นเลือกปุ่ม Close
