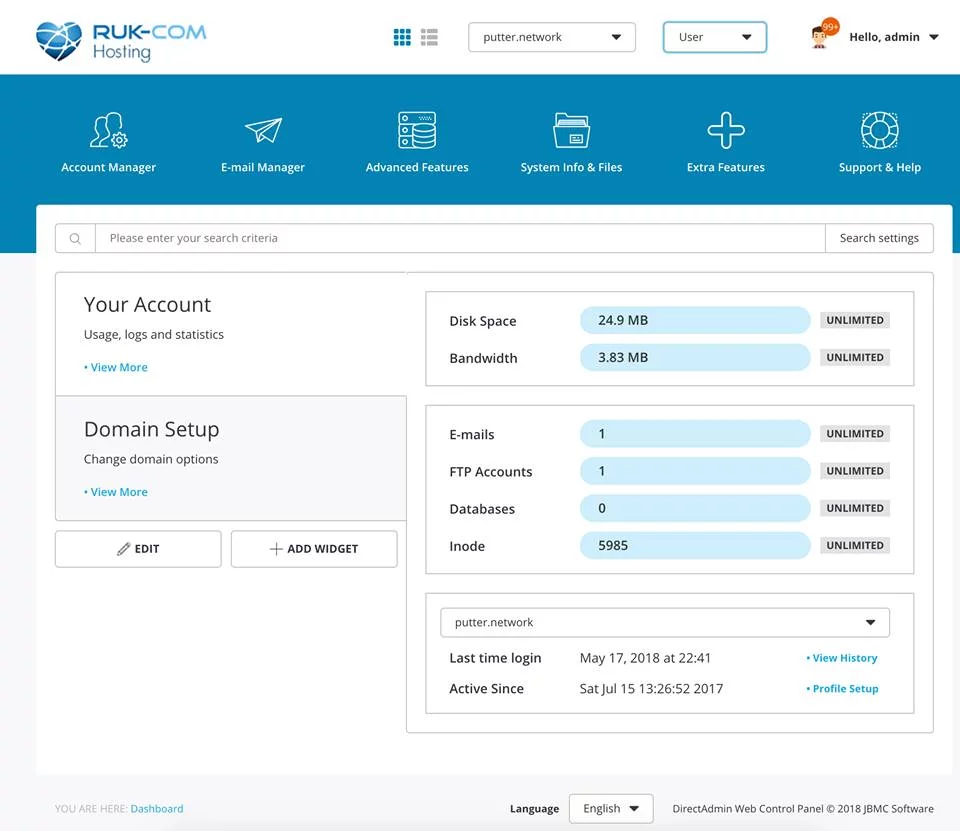
ການຕິດຕັ້ງ SSLໃນ Directadmin revolution
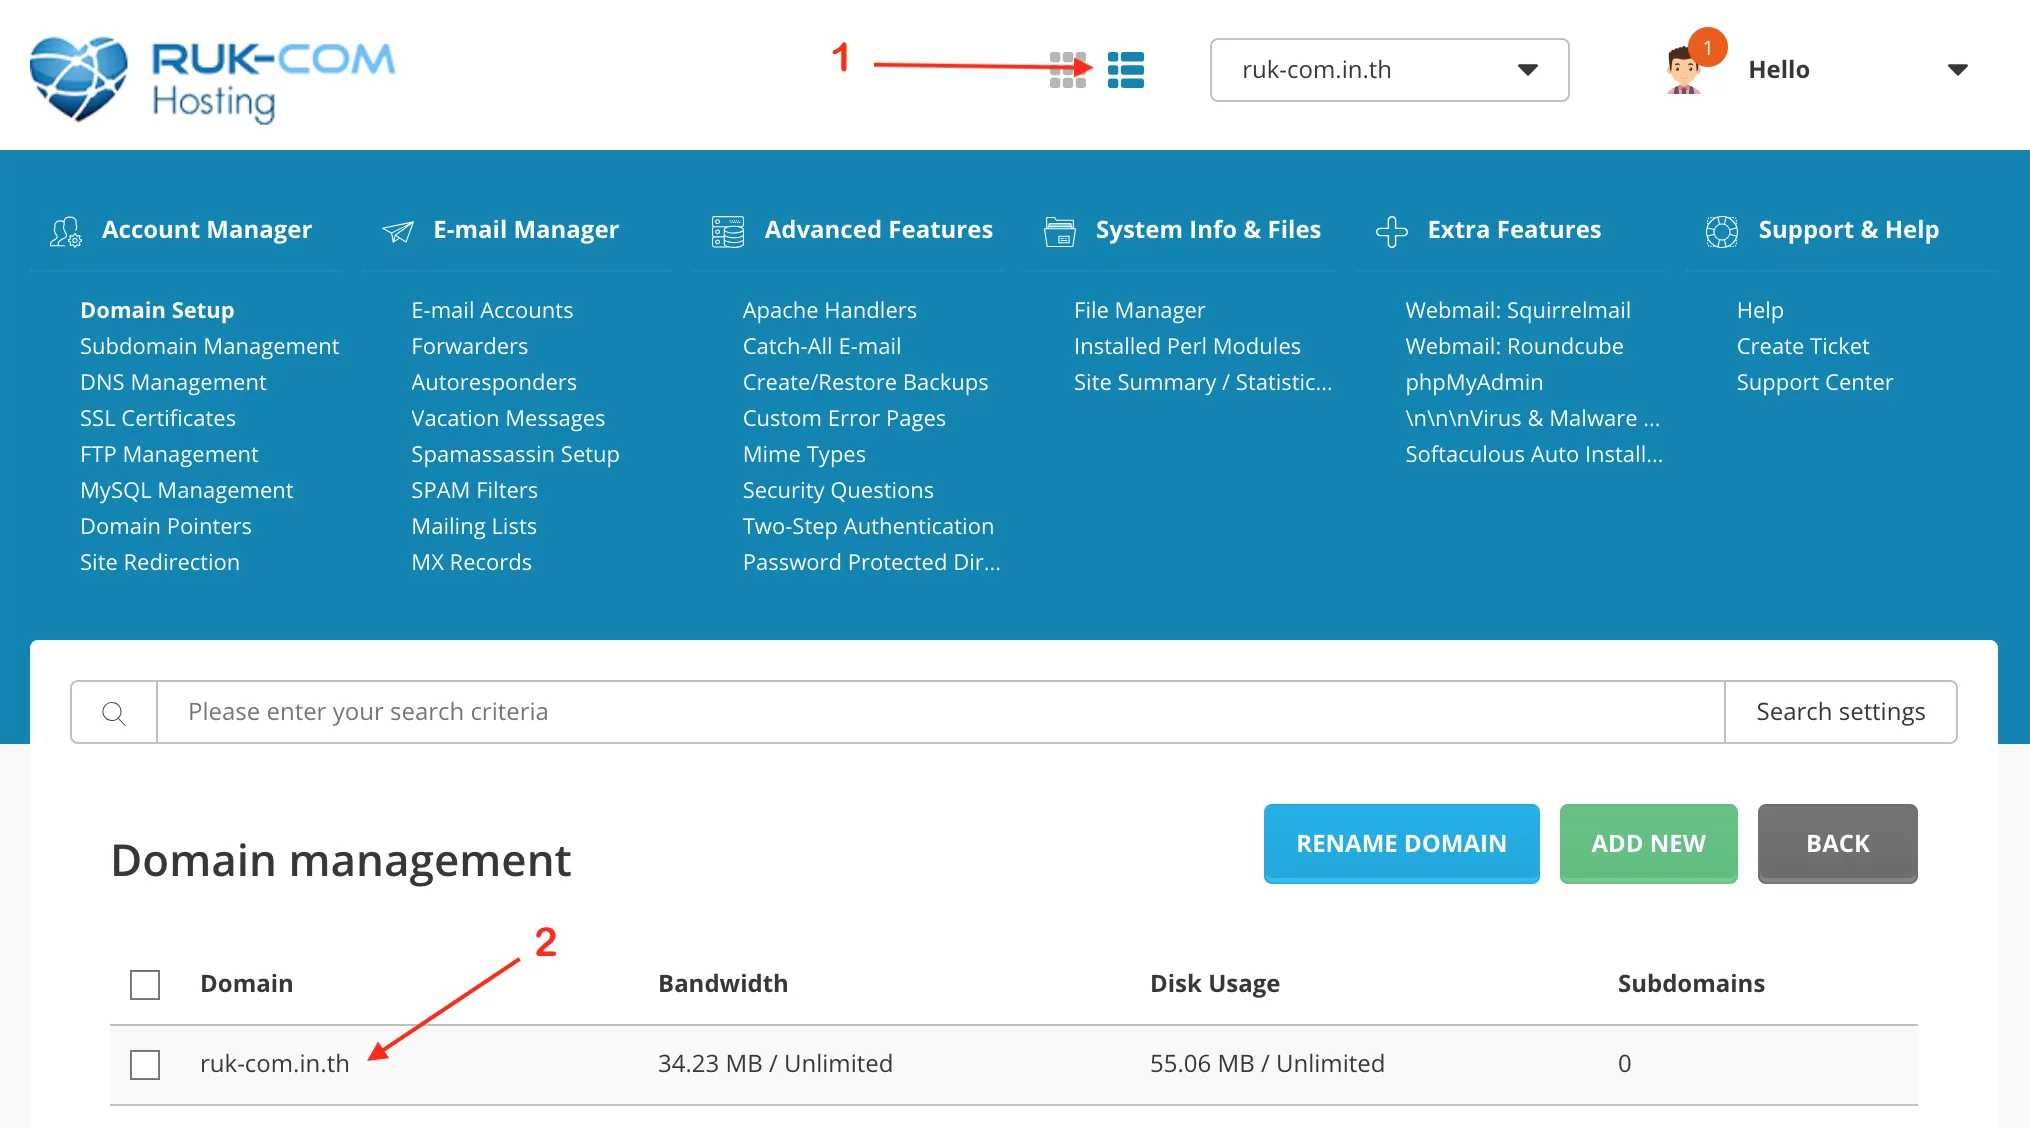
1. ປ່ຽນ Menu ເປັນແບບ List ເພື່ອສະແດງ Submenu ທັງໝົດ
2. ເລືອກ Domain ທີ່ຕ້ອງການຕິດຕັ້ງ SSL
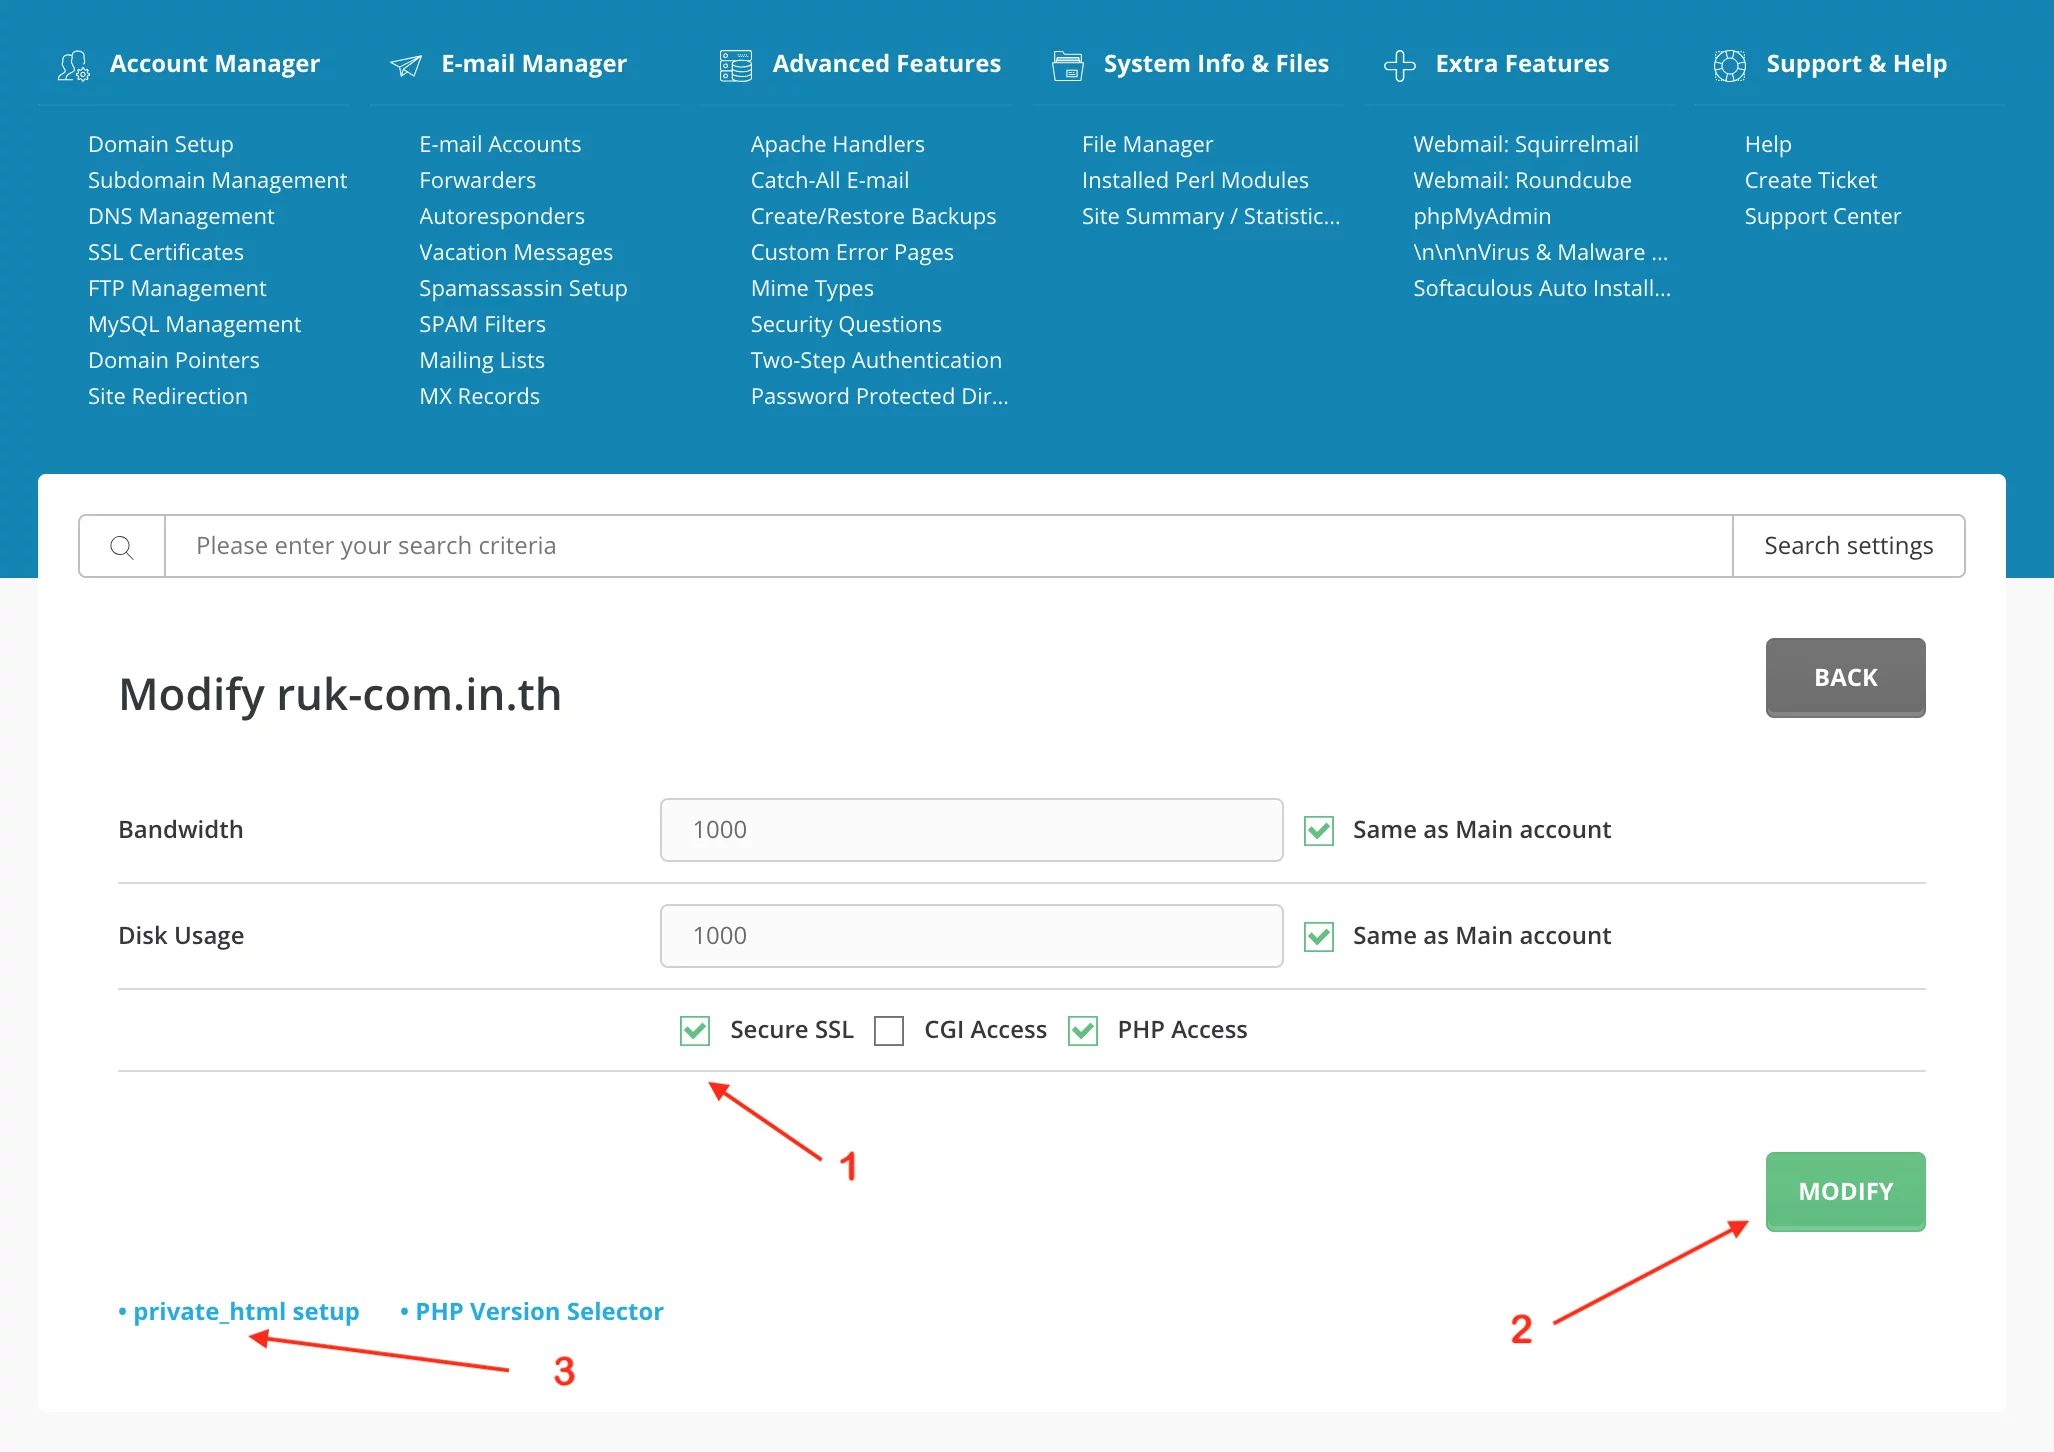
ຂັ້ນຕອນການເປີດໃຫ້ Domain ຮອງຮັບ SSL
1. ເລືອກ Secure SSL
2. ກົດປຸ່ມ Modify ເພື່ອບັນທຶກຂໍ້ມູນ
3. ກົດປຸ່ມ private_html setup ເພື່ອຕັ້ງຄ່າ Folder private_html
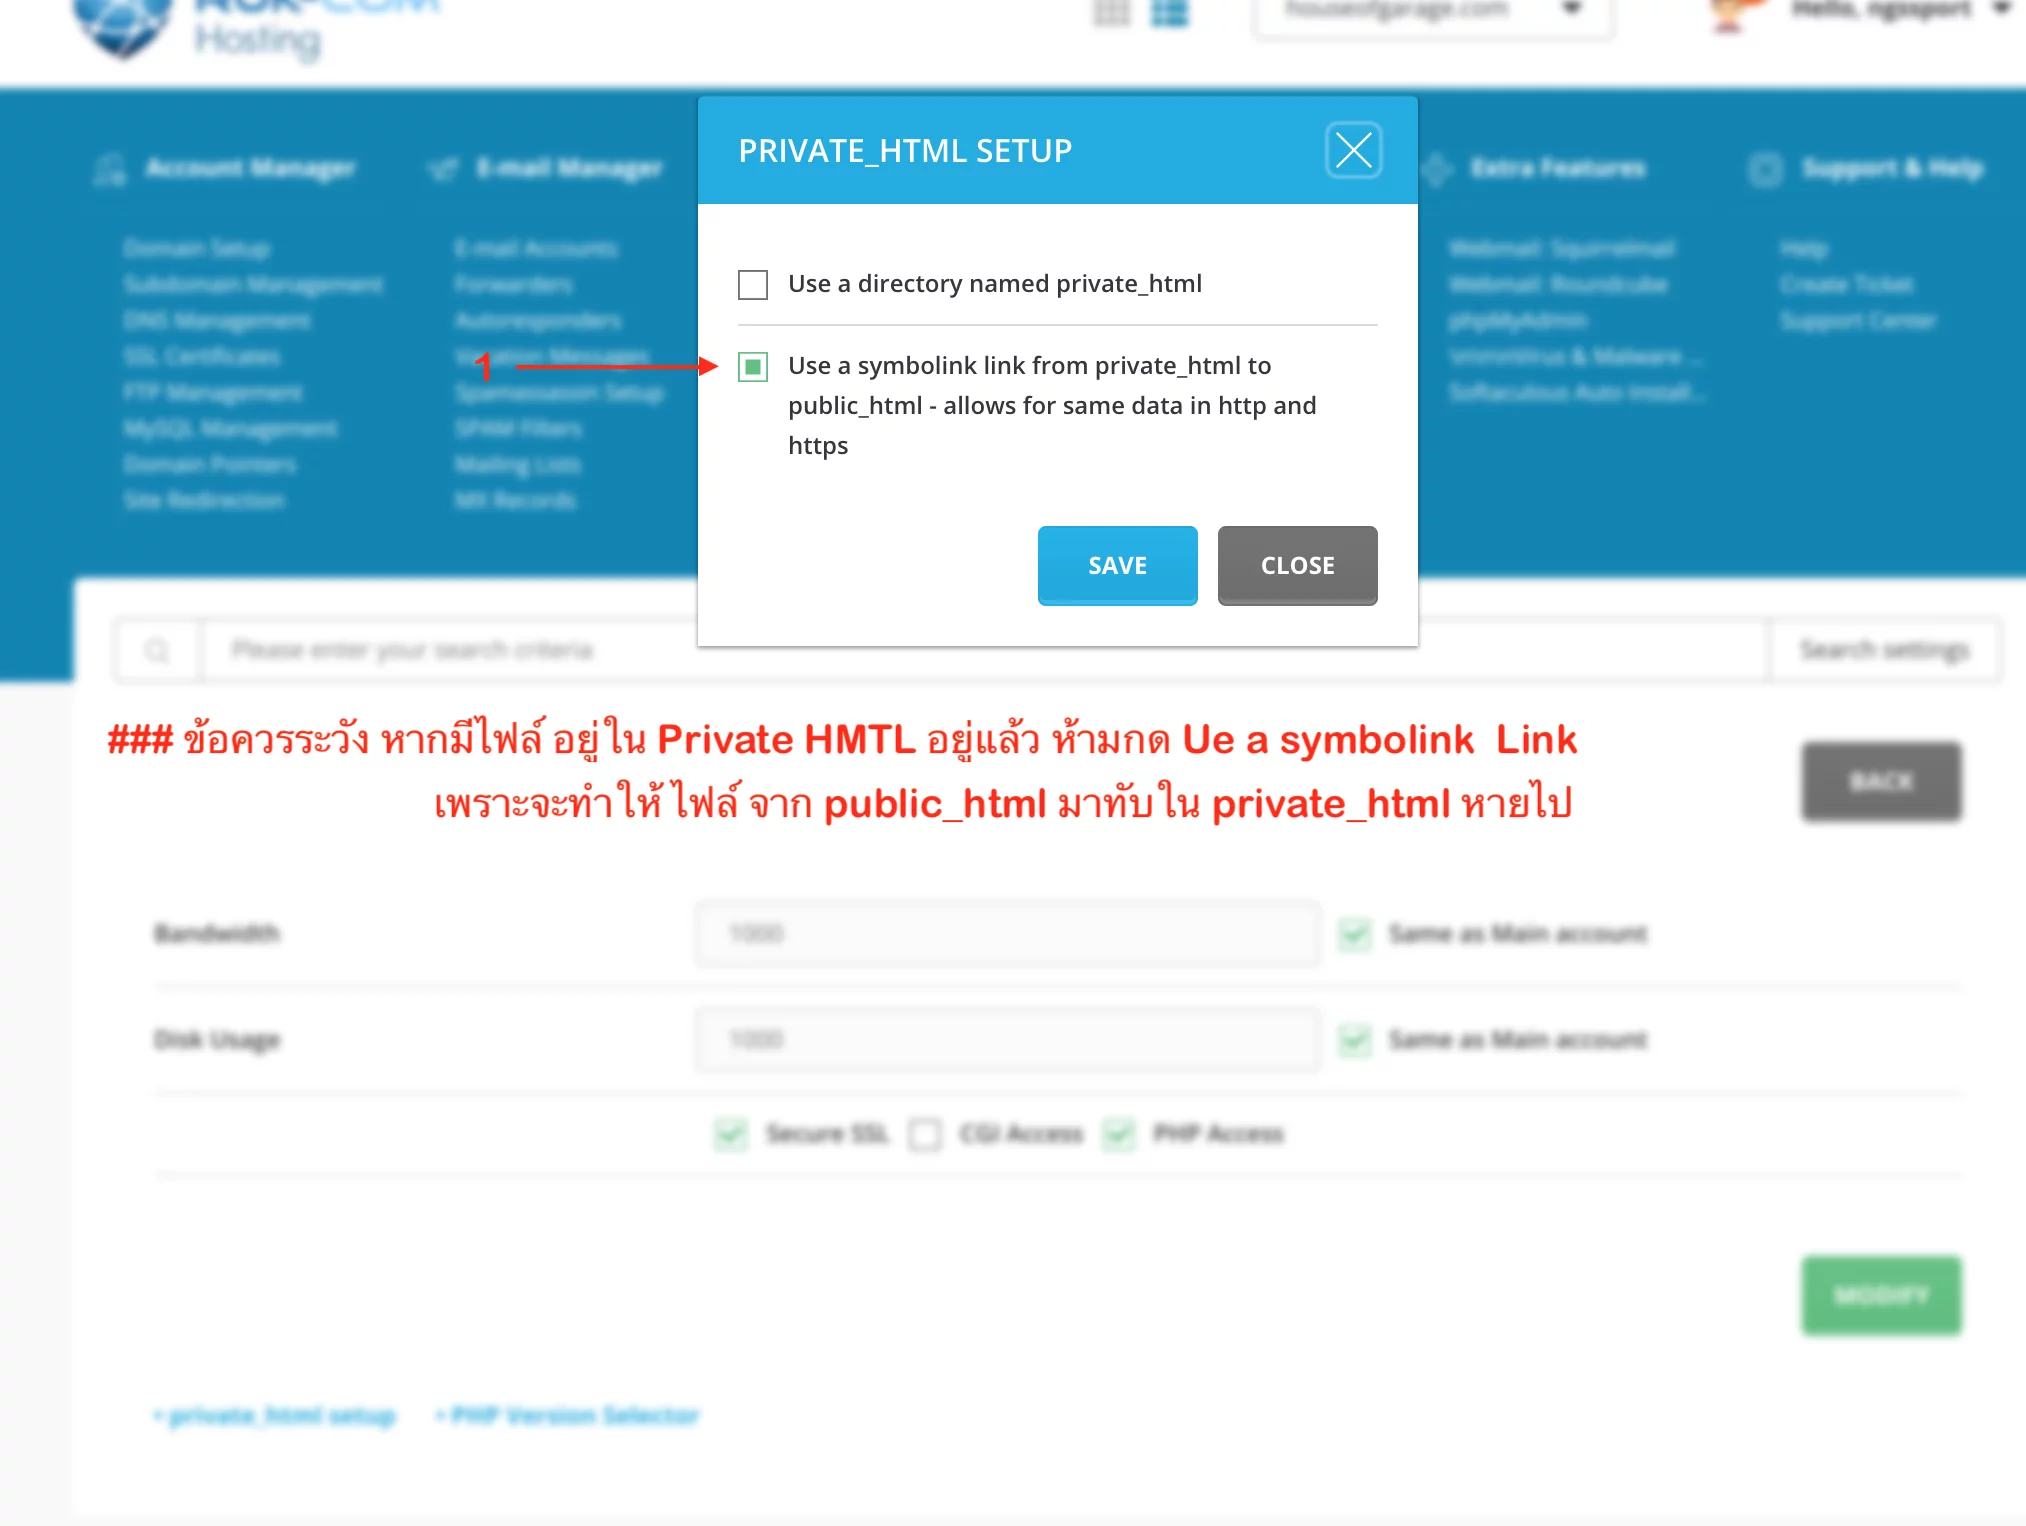
ຂັ້ນຕອນການສ້າງ Symbolink
1. ເລືອກ Us a symbolink Link ເພື່ອນໍາໄຟລໃນ public_html ມາທັບໃນ private_html
### ຂໍ້ຄວນລະວັງ ຫາກມີໄຟລຢູ່ໃນ Private HMTL ຢູ່ແລ້ວຫ້າມກົດ Us a symbolink Link ເພາະຈະເຮັດໃຫ້ໄຟລຈາກ public_html ມາທັບໃນ private_html ຫາຍໄປ
ຂັ້ນຕອນການຂໍ Certificate from Let’s Encrypt
1. ເລືອກ Menu SSL Certificates
2. ຫຼັງຈາກເຂົ້າໜ້າ SSL Certificates ເລືອກເປີດນໍາໃຊ້
Free & automatic certificate from Let’s Encrypt

ຂັ້ນຕອນການຂໍ Certificate from Let’s Encrypt
1. ເລືອກ Menu SSL Certificates
2. ຫຼັງຈາກເຂົ້າໜ້າ SSL Certificates ເລືອກເປີດນໍາໃຊ້
Free & automatic certificate from Let’s Encrypt

ຫຼັງຈາກດໍາເນີນການສໍາເລັດທັງໝົດ ຈະລໍຖ້າປະມານ 10-15 ນາທີ . ເພື່ອໃຫ້ຂໍ້ມູນ Update ແລະຖ້າຫາກ Website ເປັນ WordPress ສາມາດດໍາເນີນການຕັ້ງຄ່າໄດ້ທີ່ບົດຄວາມ ເປັນຫຍັງເຮັດ https:// ແລ້ວ URL ບໍ່ປ່ຽນເປັນສີຂຽວ

